

Lesson Summary
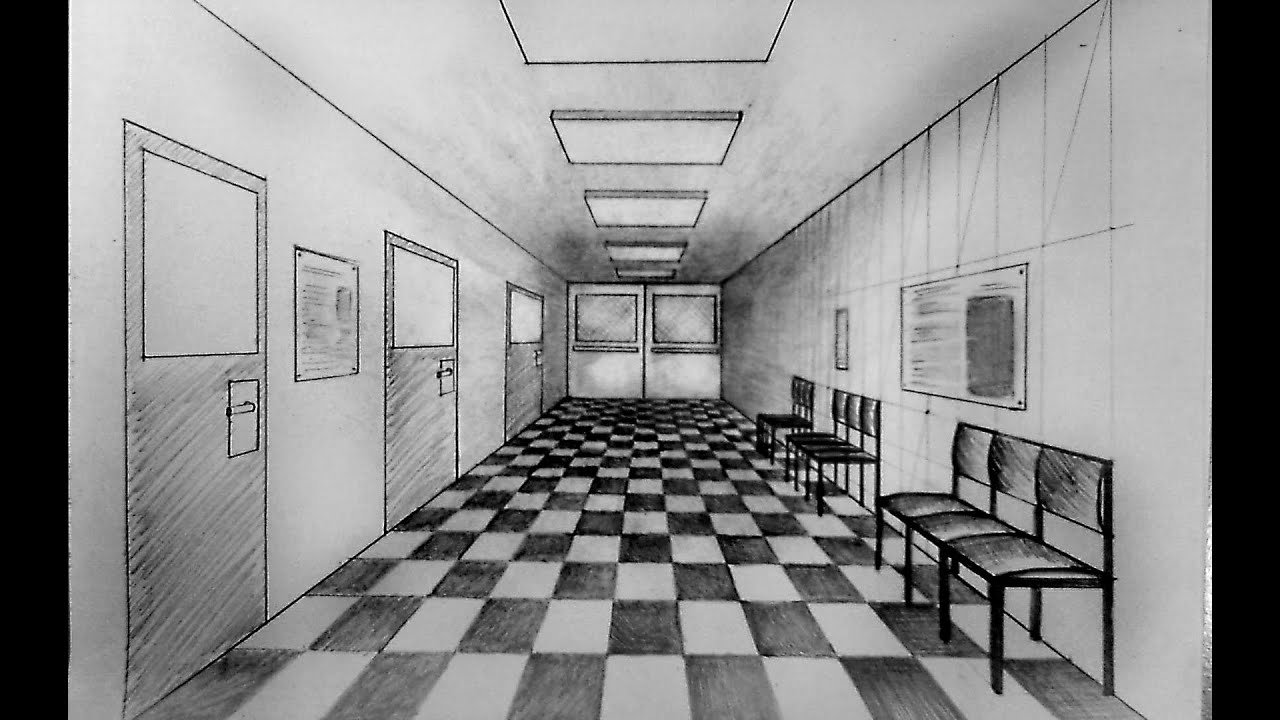
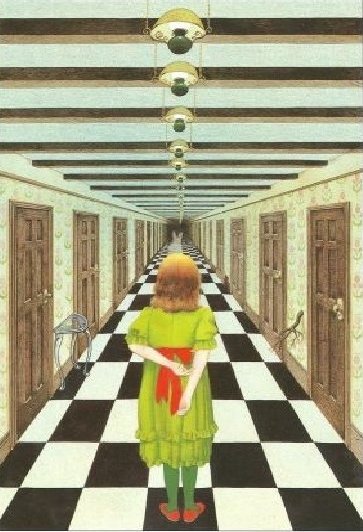
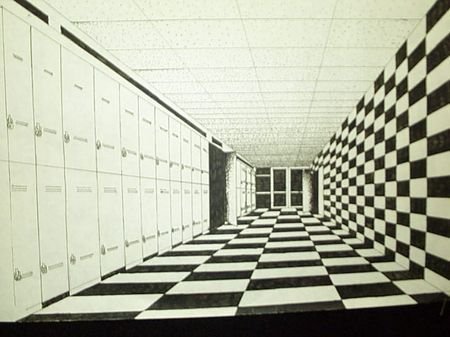
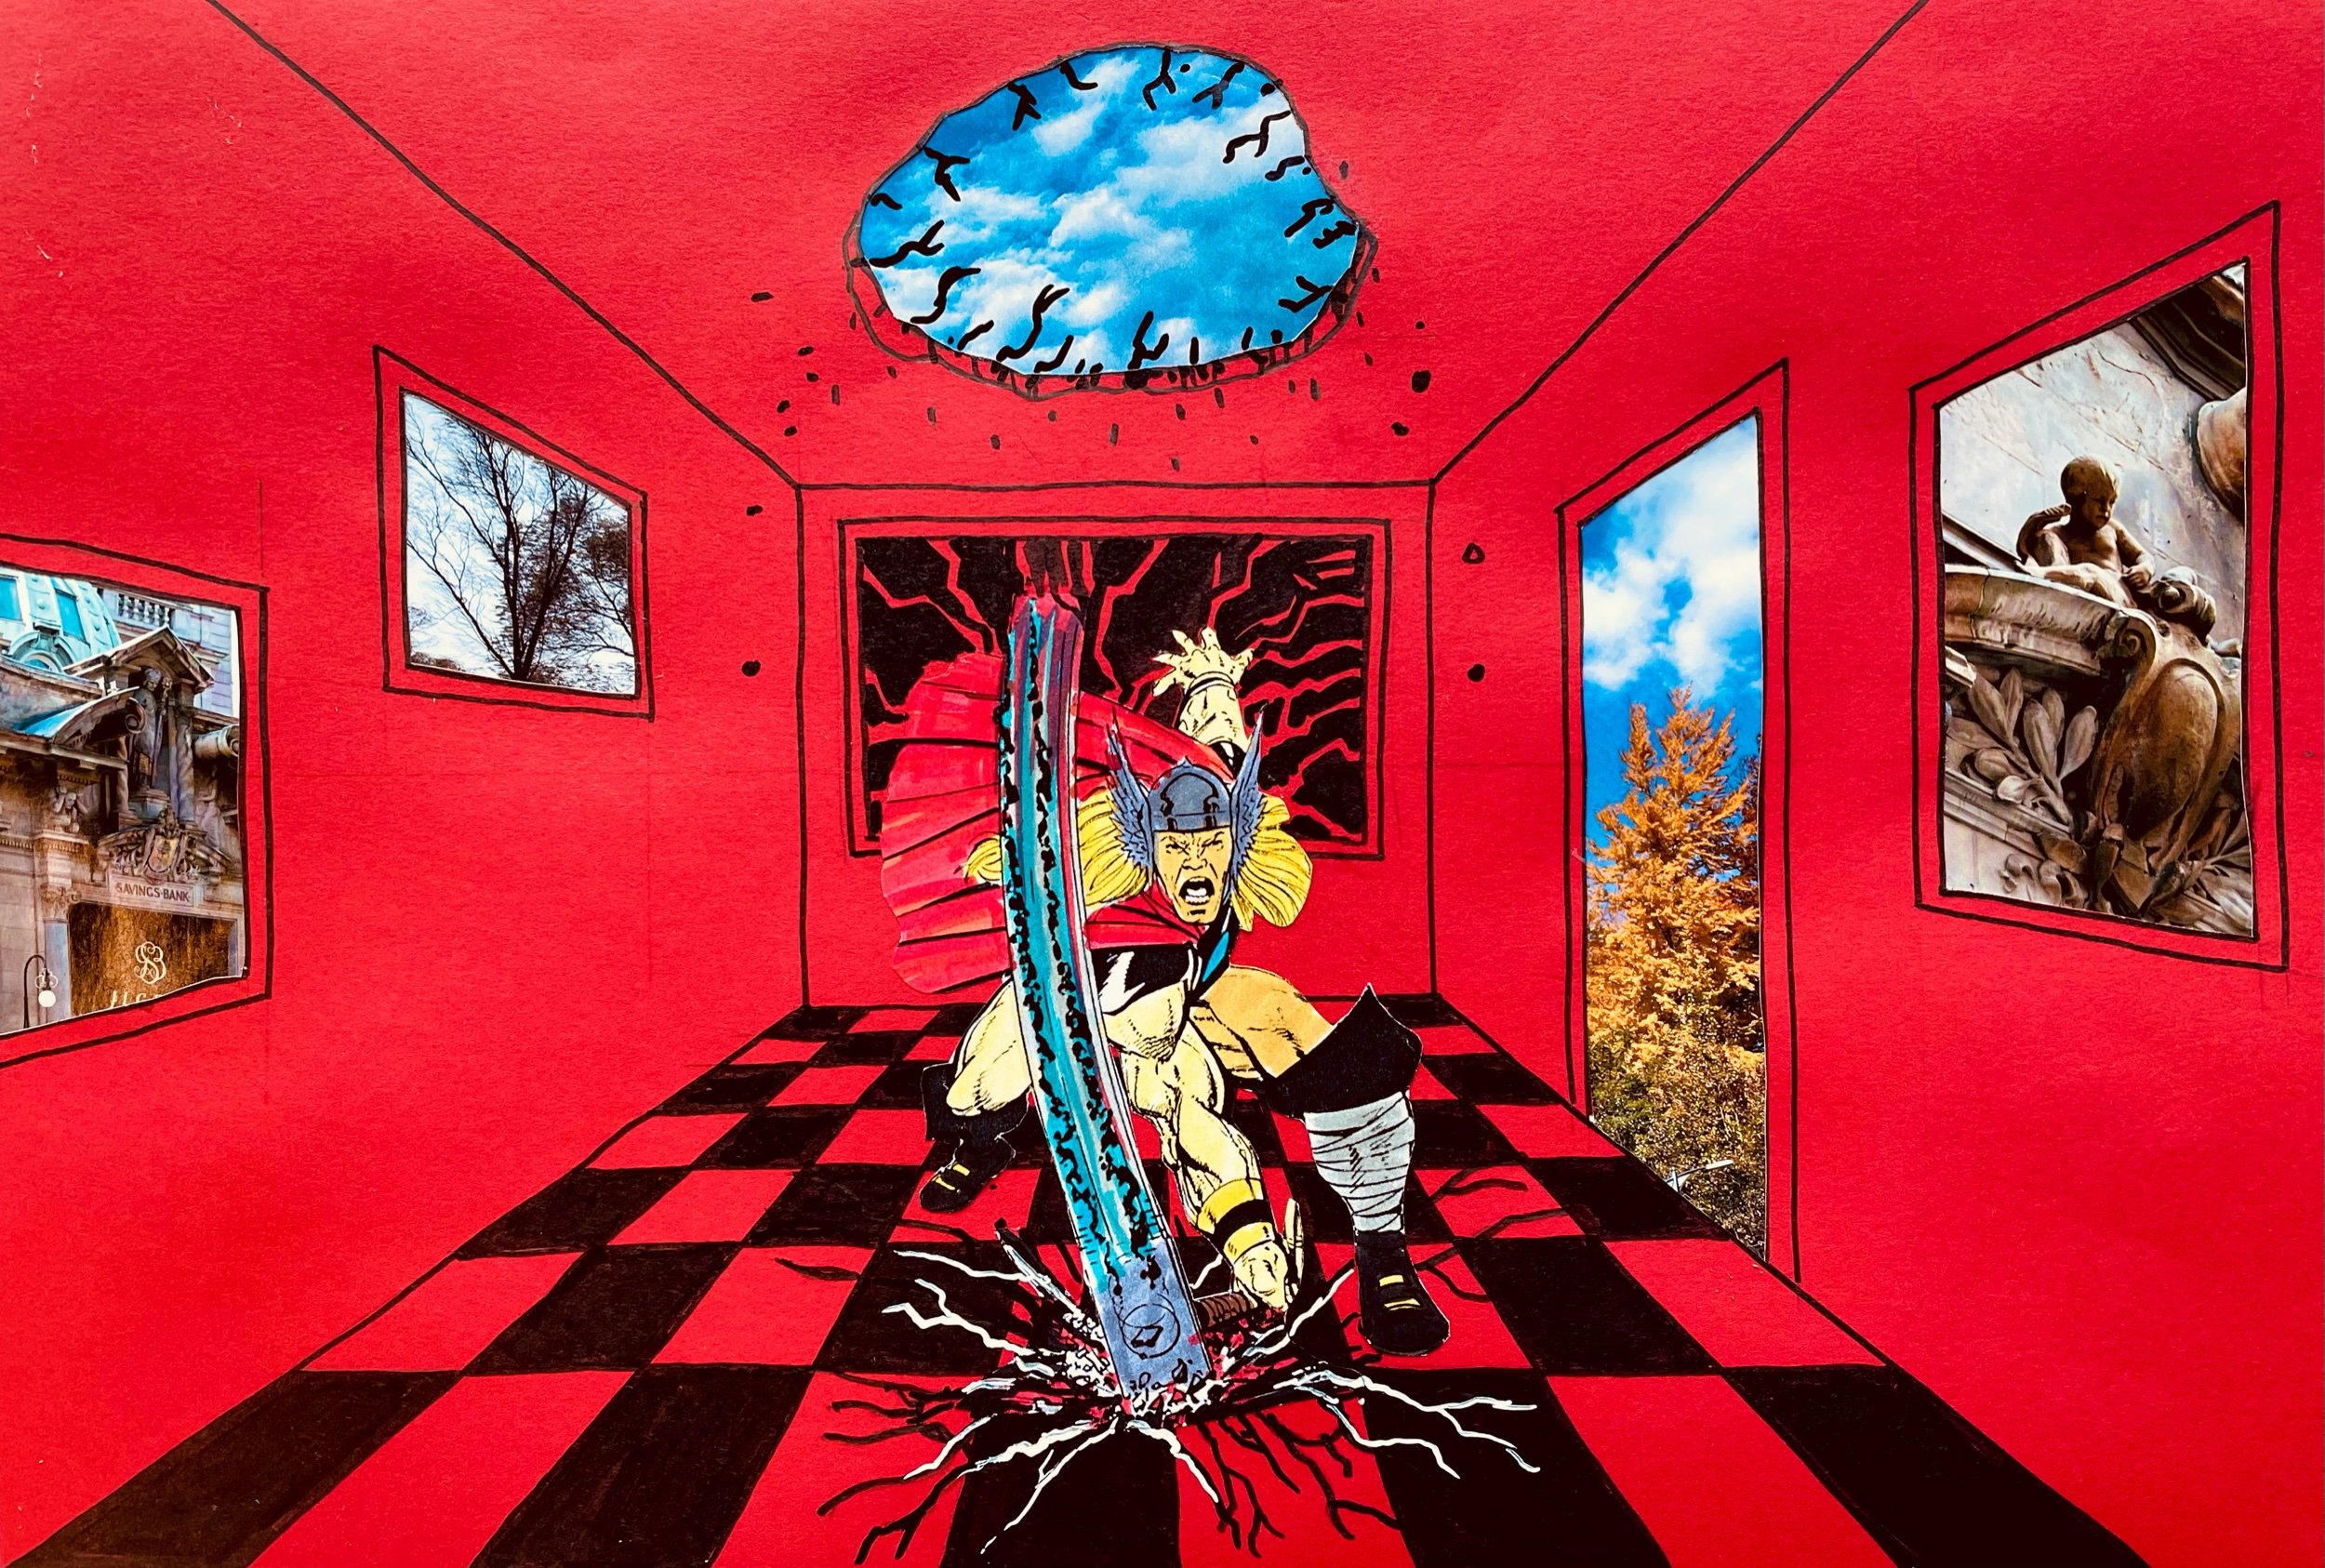
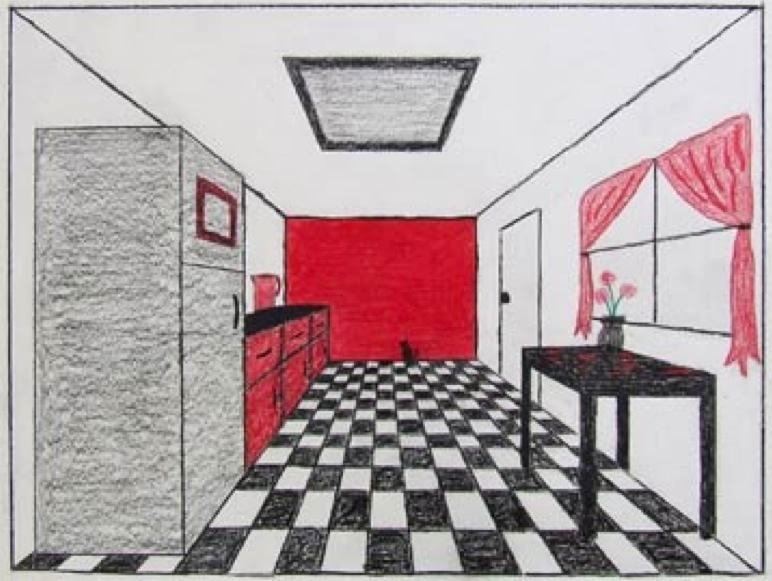
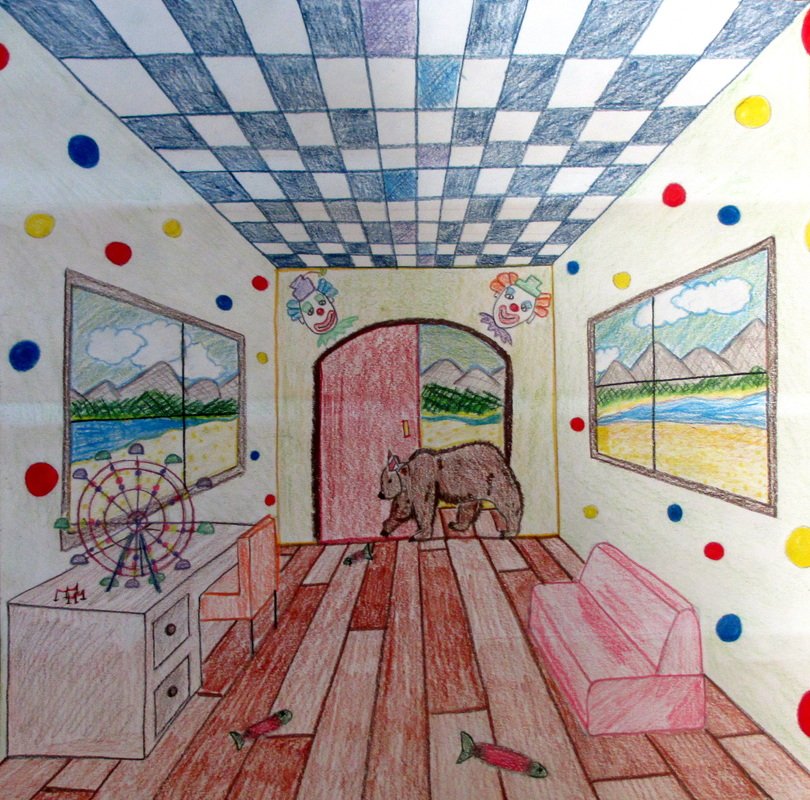
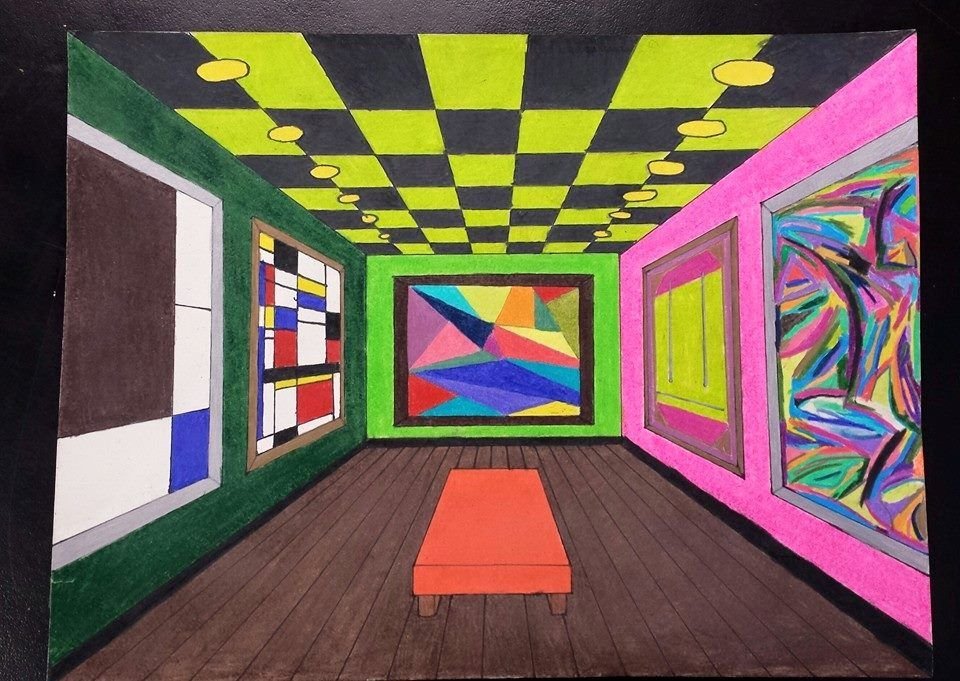
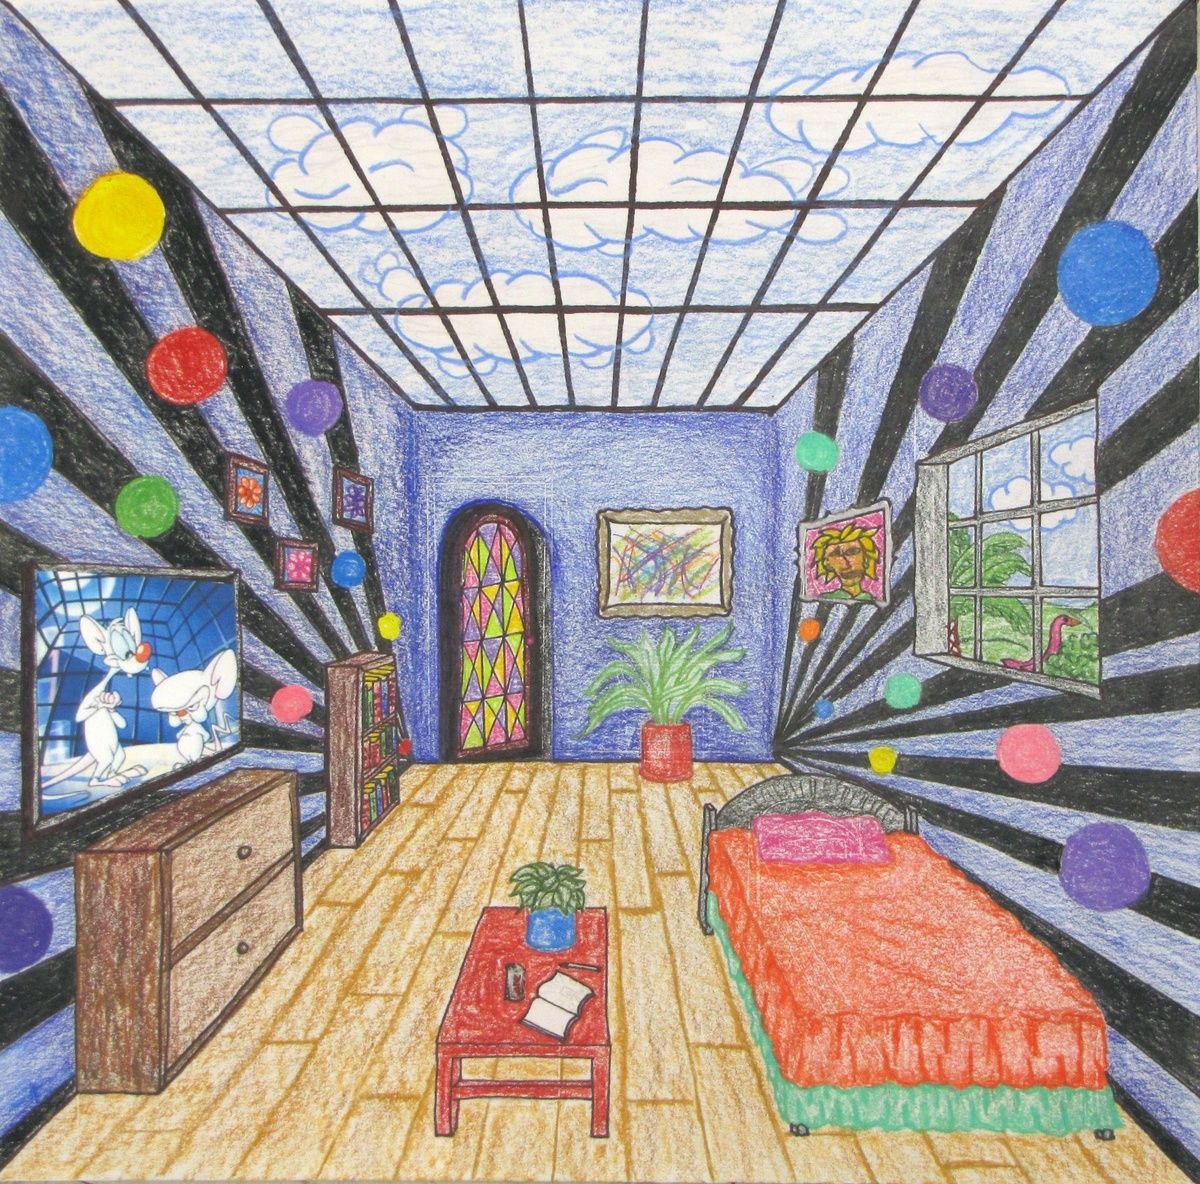
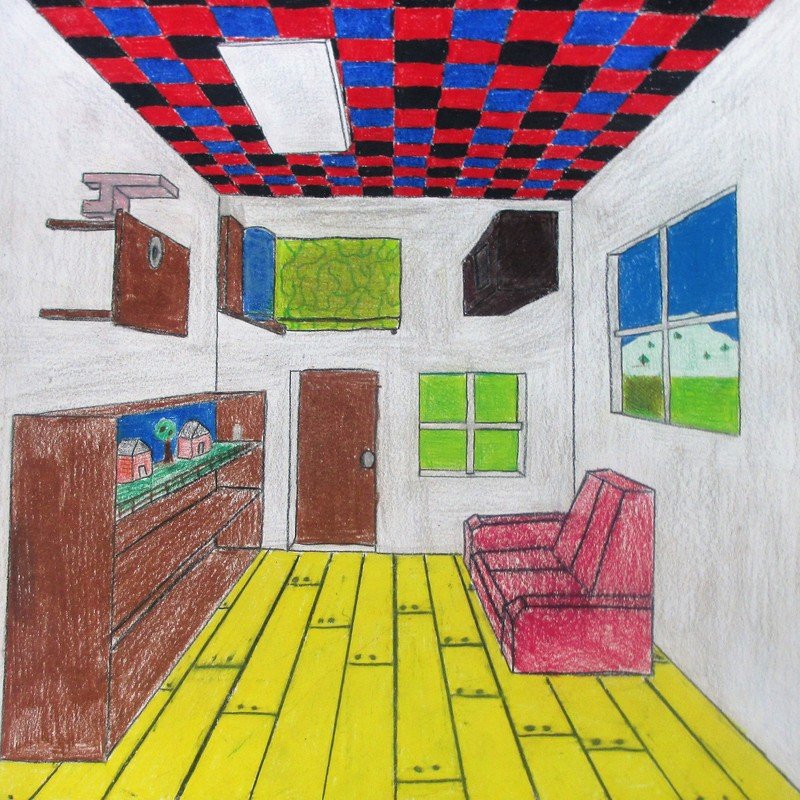
This lesson guides students in creating illustrations of tile floor rooms in one-point perspective. Tile floors not only add depth but also provide an abstract aesthetic to a room. The perspective grid, a fundamental tool utilized in this process, holds significance for architects, industrial designers, and computer animators in drafting their concepts.
Lesson Objectives
Learn to draw a perspective grid and comprehend its applications in drafting.
Illustrate imaginative rooms using one-point perspective grids.

Perspective Grid
A perspective grid is a fundamental tool utilized by artists to achieve precise drawings in perspective. Architects, industrial designers, and computer animators also rely on perspective grids to draft and visualize their concepts with accuracy and depth.
Brainstorm Discussion
Have you seen square tiles used in any room interiors? If so, where?
Can you think of some different types of indoor spaces? eg. dance club, gym, museum, etc.
Do you have any specific themes in mind for the room you want to depict?
Why are perspective grids utilized in drawing?

You’ll Need
Pencil & Eraser
Ruler
Black Permanent Markers
Colored Paper
Colored Pencils
Color Markers


Process
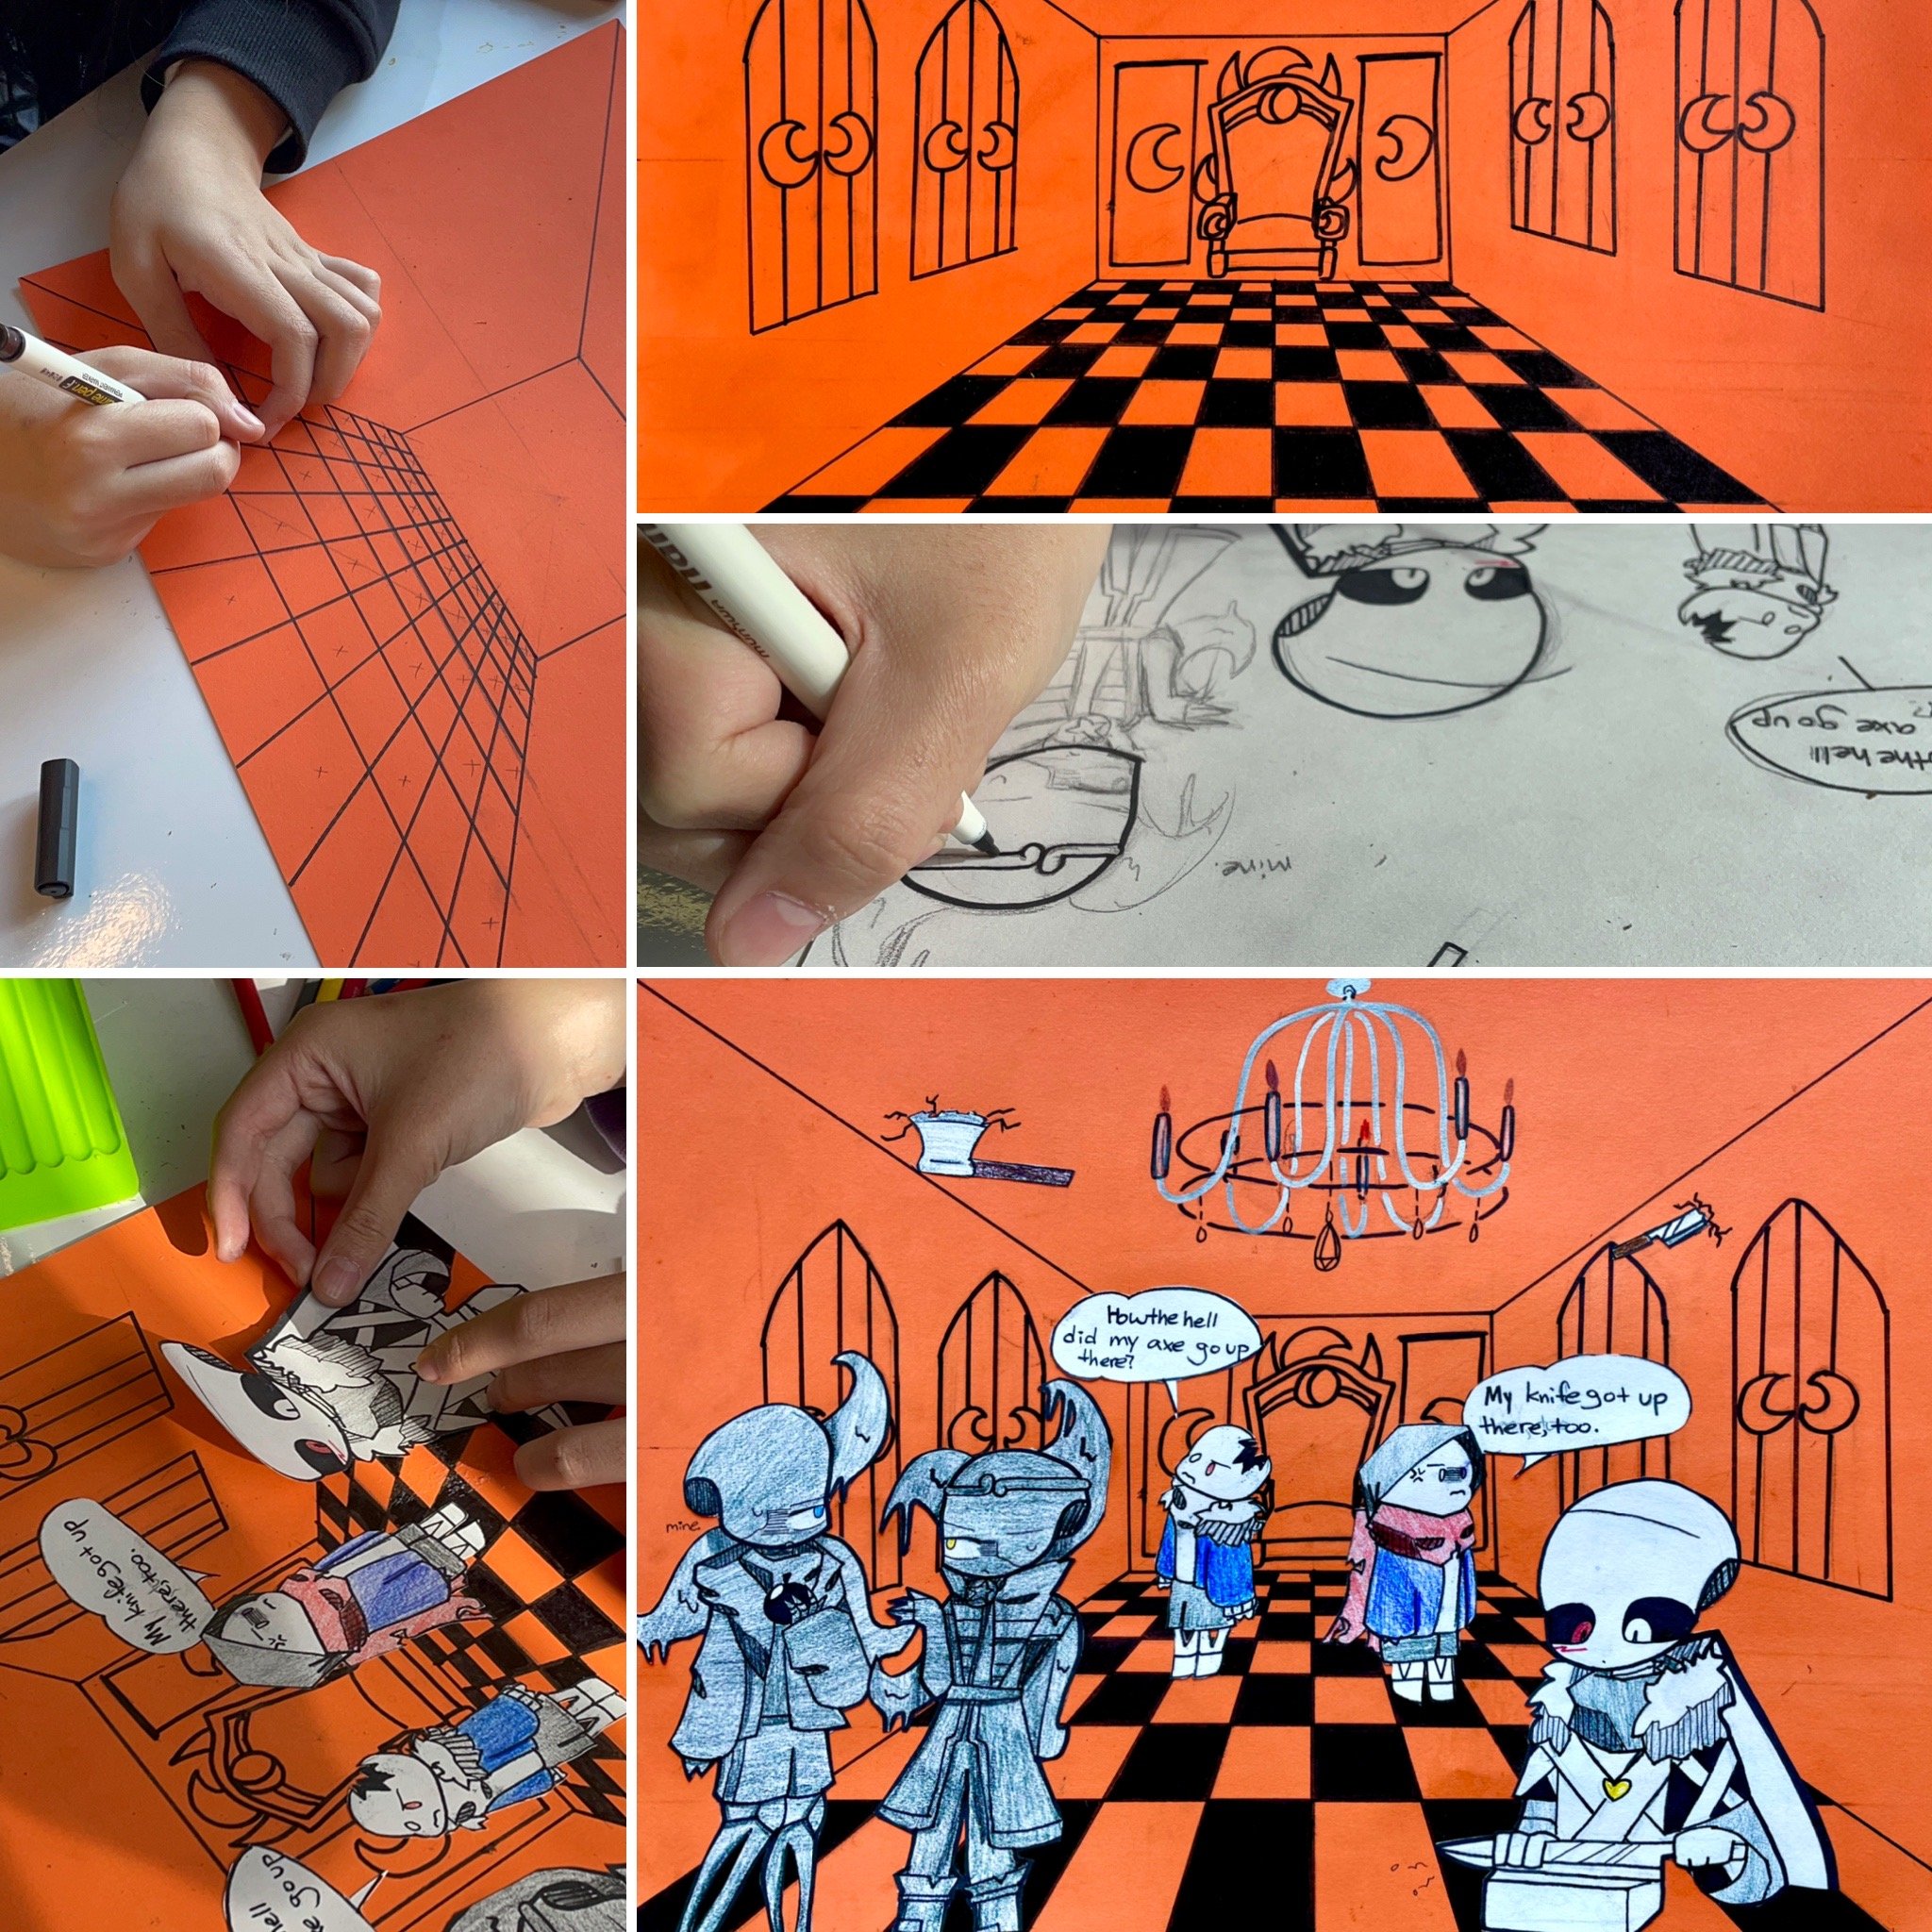
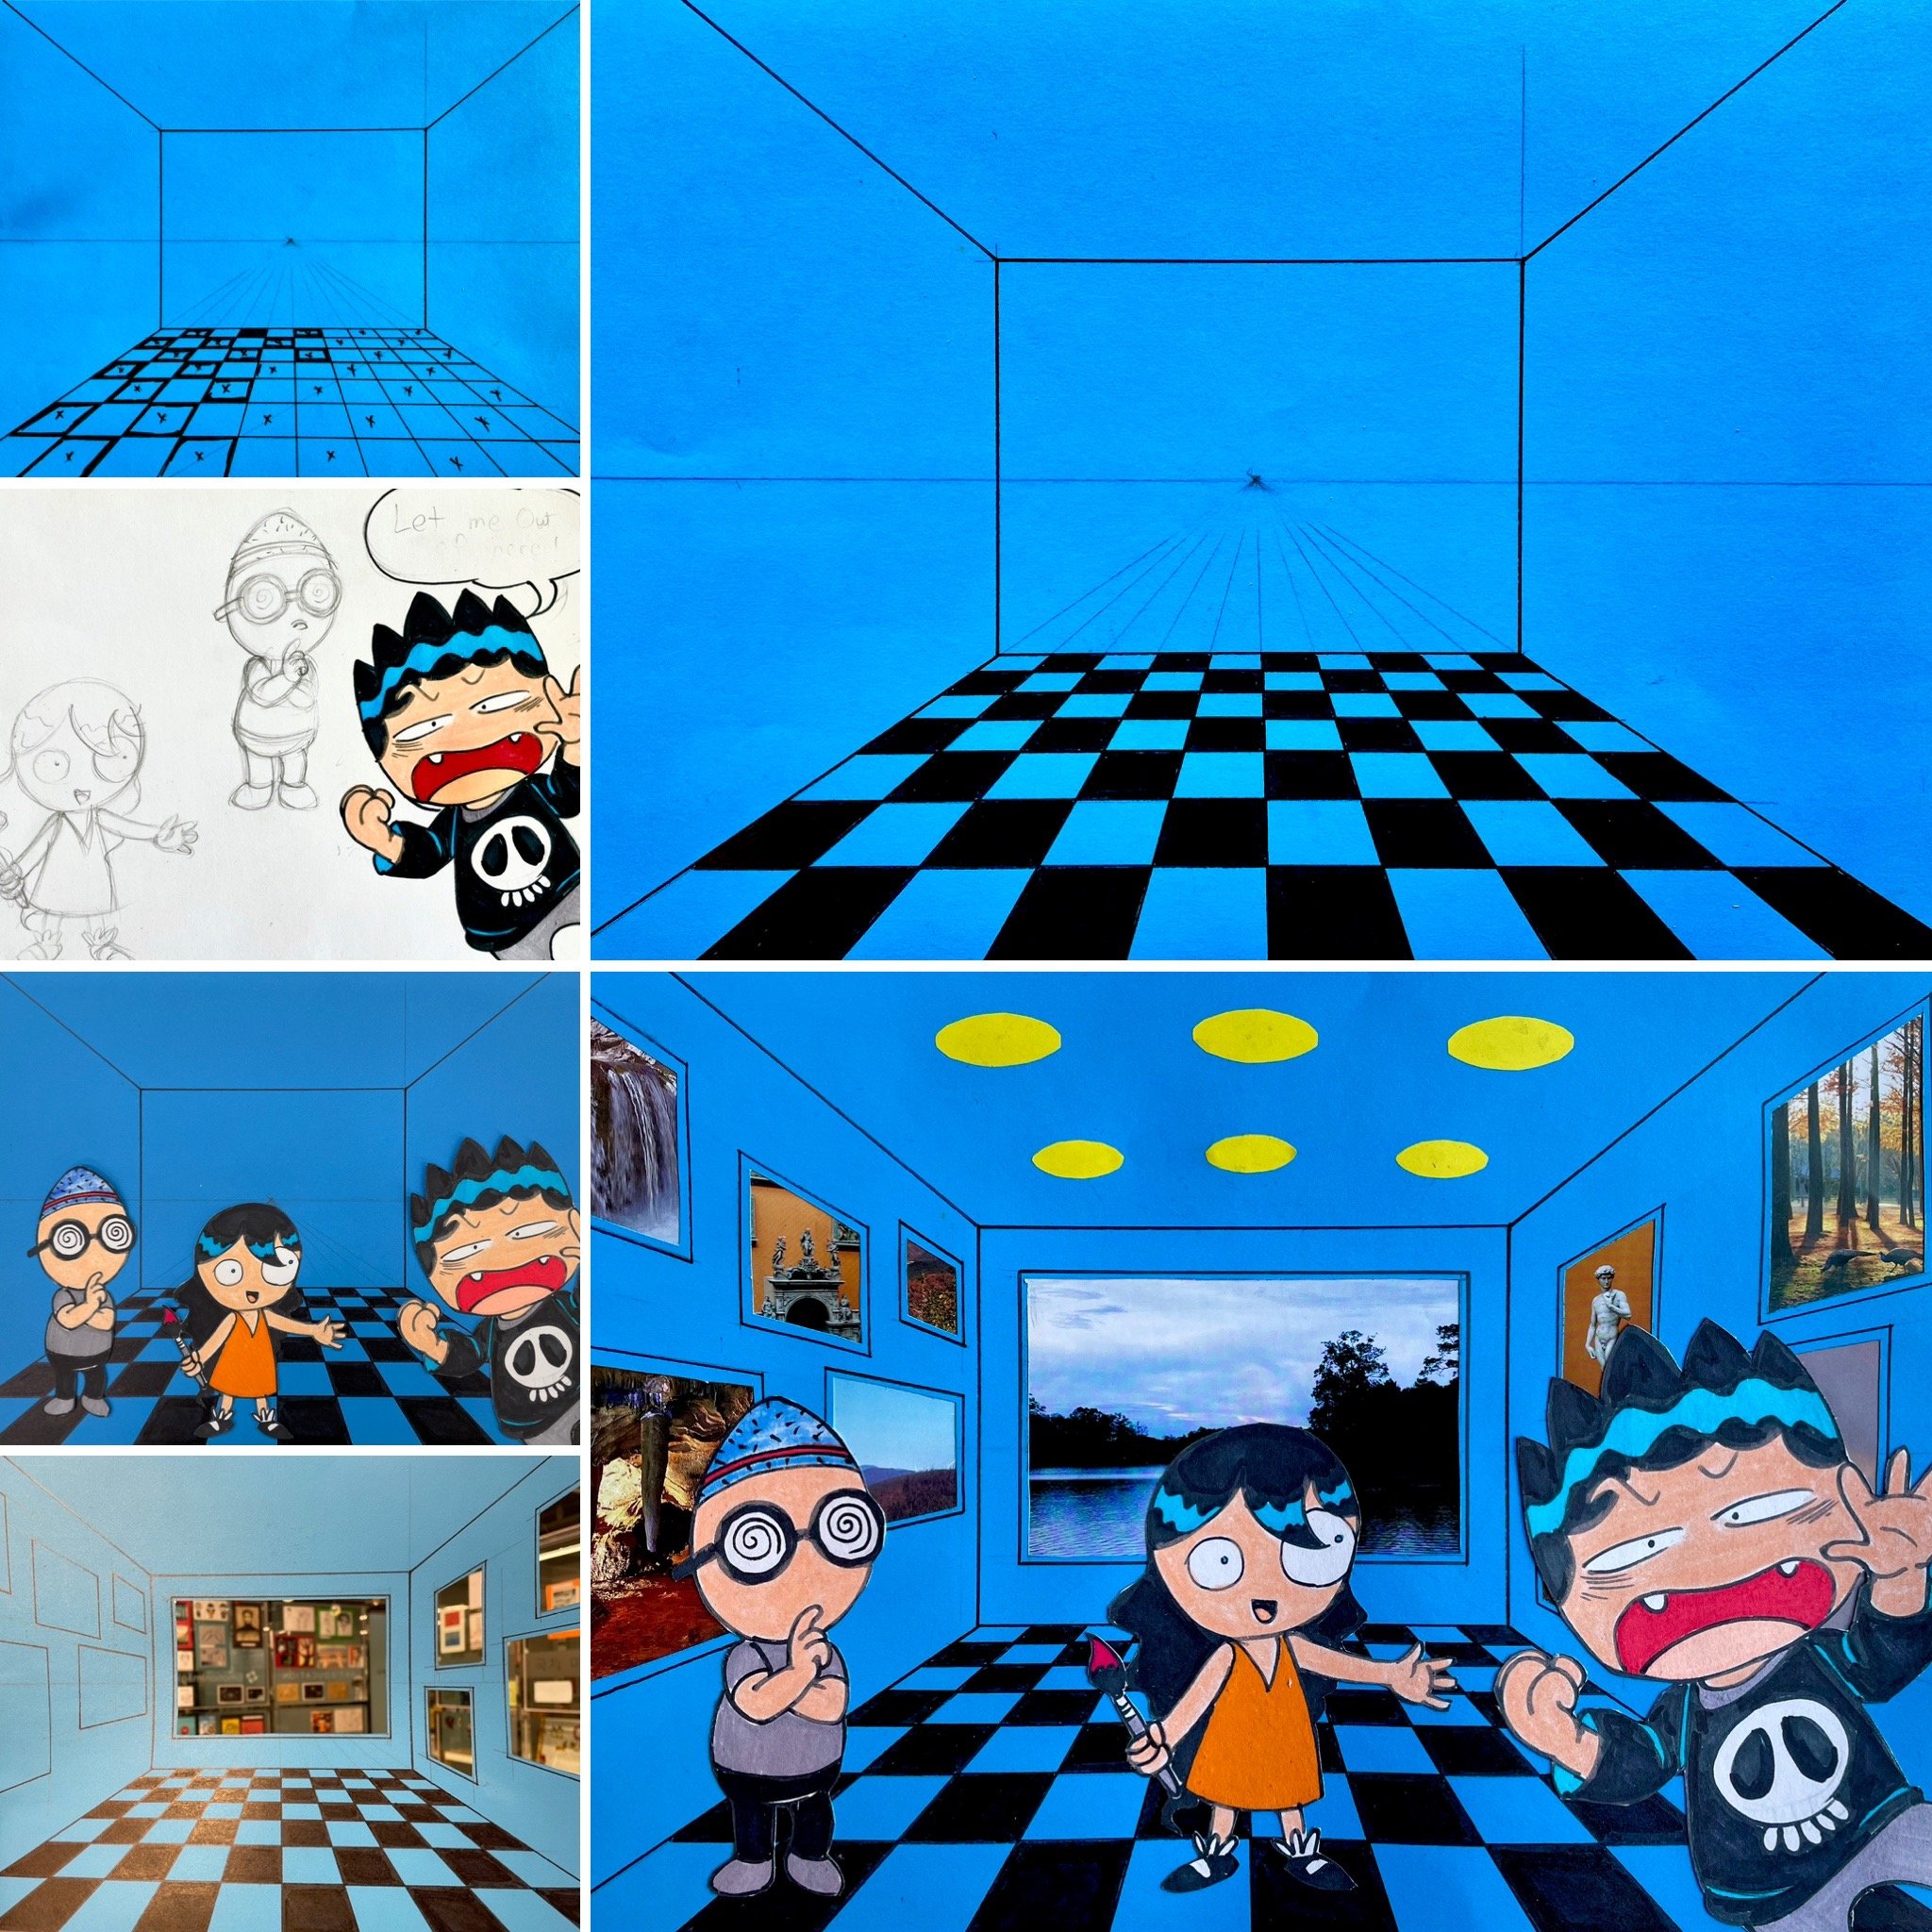
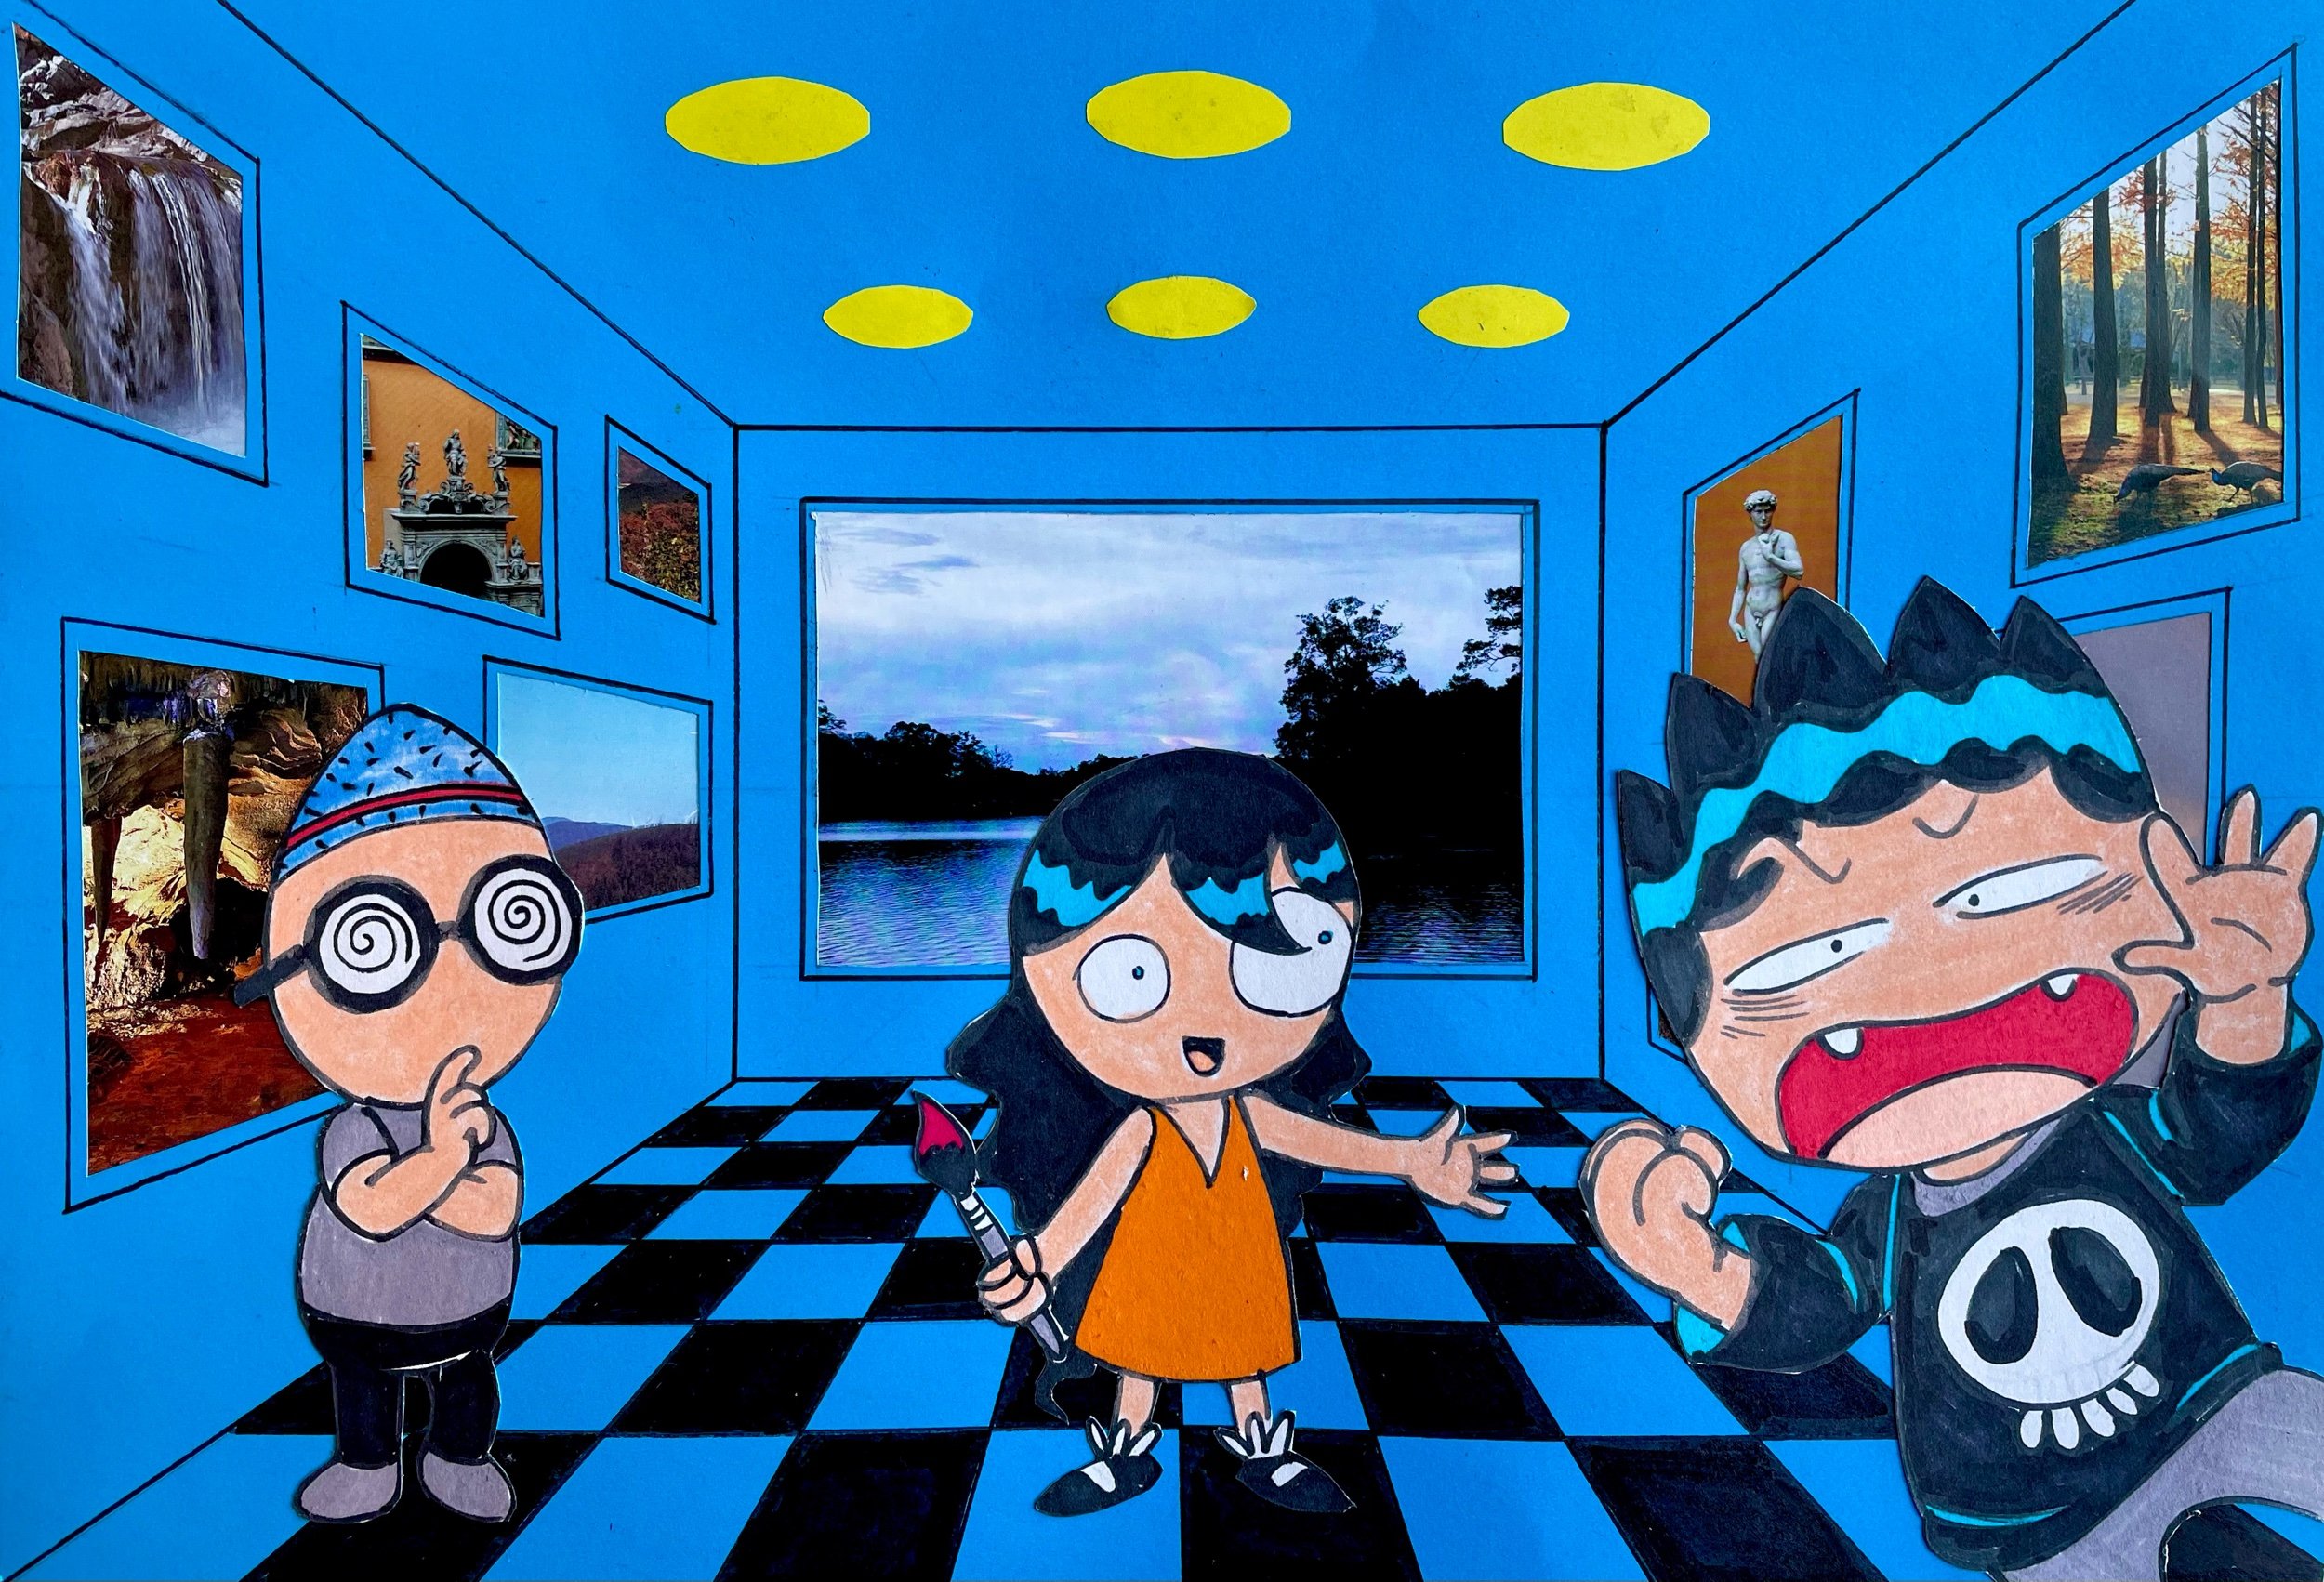
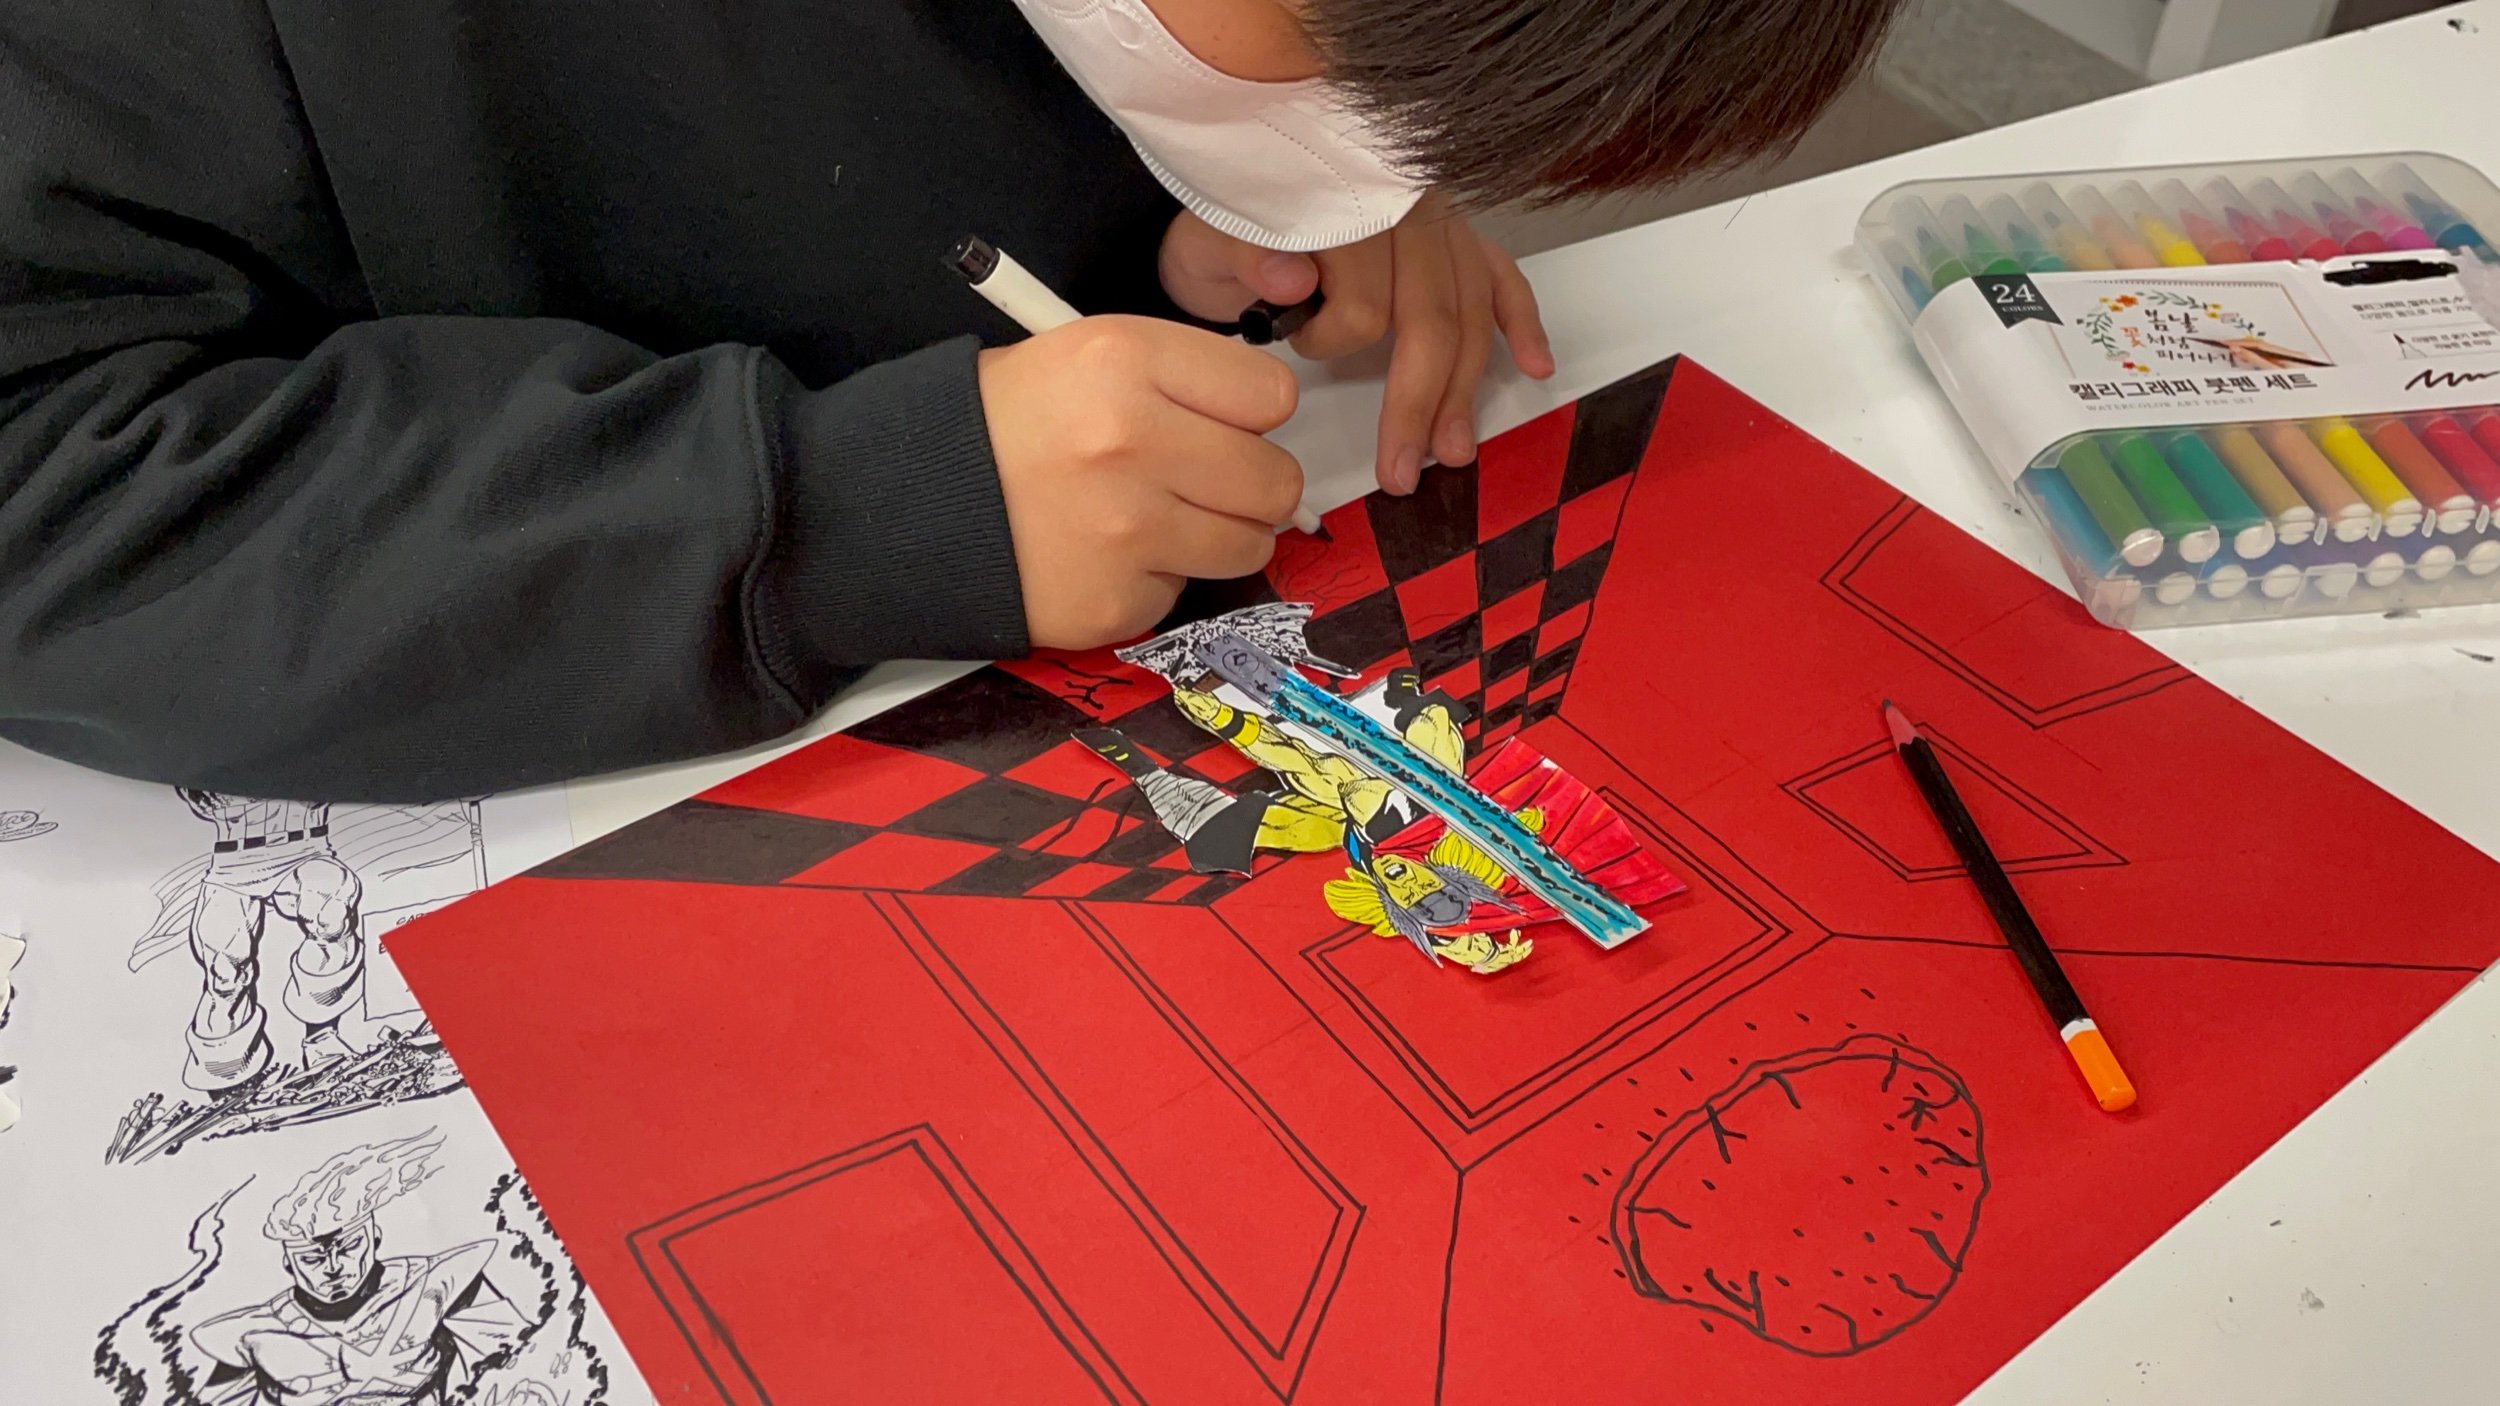
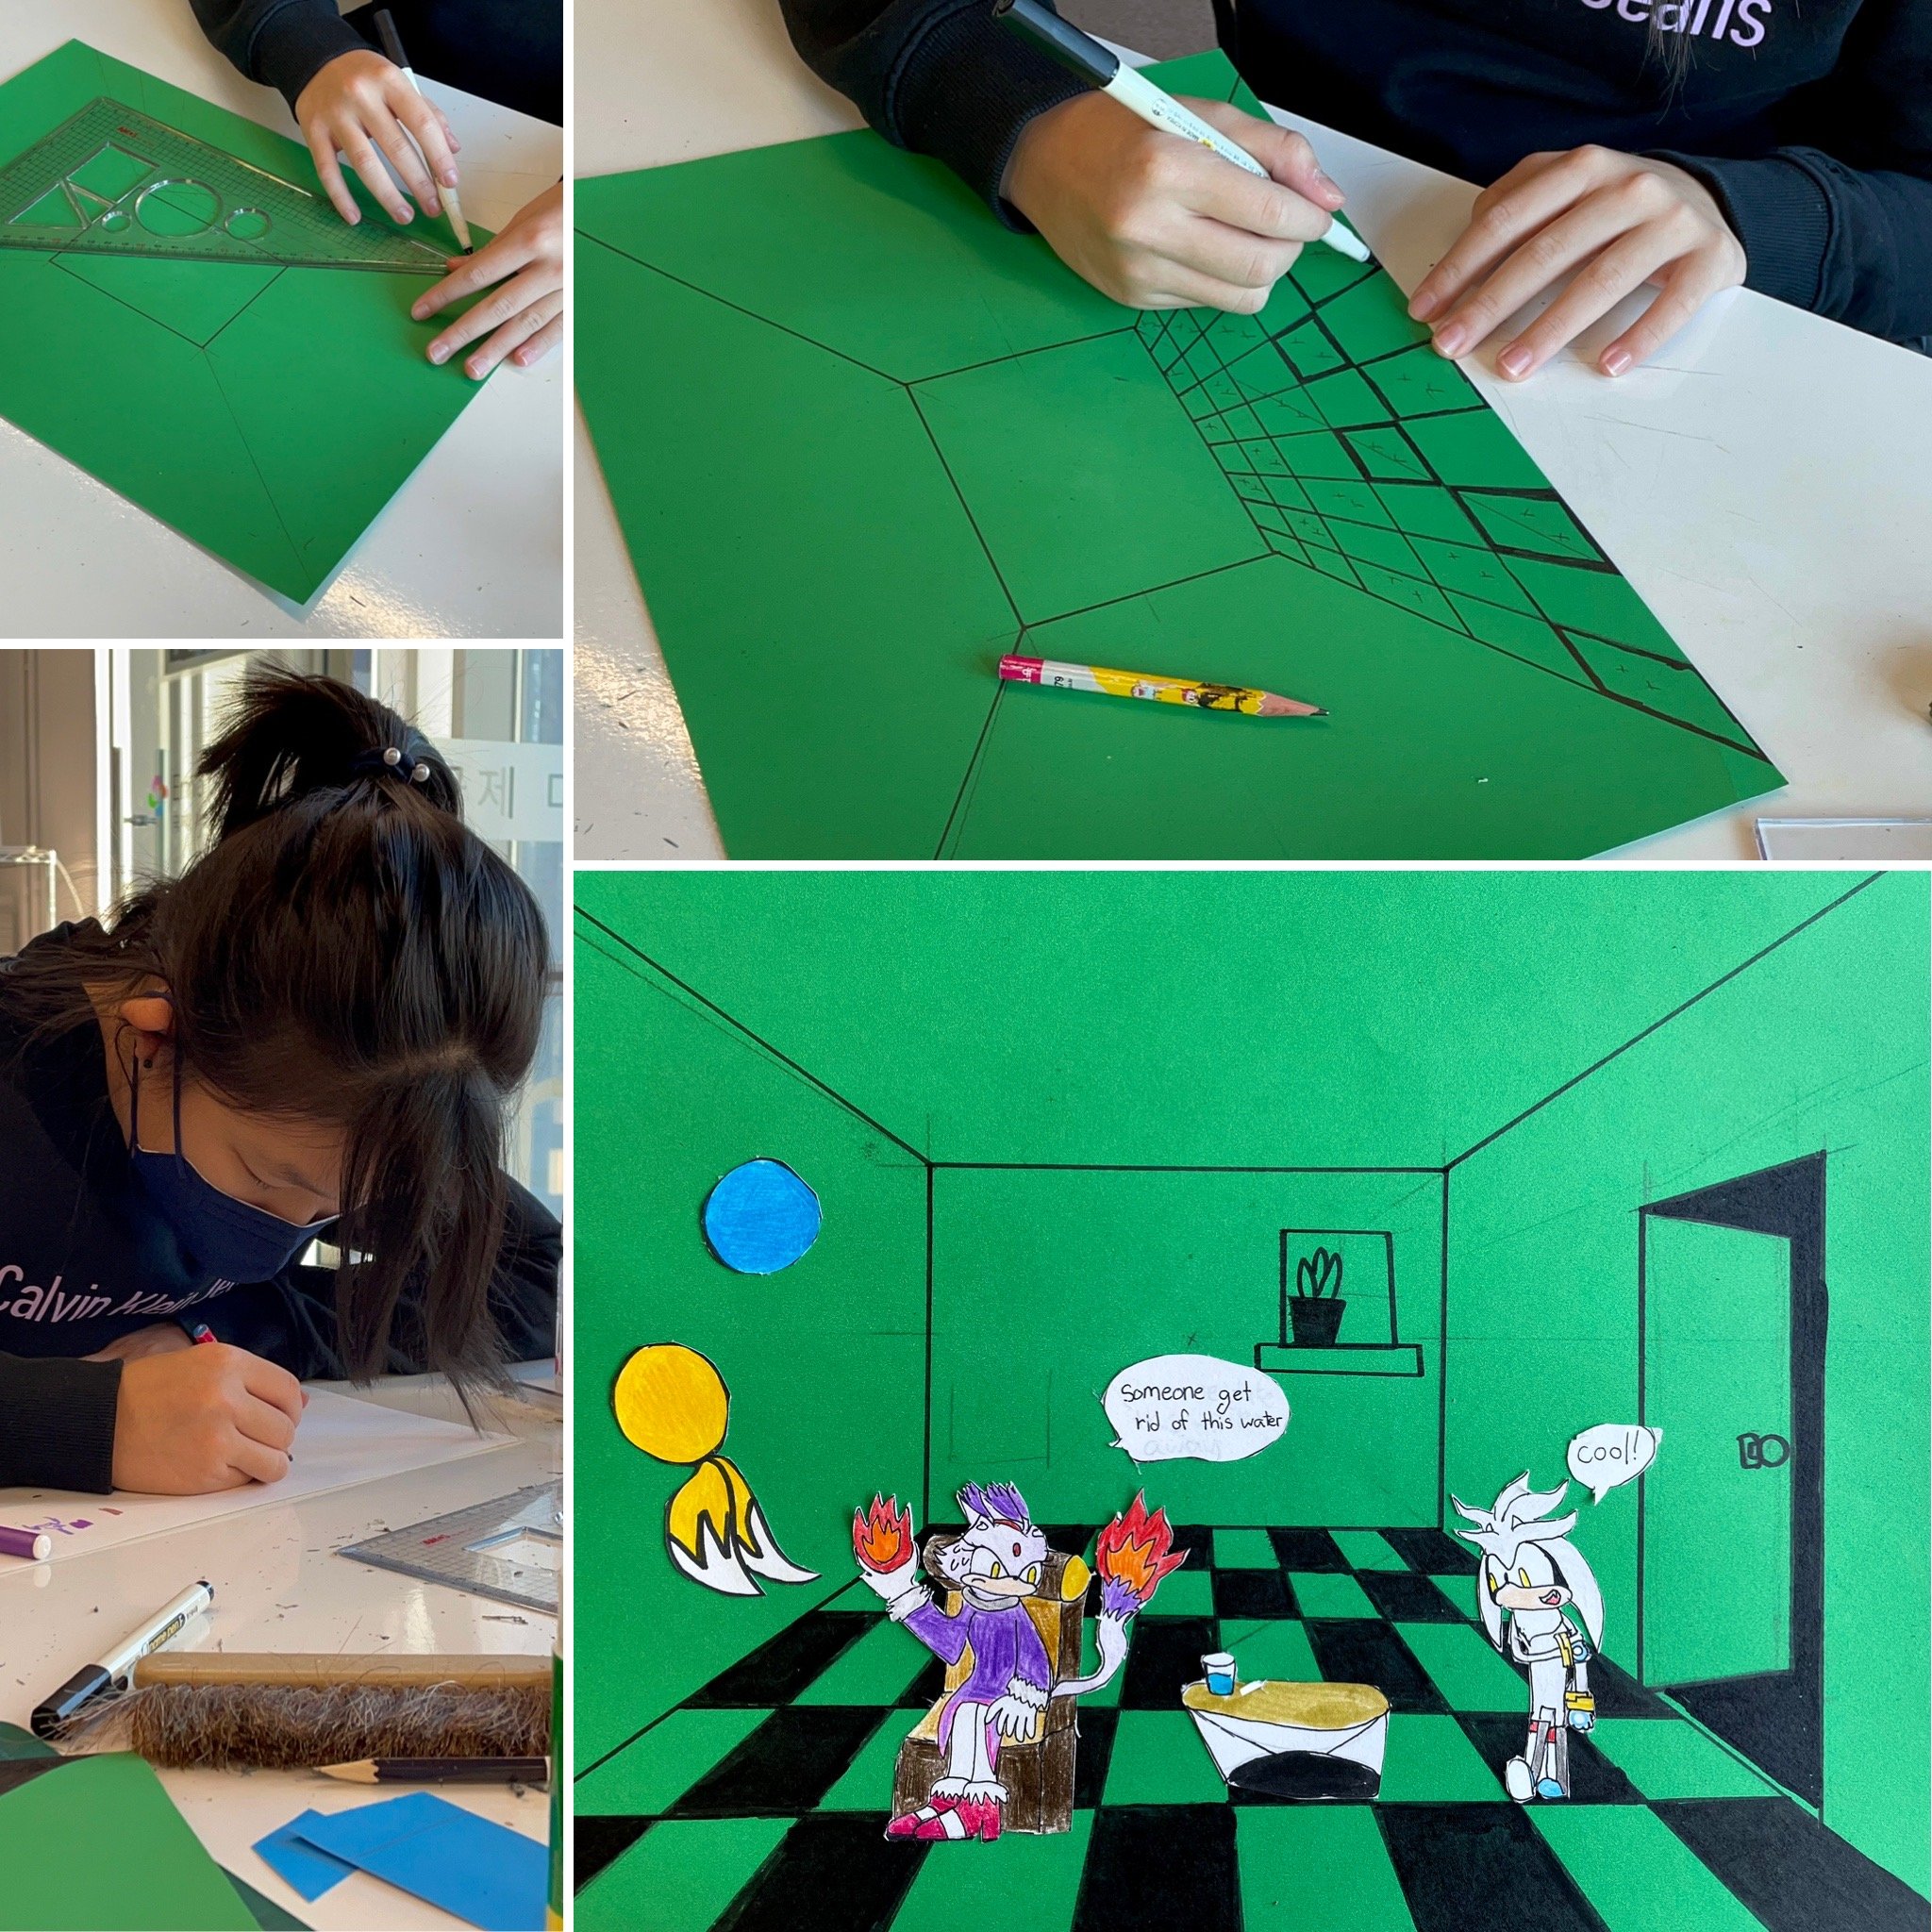
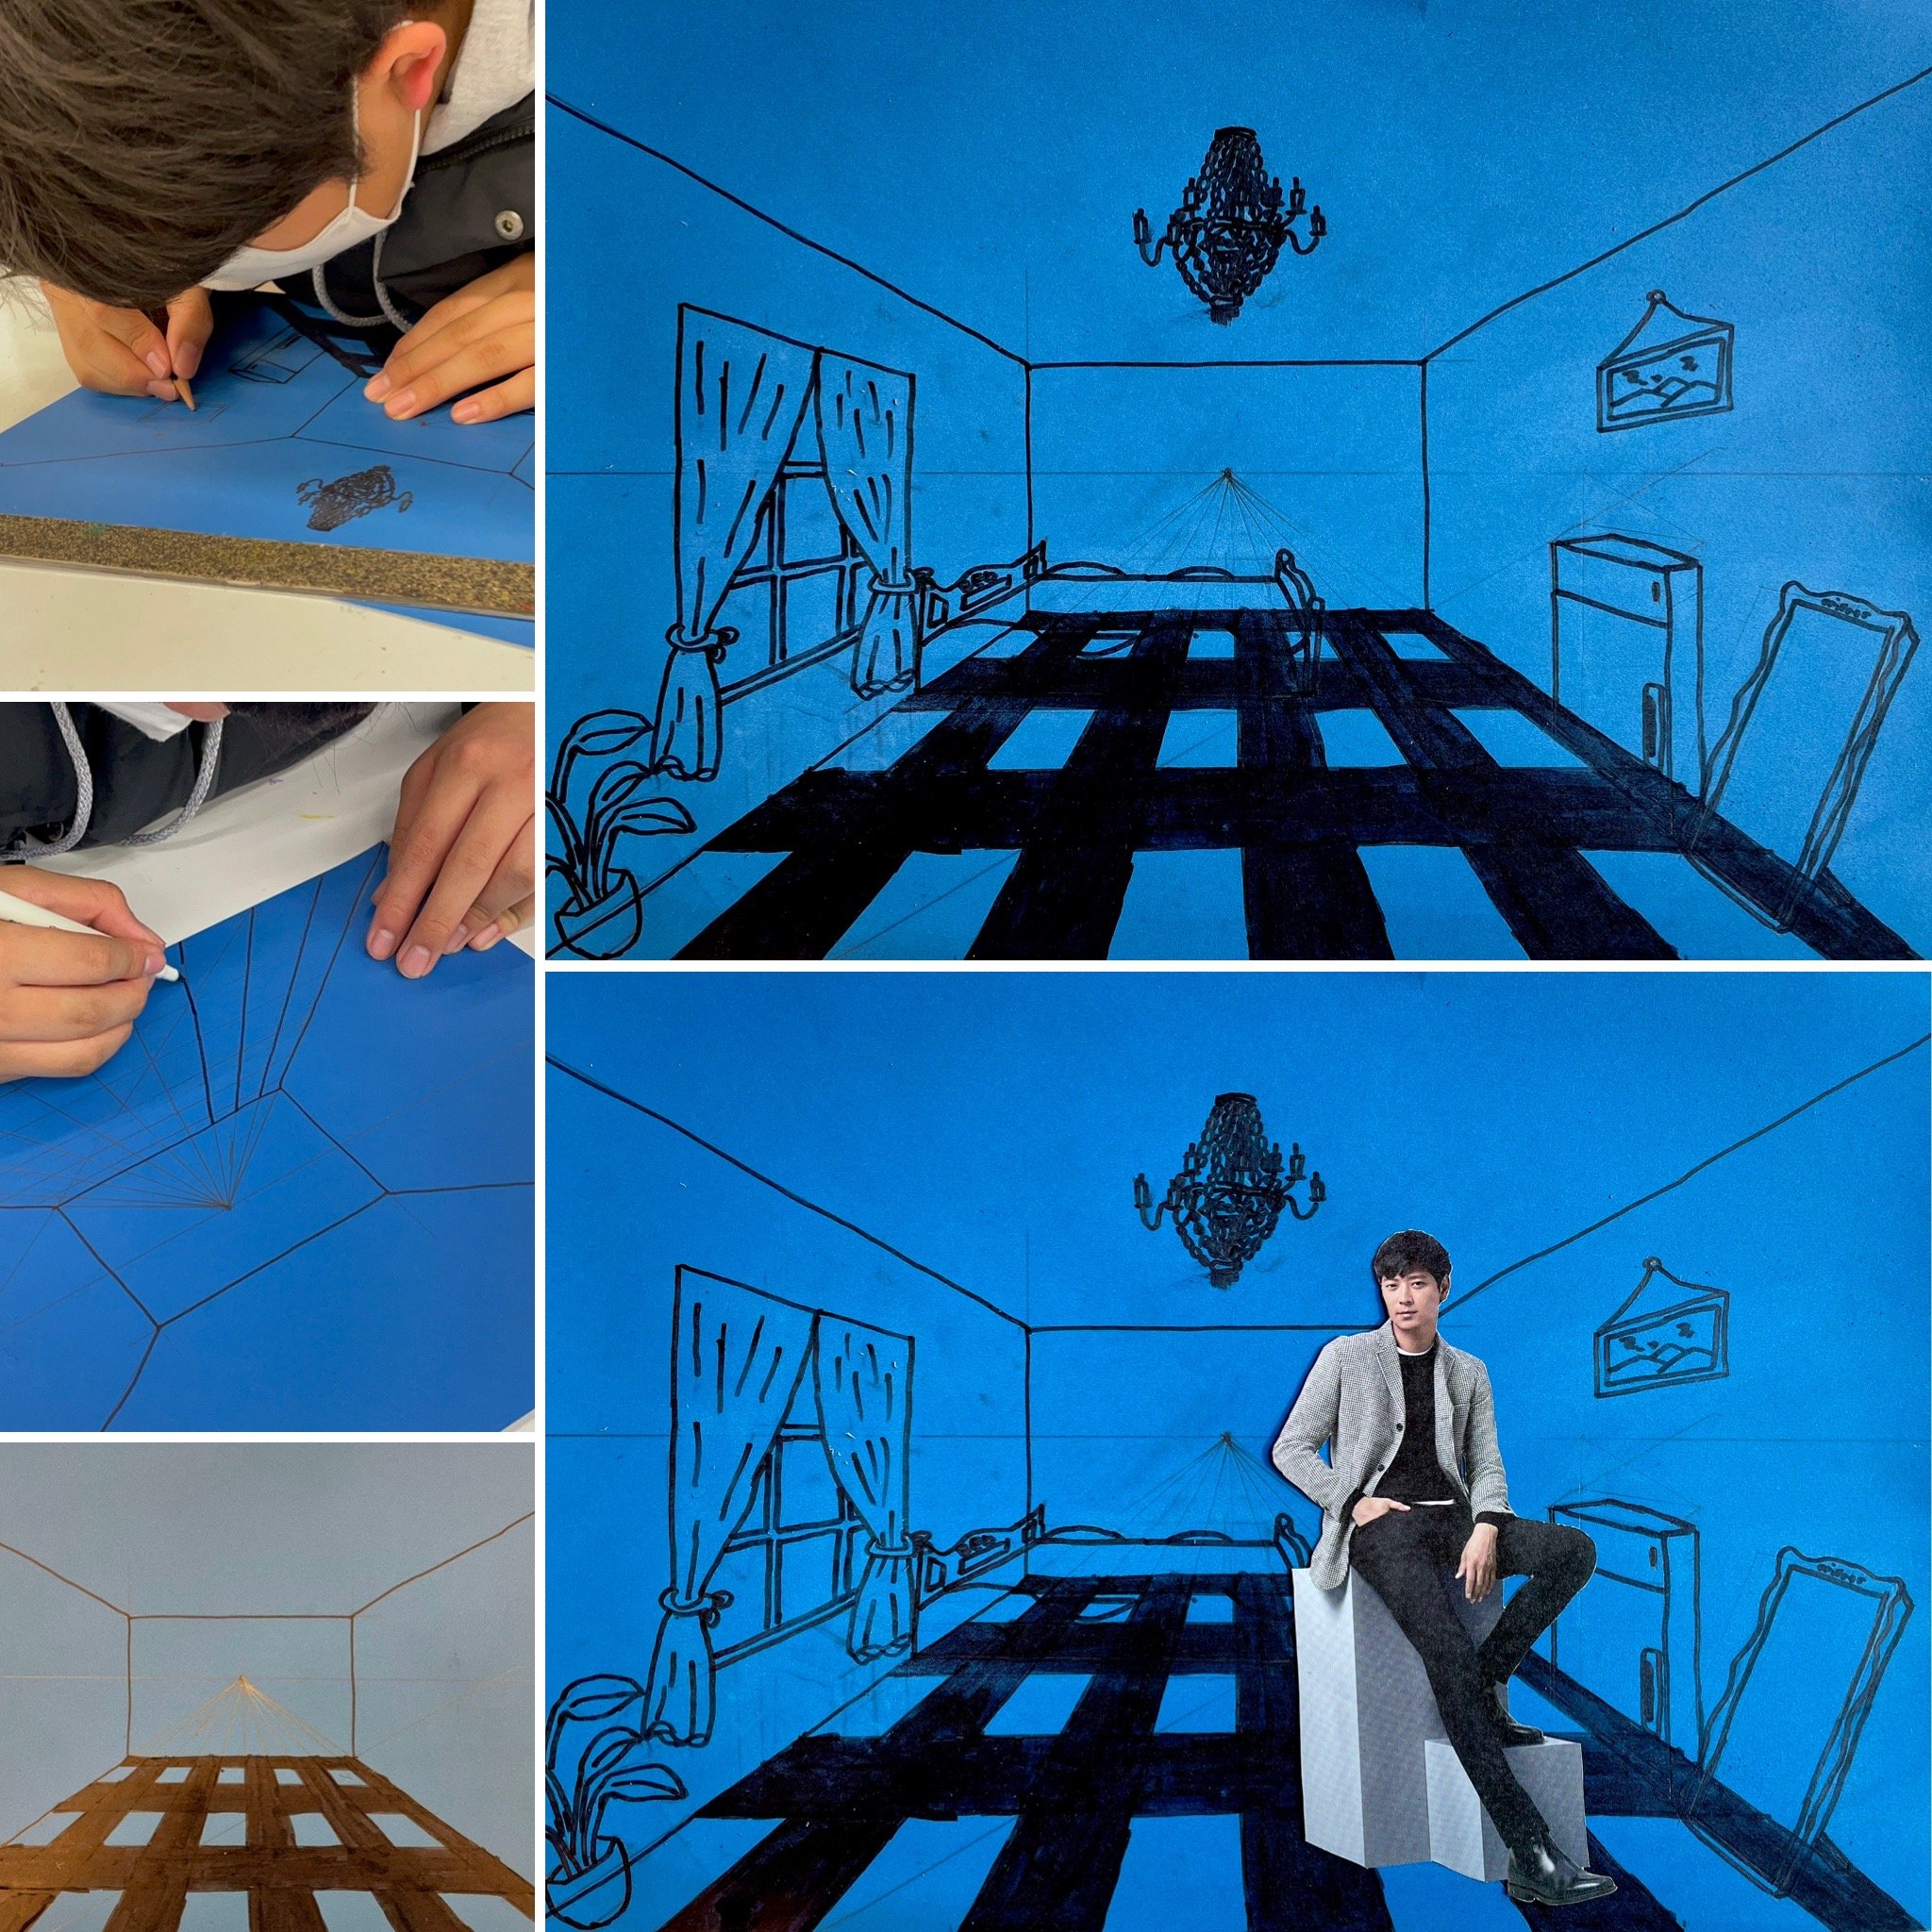
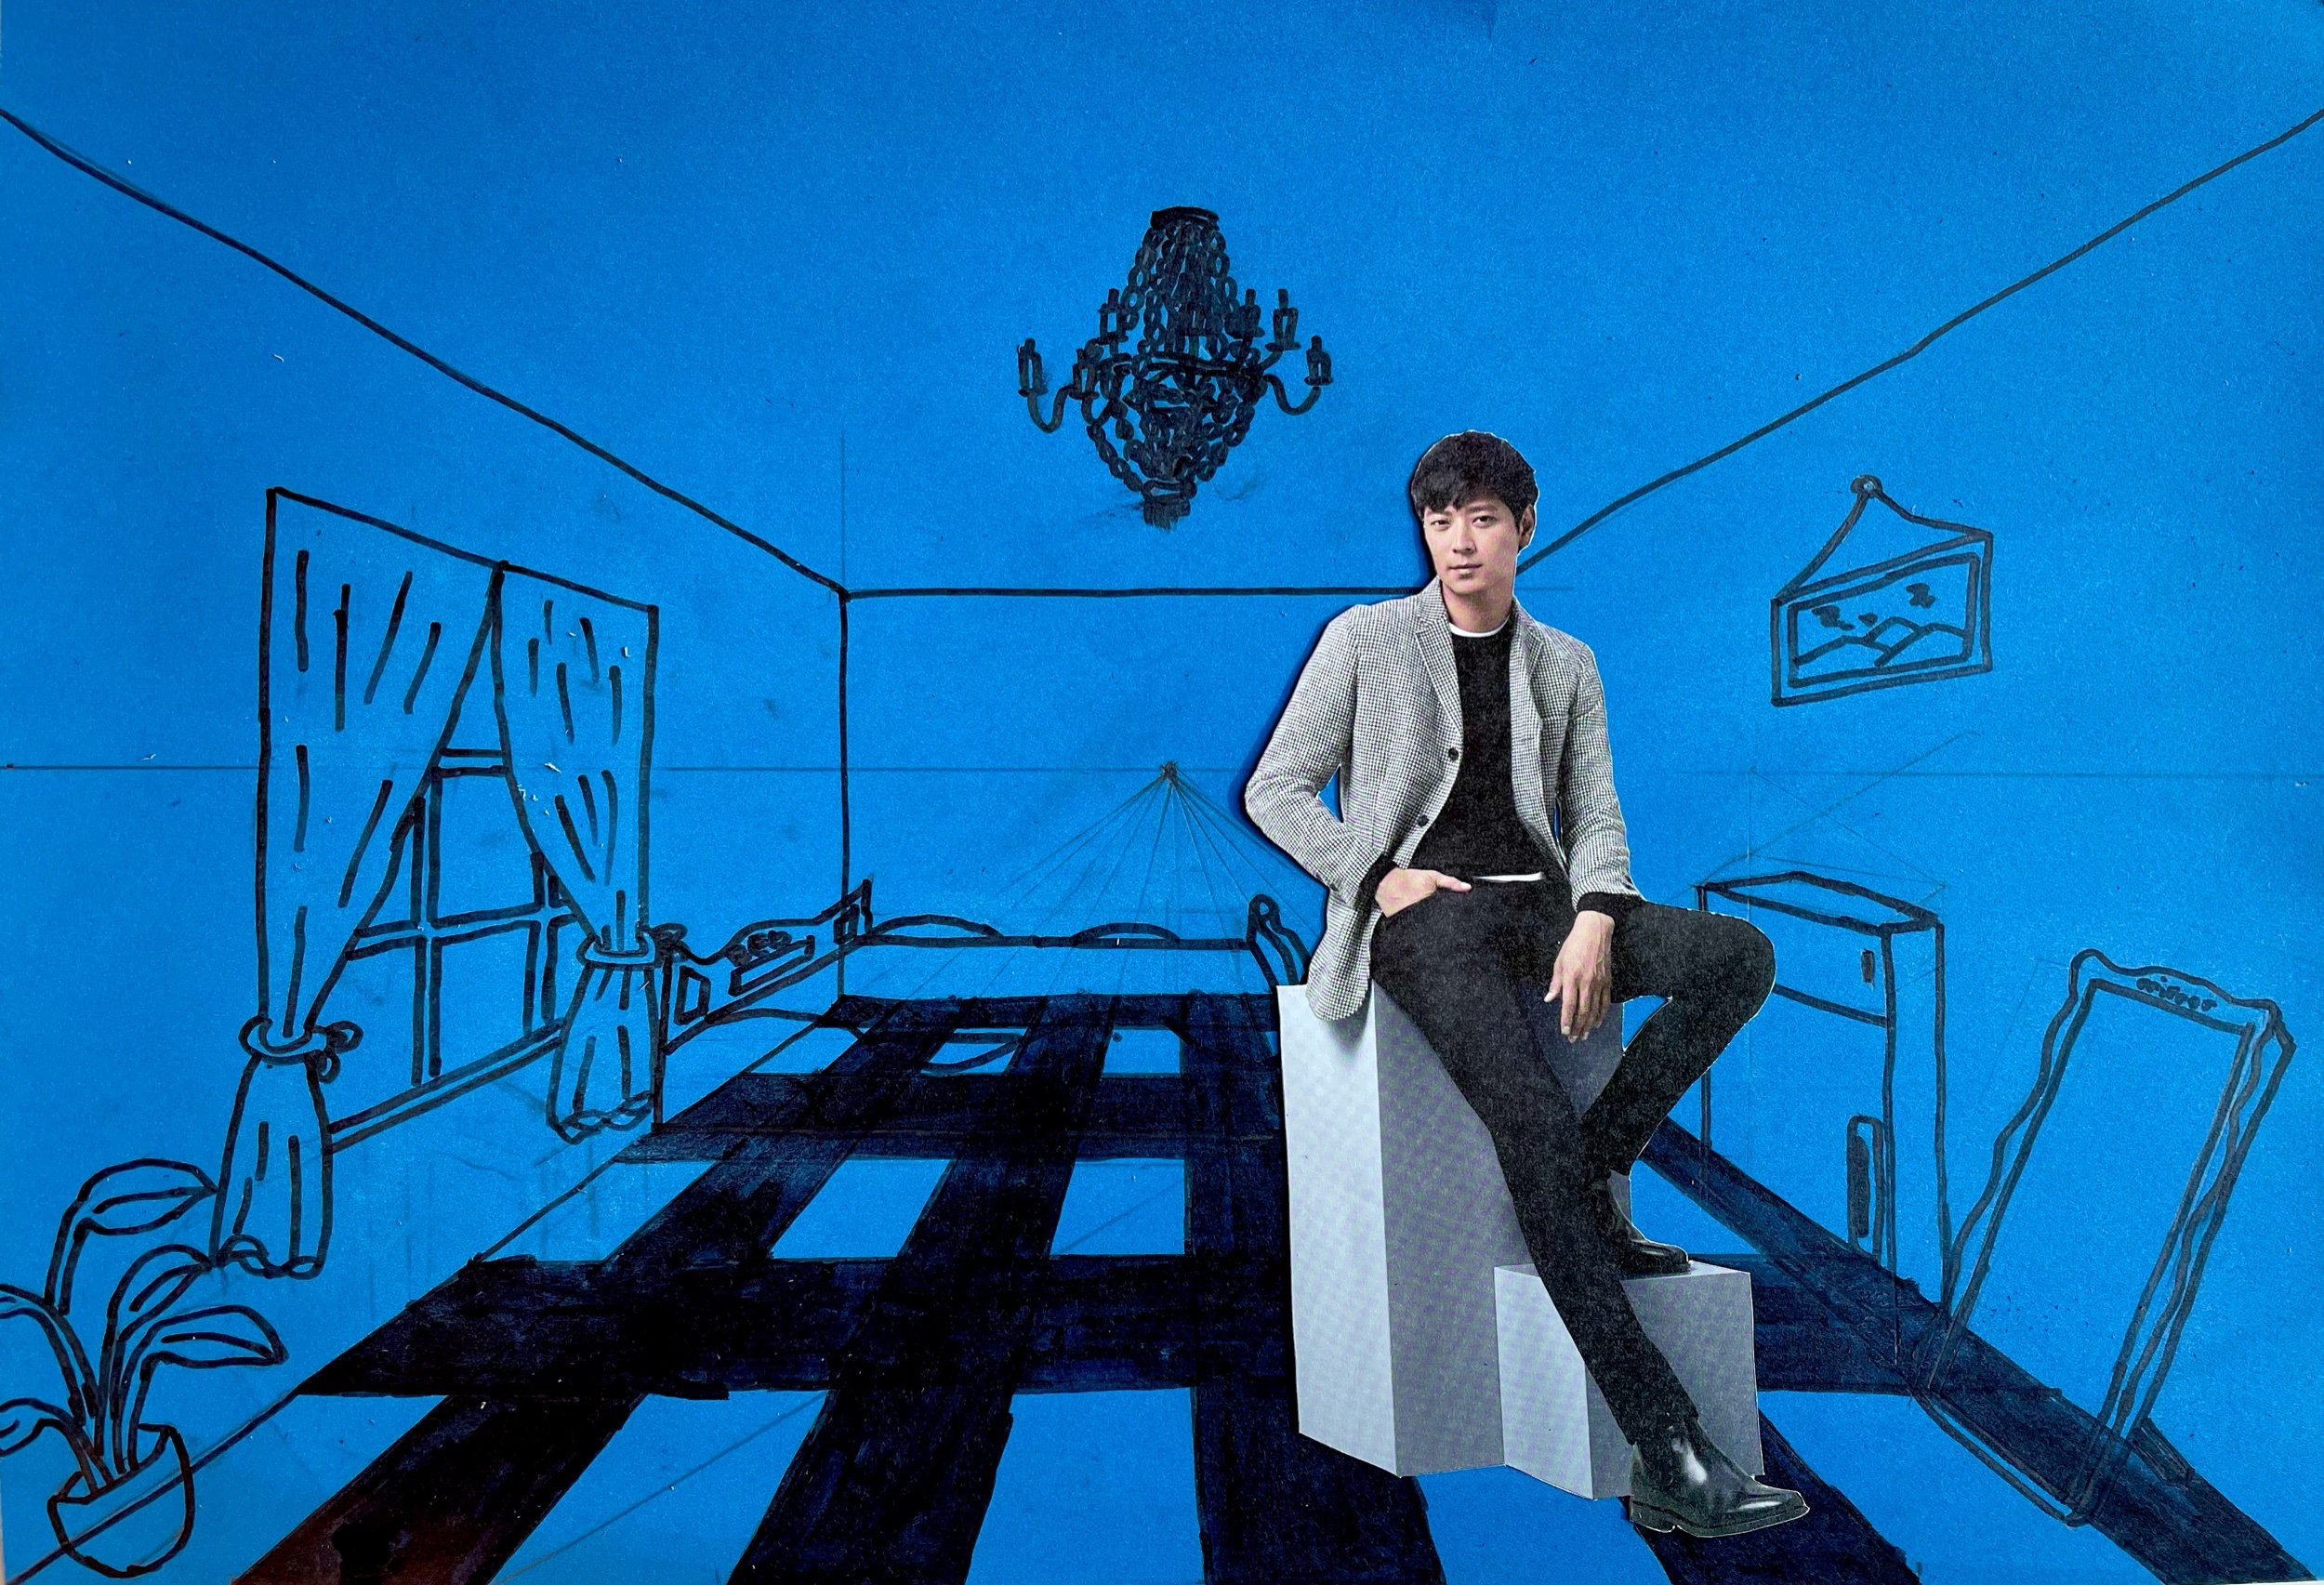
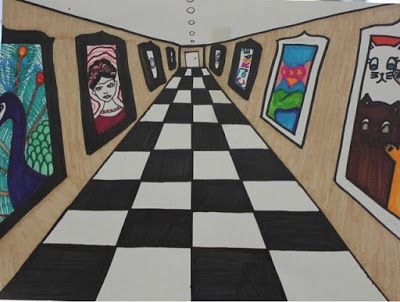
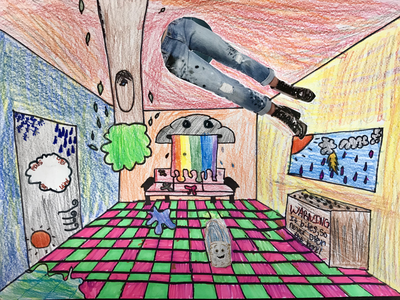
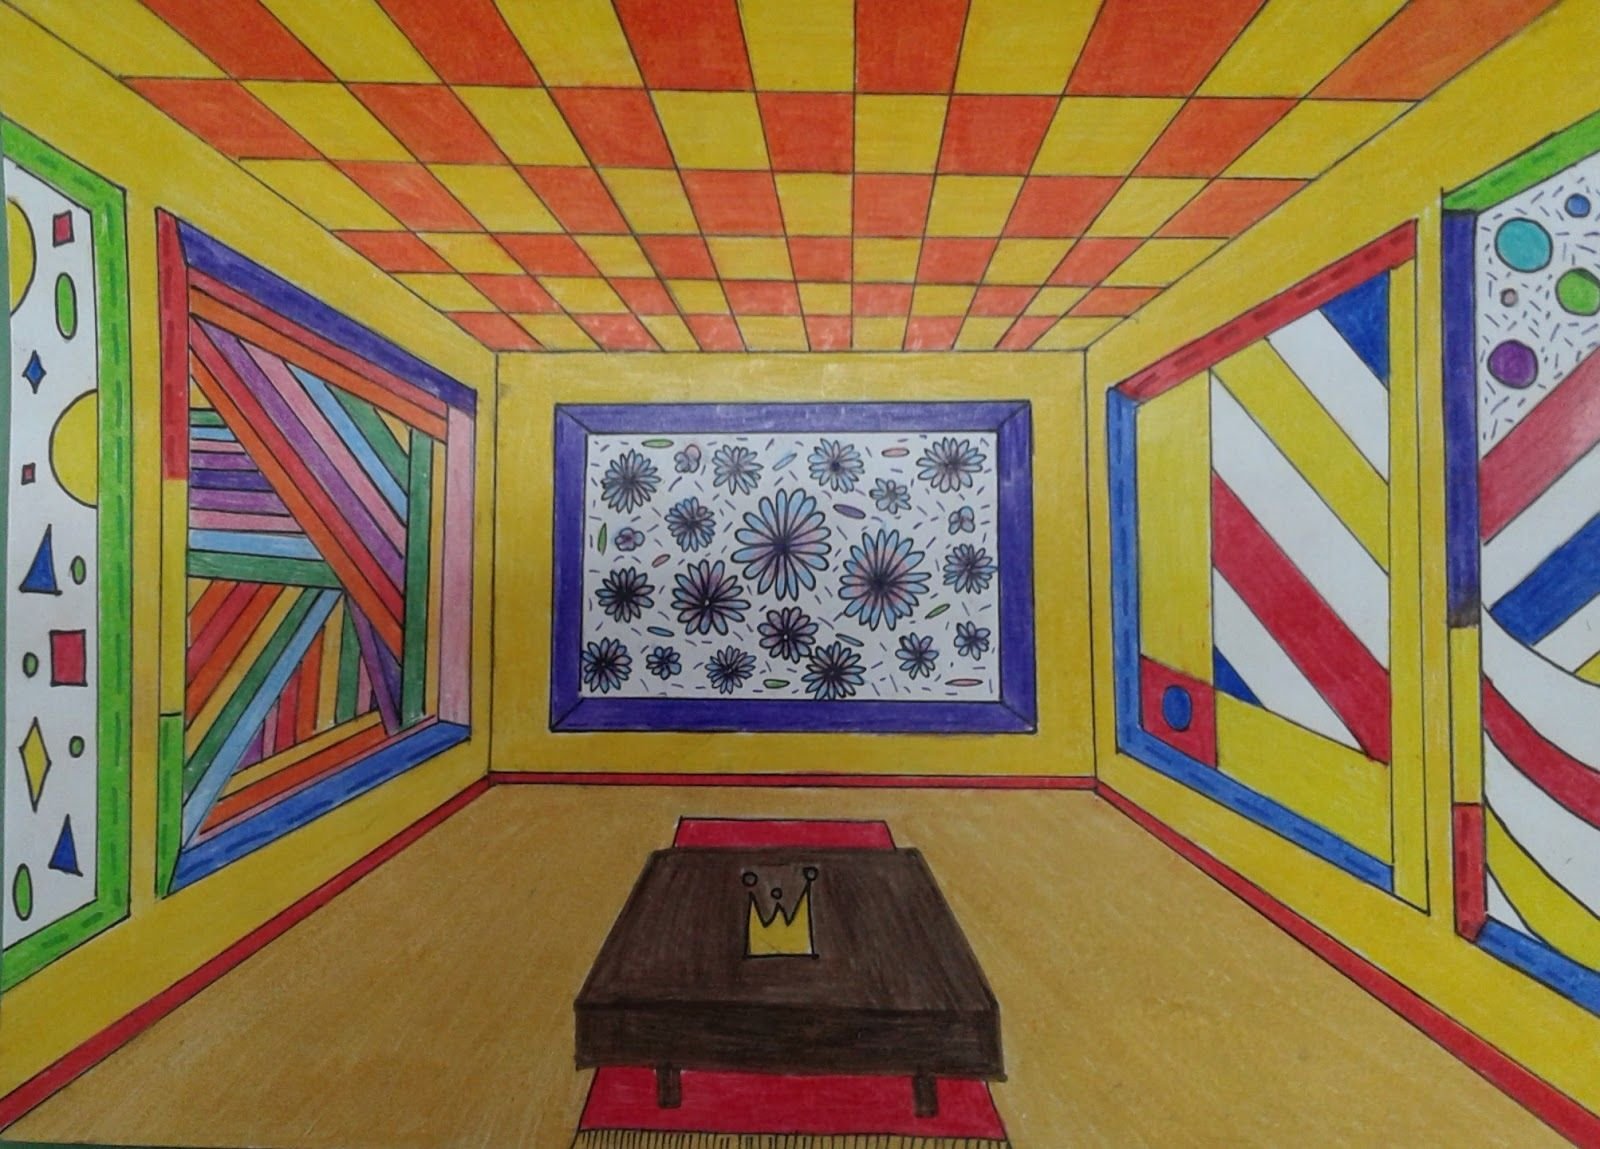
Theme: Visualize and sketch your desired room theme in your sketchbook, exploring various concepts like Pokemon, Undertale, museums, or insects.
Colored Paper: Choose a large sheet of colored paper that complements your chosen theme.
Horizon Line: Draw a horizon line across the middle of the colored paper using a ruler.
Vanishing Point: Mark the vanishing point with an 'X' at the center of the horizon line.
Converging Lines: Divide the bottom of the paper into 4-centimeter units and extend each point to converge at the vanishing point.
Horizontal Lines: Draw a 30-degree angle line across the converging lines, then draw horizontal lines intersecting each point.
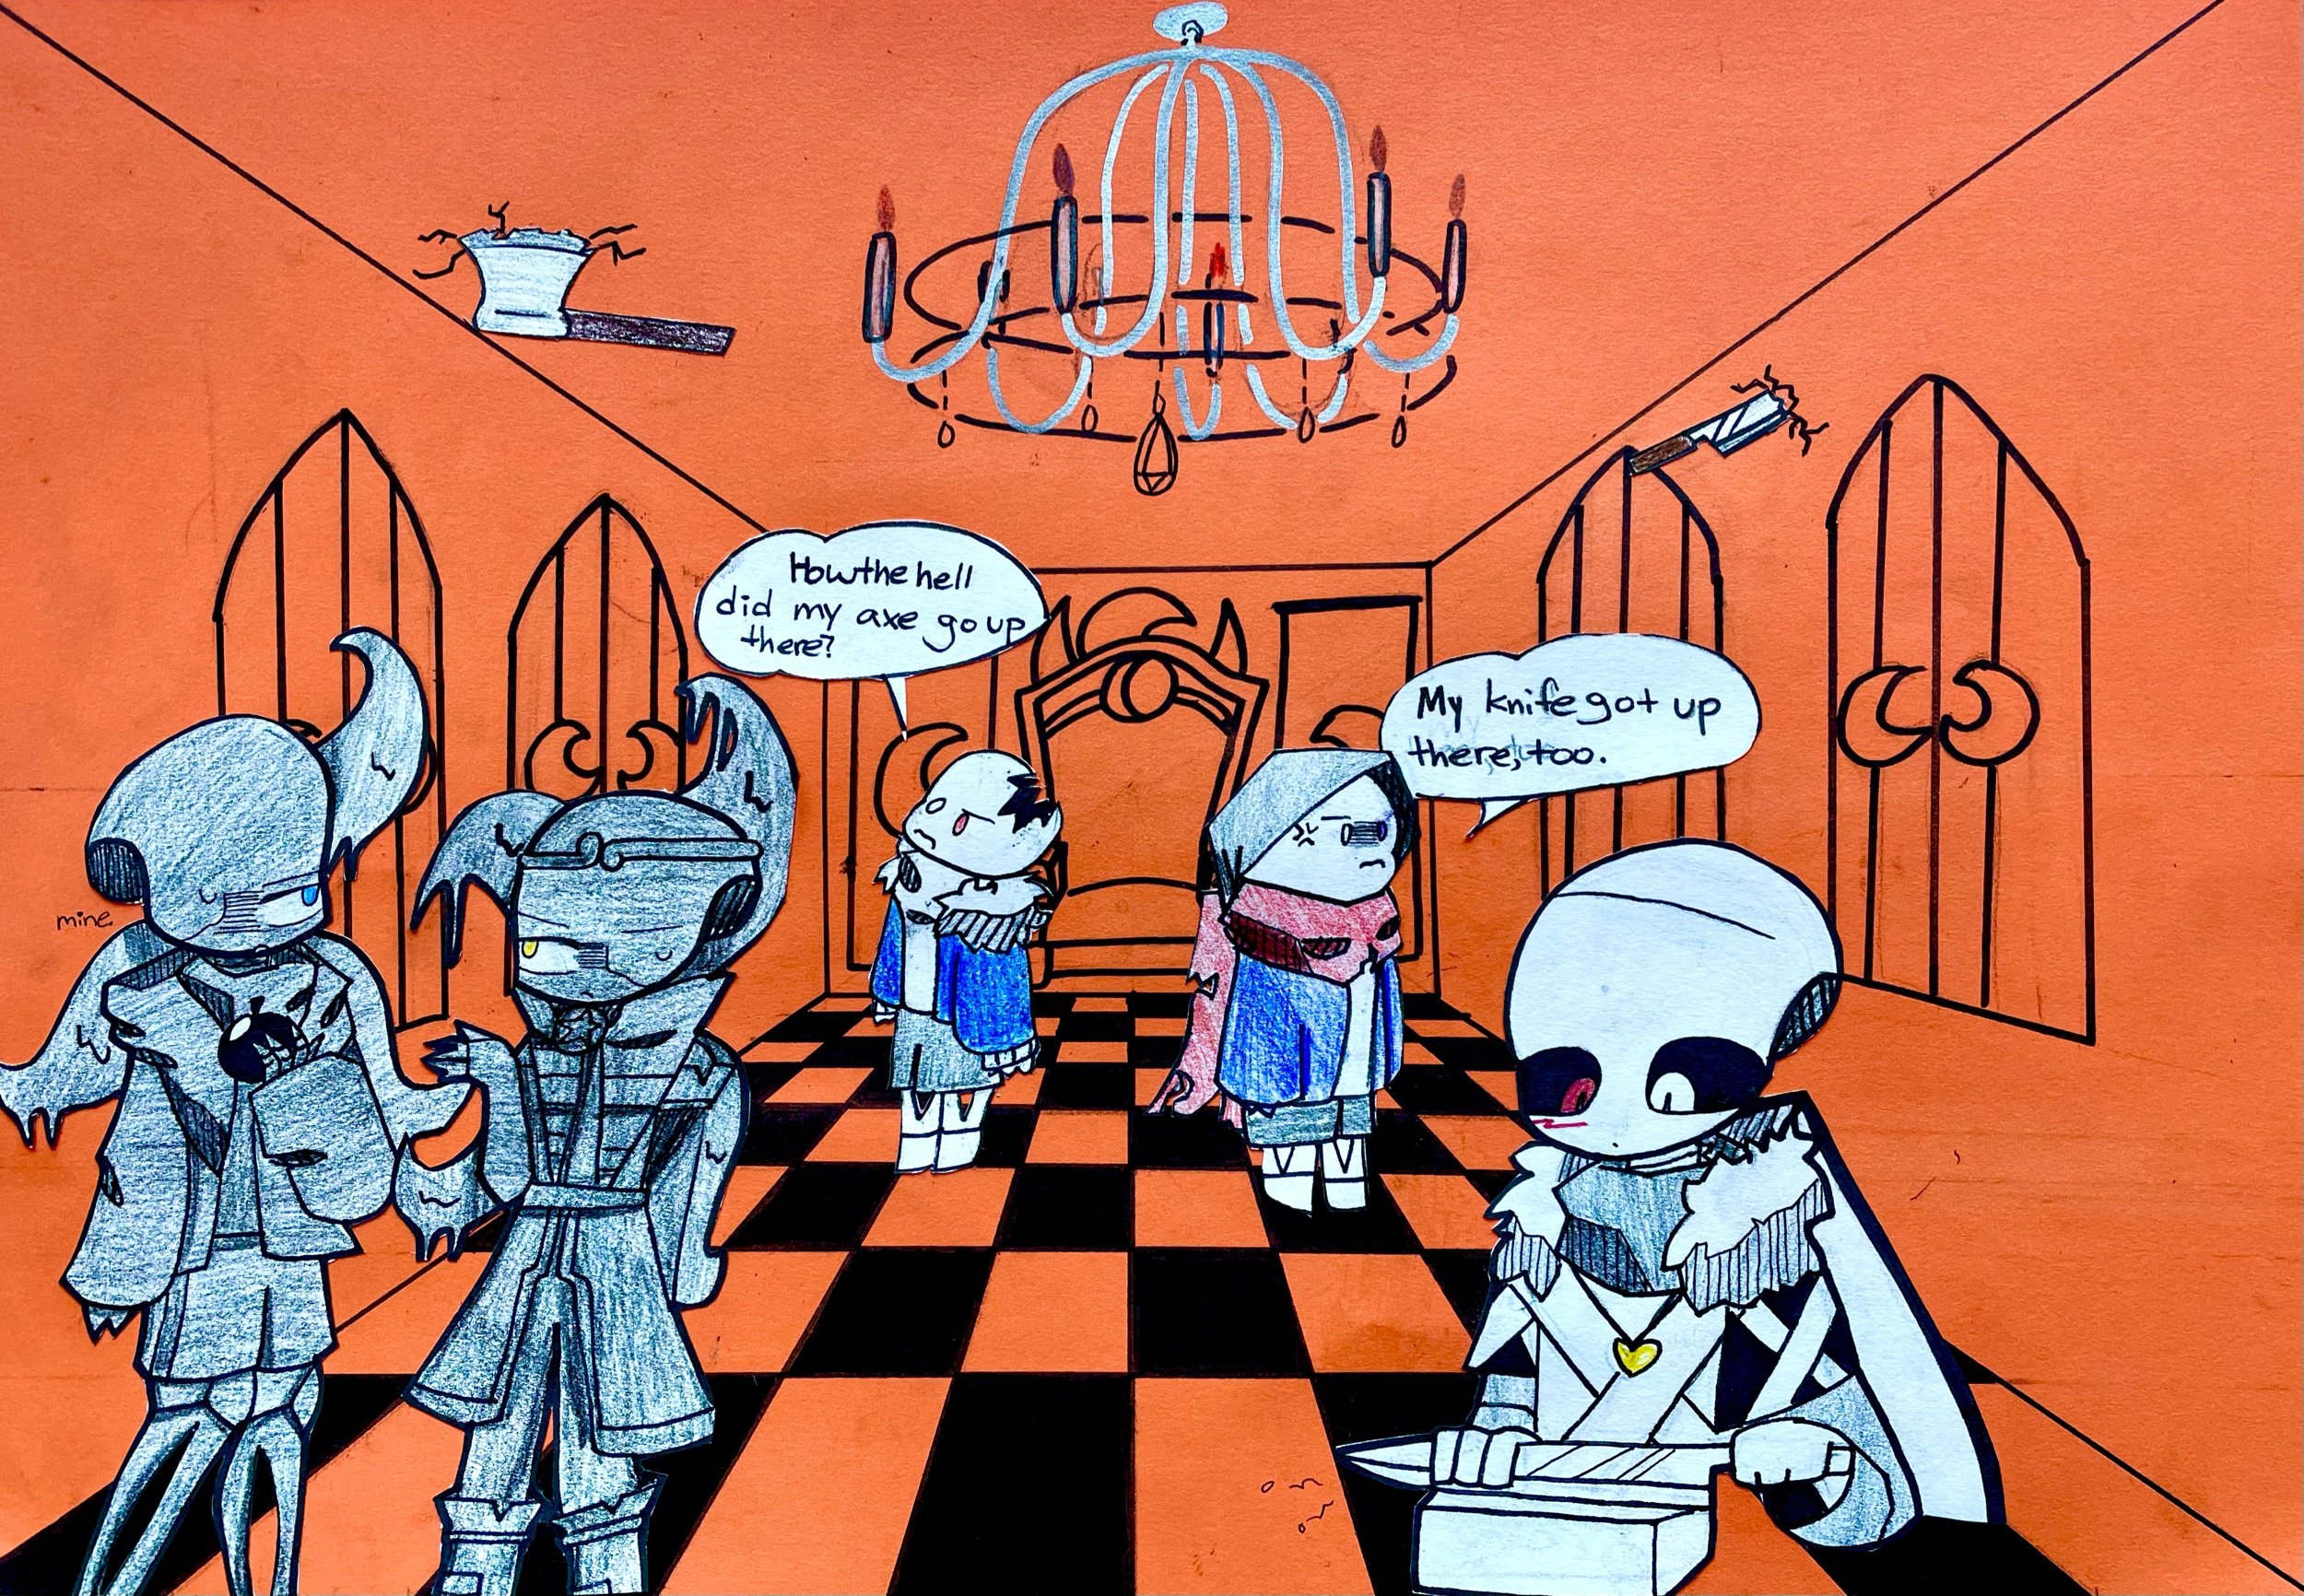
Draw the Back Wall: Sketch a square to represent the back wall of your room.
Draw the Side Walls and Ceiling: Extend four lines from the vanishing point, aligning them with the corners of the back wall to depict the side walls and ceiling.
Inking: Use black permanent markers to ink your grid.
Windows and Doors: Draw doors and windows, using the vanishing point as a guide.
Characters and Objects: Add characters and objects on a separate sheet of colored paper, ensuring they align with the perspective grid. Utilize magazine images if desired and outline them with black markers.
Color: Color or paint your illustration using gouache, watercolors, or colored pencils to bring your scene to life.
Encourage experimentation and creativity throughout the process, allowing students to explore various themes and techniques to enhance their illustrations.


Terminology
Perspective Grid — Intersecting lines drawn onto a two-dimensional surface that resembles square tiles receding into the distance. This tool serves as a guide for artists to make accurate drawings in perspective.
Depth Measuring Line — A diagonal line used to measure depth in perspective drawing. The angle of the line is typically between 30 to 40 degrees.
Perspective Drawing — A drawing technique that creates the illusion of depth and distance. In perspective drawing, objects farther from the viewer appear smaller, while those closer seem larger.
Horizon Line — The line where the sky appears to meet the land or sea. It consistently aligns with the viewer's eye level.
Vanishing Point — The point at which parallel lines, when viewed in perspective, appear to converge.
Guideline — Lightly drawn lines that assist artists in constructing their drawings.
Cube — A three-dimensional square with six sides. It serves as a fundamental geometric shape in drawing.
Ellipse — An oval shape that, when viewed in perspective, represents a circle.
