
Lesson Summary
In this lesson, we will explore the art of drawing the human figure by starting with basic shapes and incorporating the concept of foreshortening. Students will draw the figure in various poses and be taught to visualize each body part as a simple geometric shape, allowing them to incorporate perspective and foreshortening into their figure drawings. This approach will add depth and realism, making their artwork appear three-dimensional and dynamic.
Lesson Objectives
Draw the human figure in different poses and study about the human anatomy.
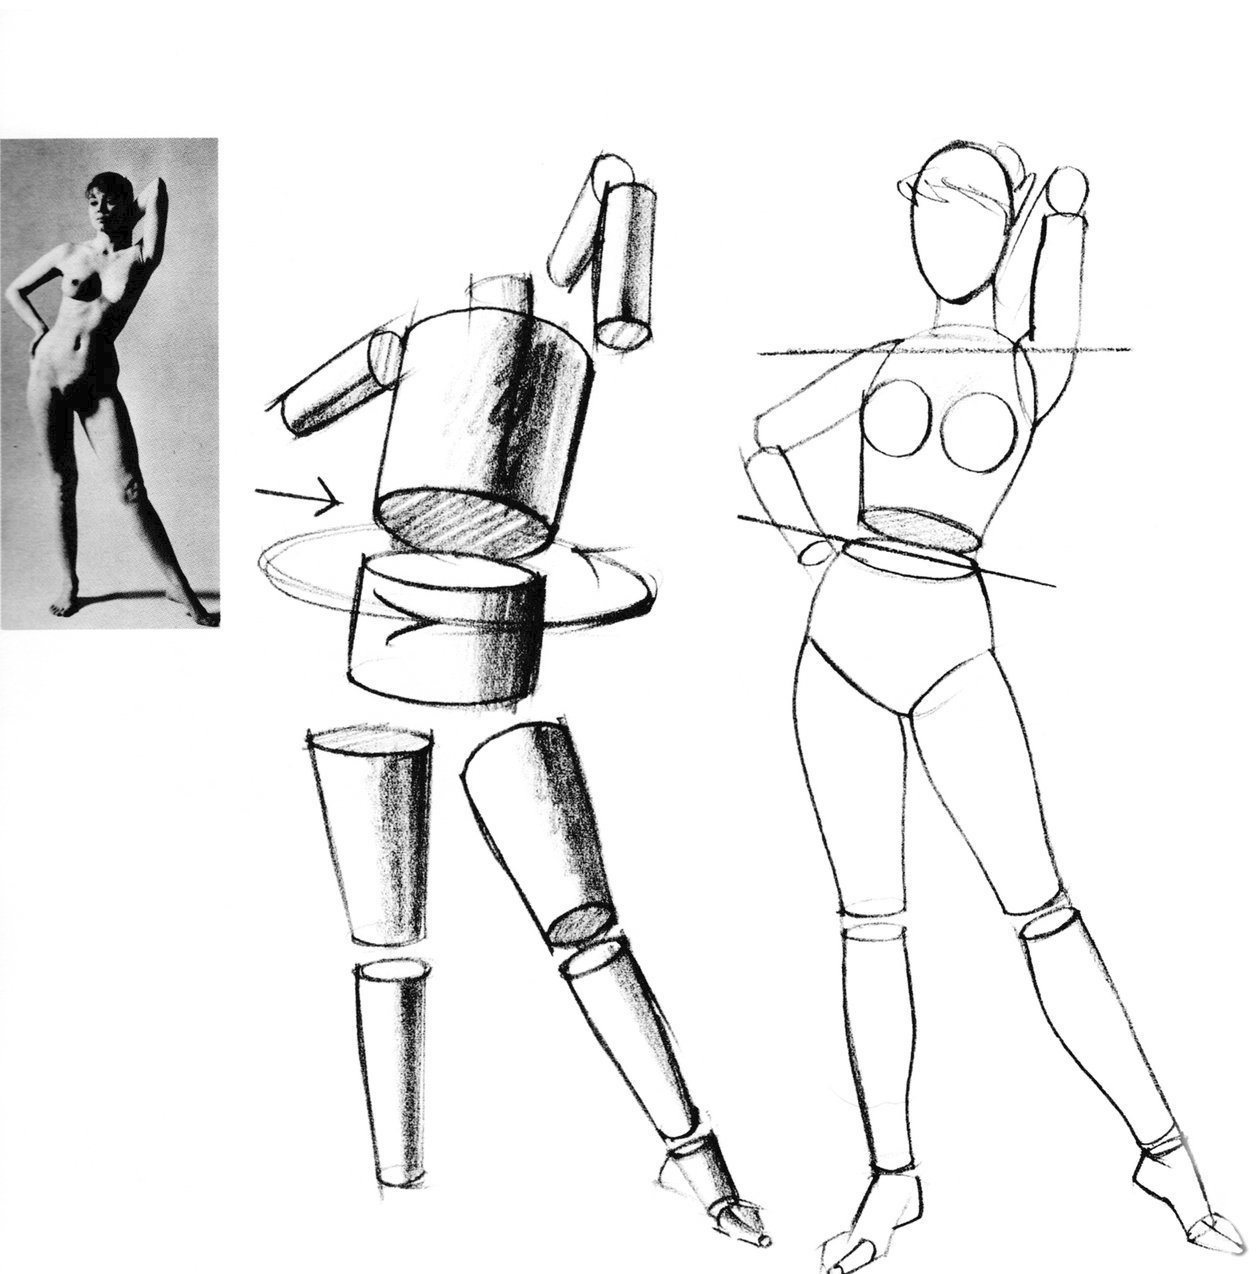
Visualize each body part as a simple geometric shape, incorporating perspective and foreshortening into their figure drawings.


Steps in Drawing the Human Figure
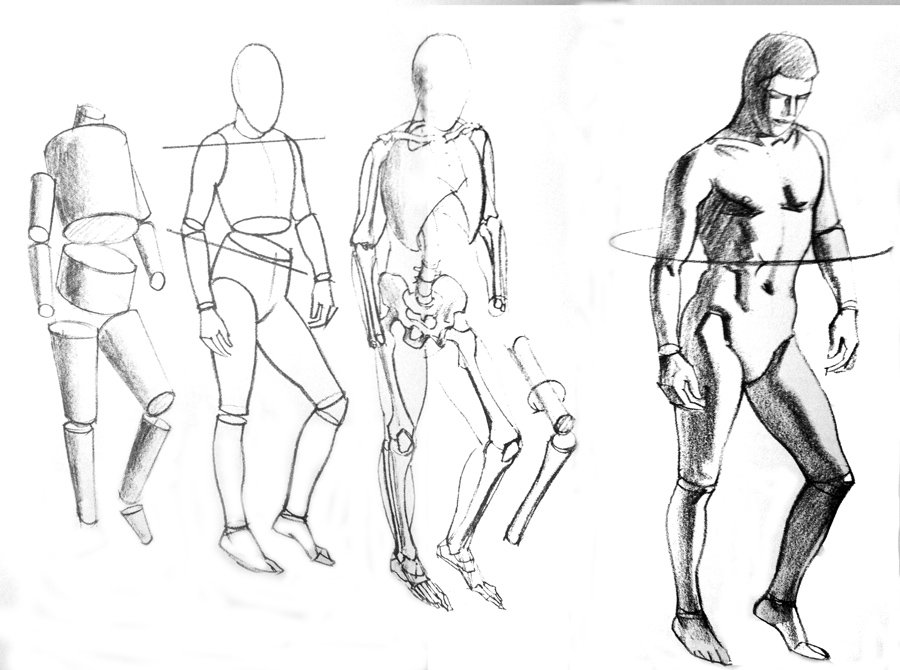
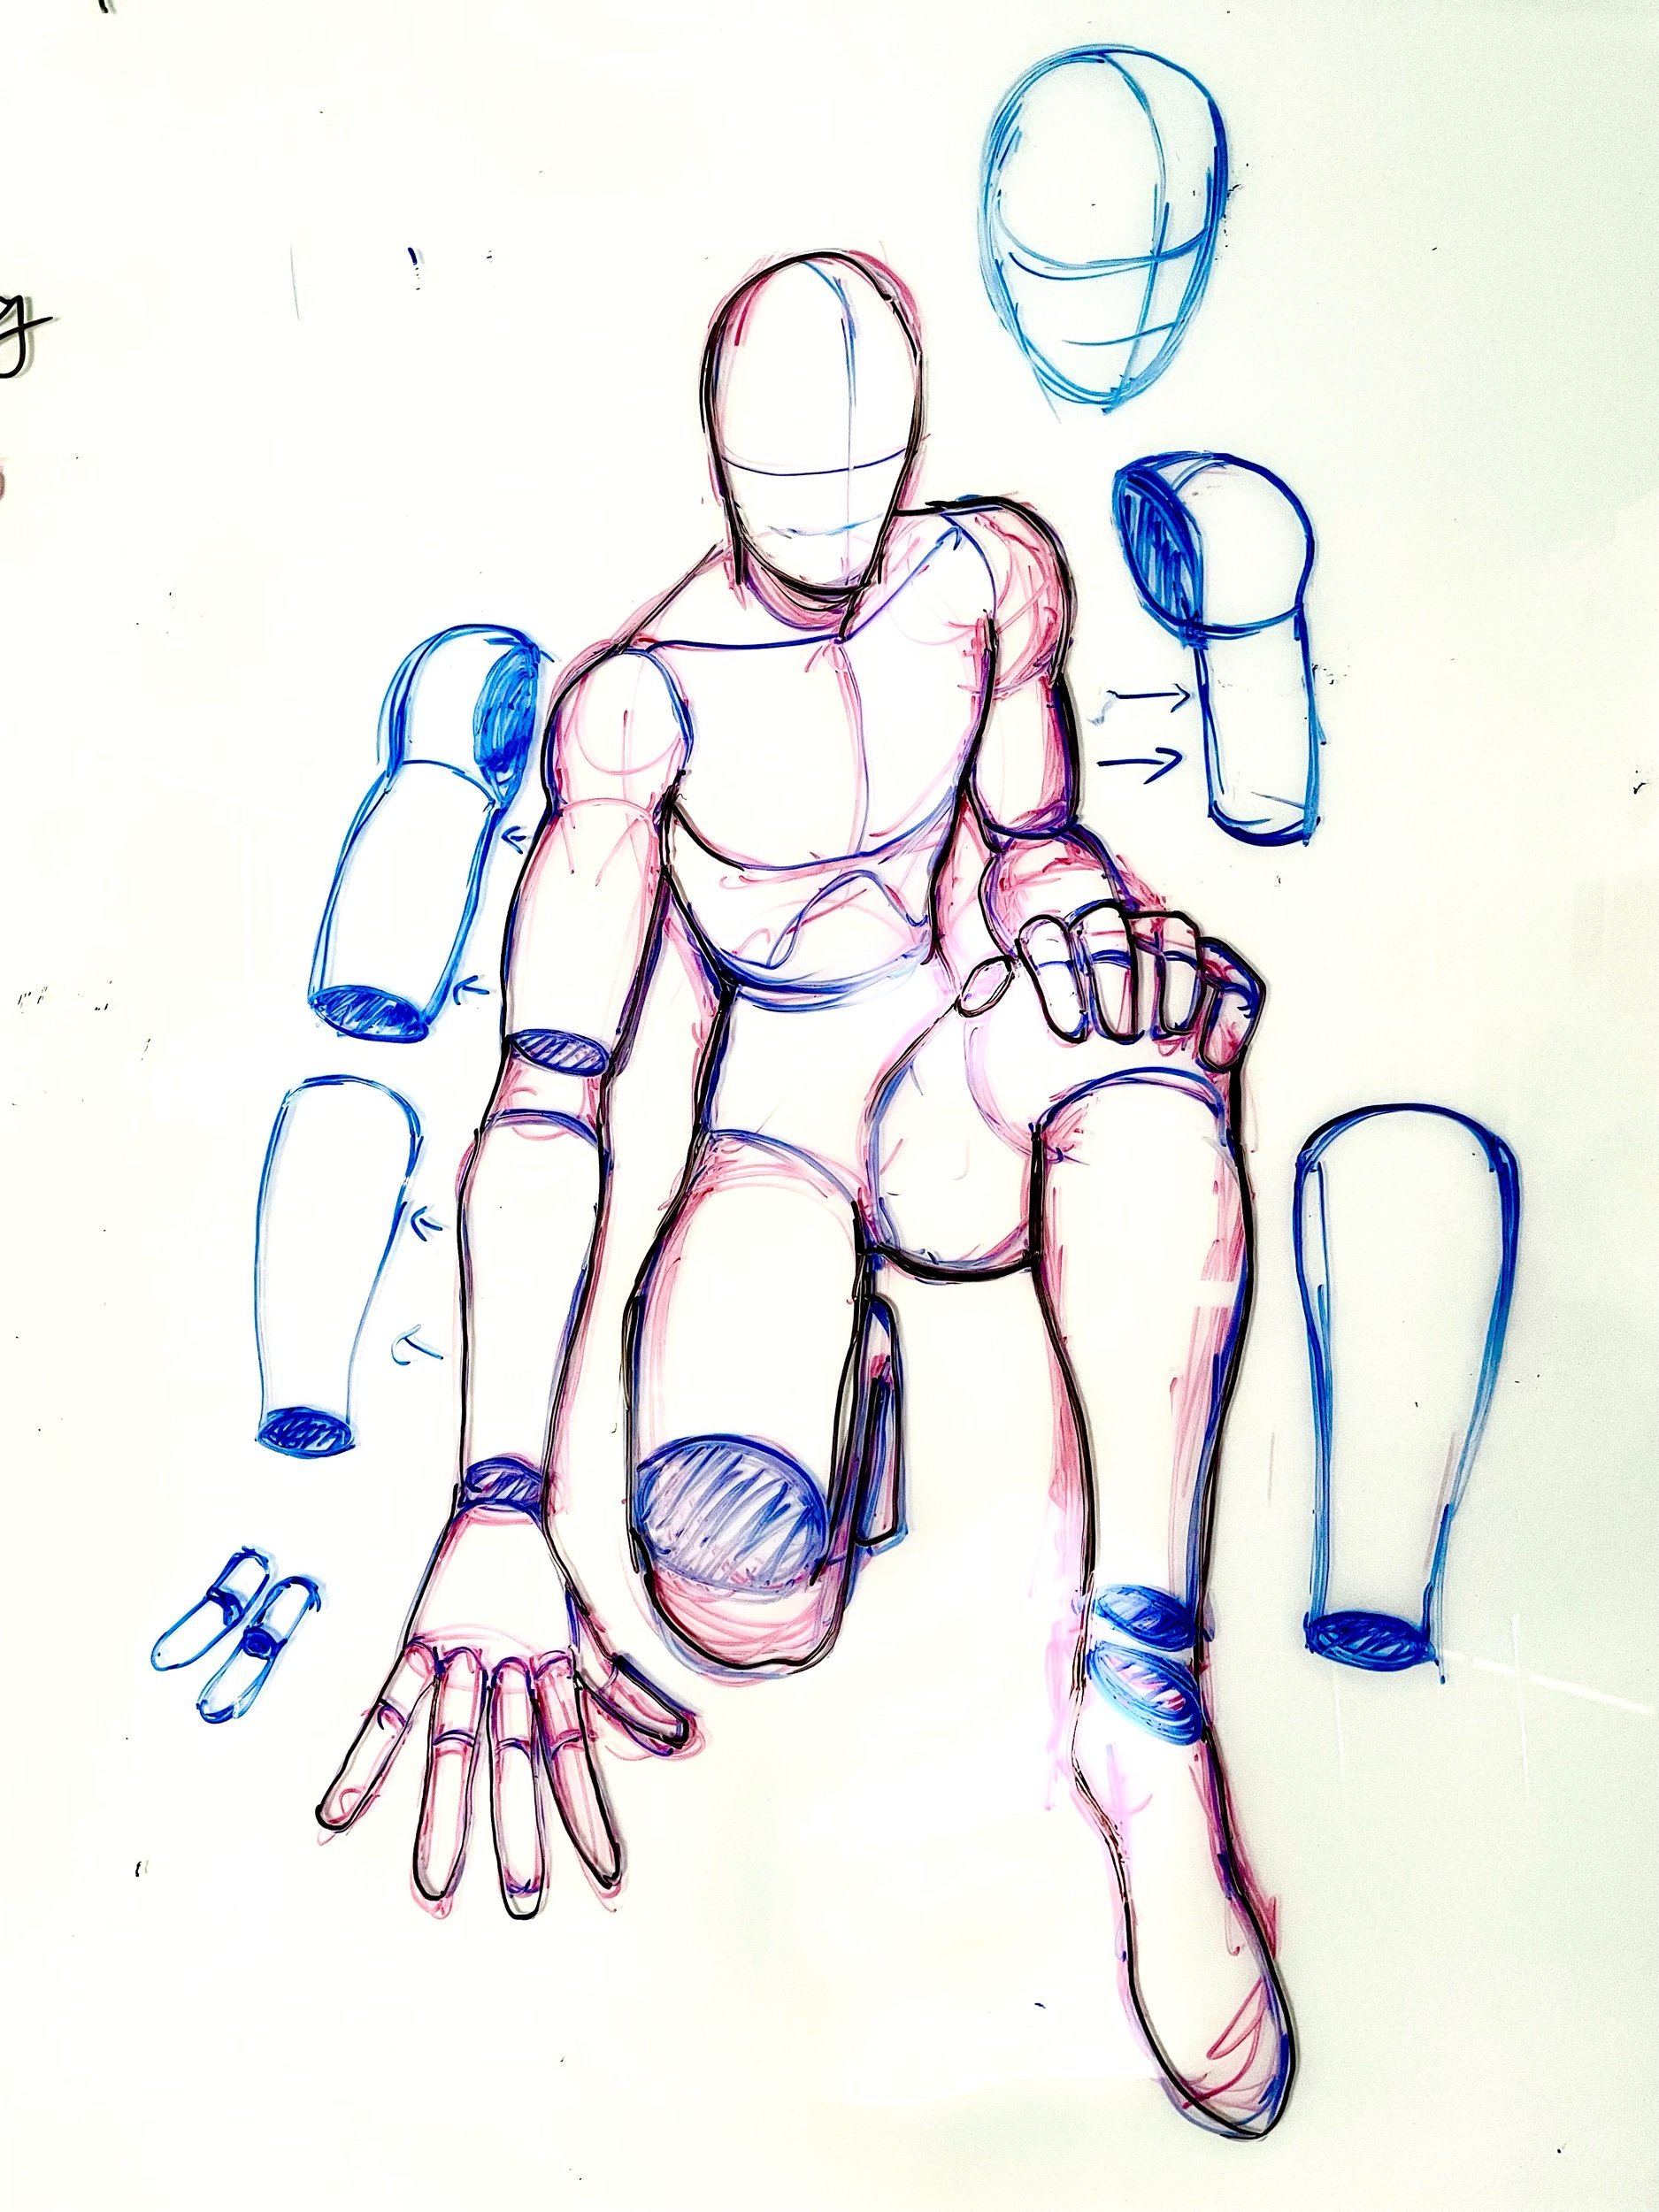
Torso: Begin by drawing the figure's largest body part, the torso; upper torso, lower torso and waist.
Limbs and Head: Progress to the smaller body parts, like the legs, arms, and head. Position these body parts to express different poses.
Proportions: While everyone's proportions vary, there are some general similarities. Use your judgment when assessing your figure's proportions.
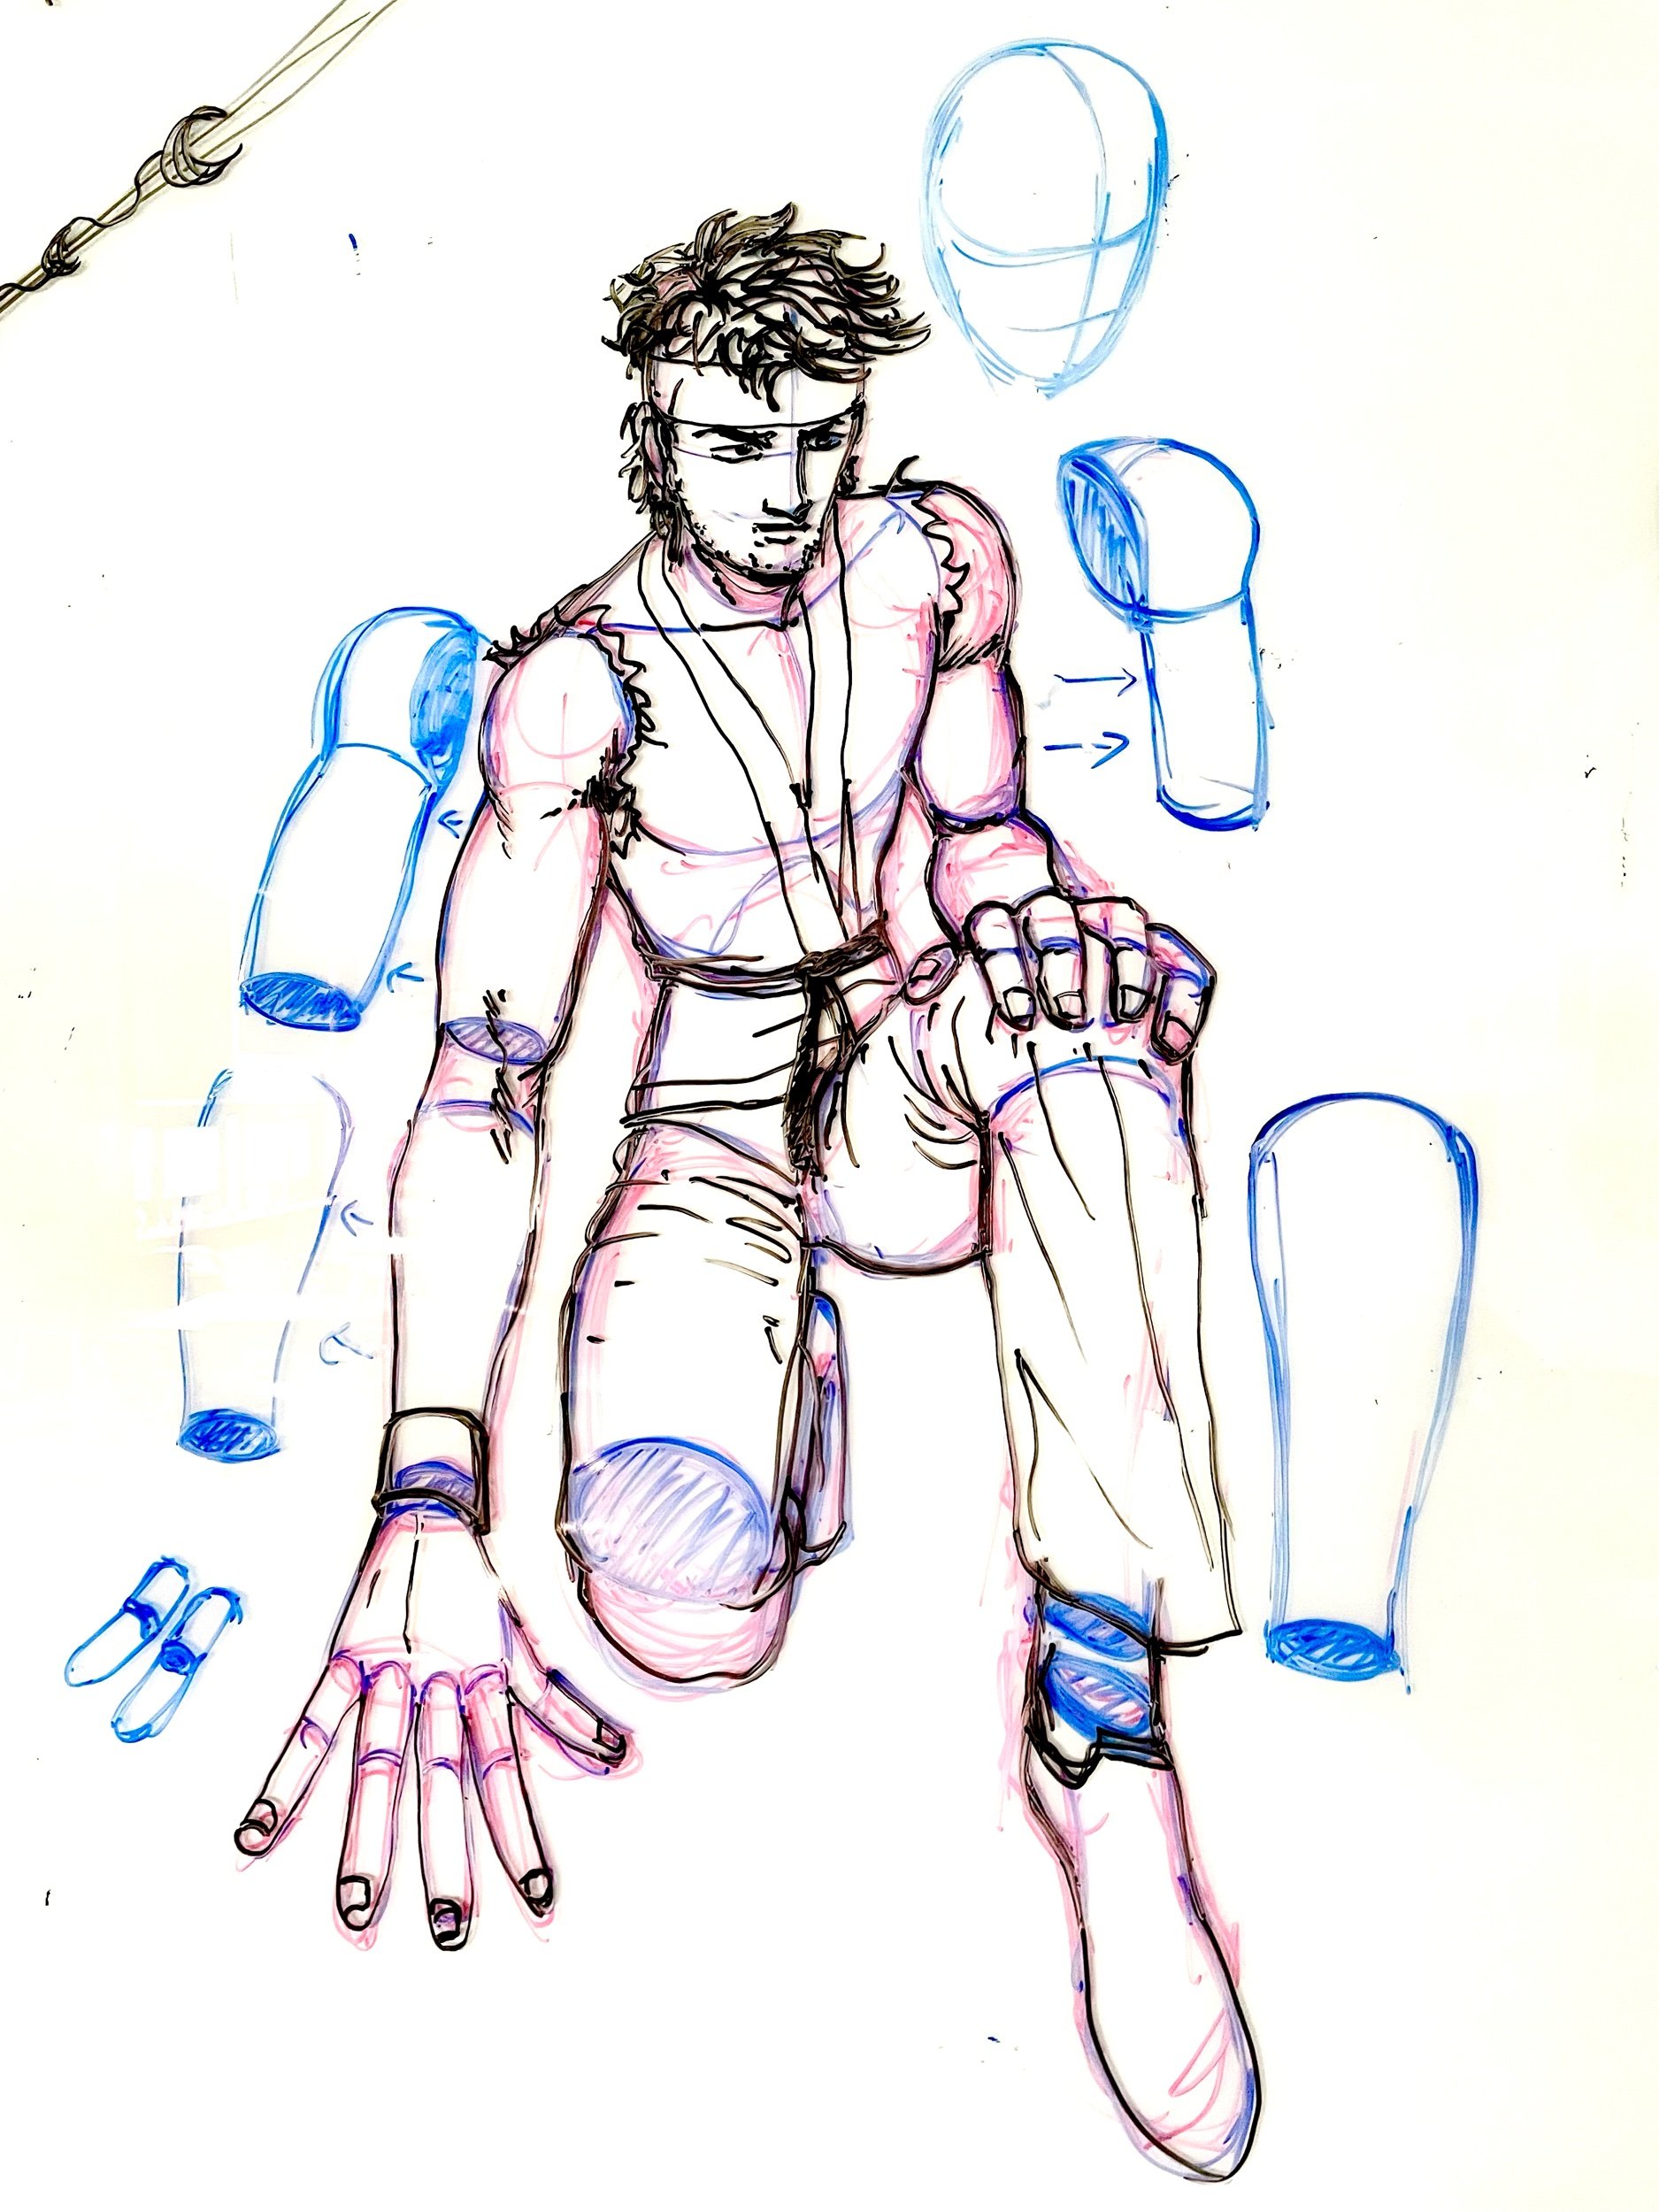
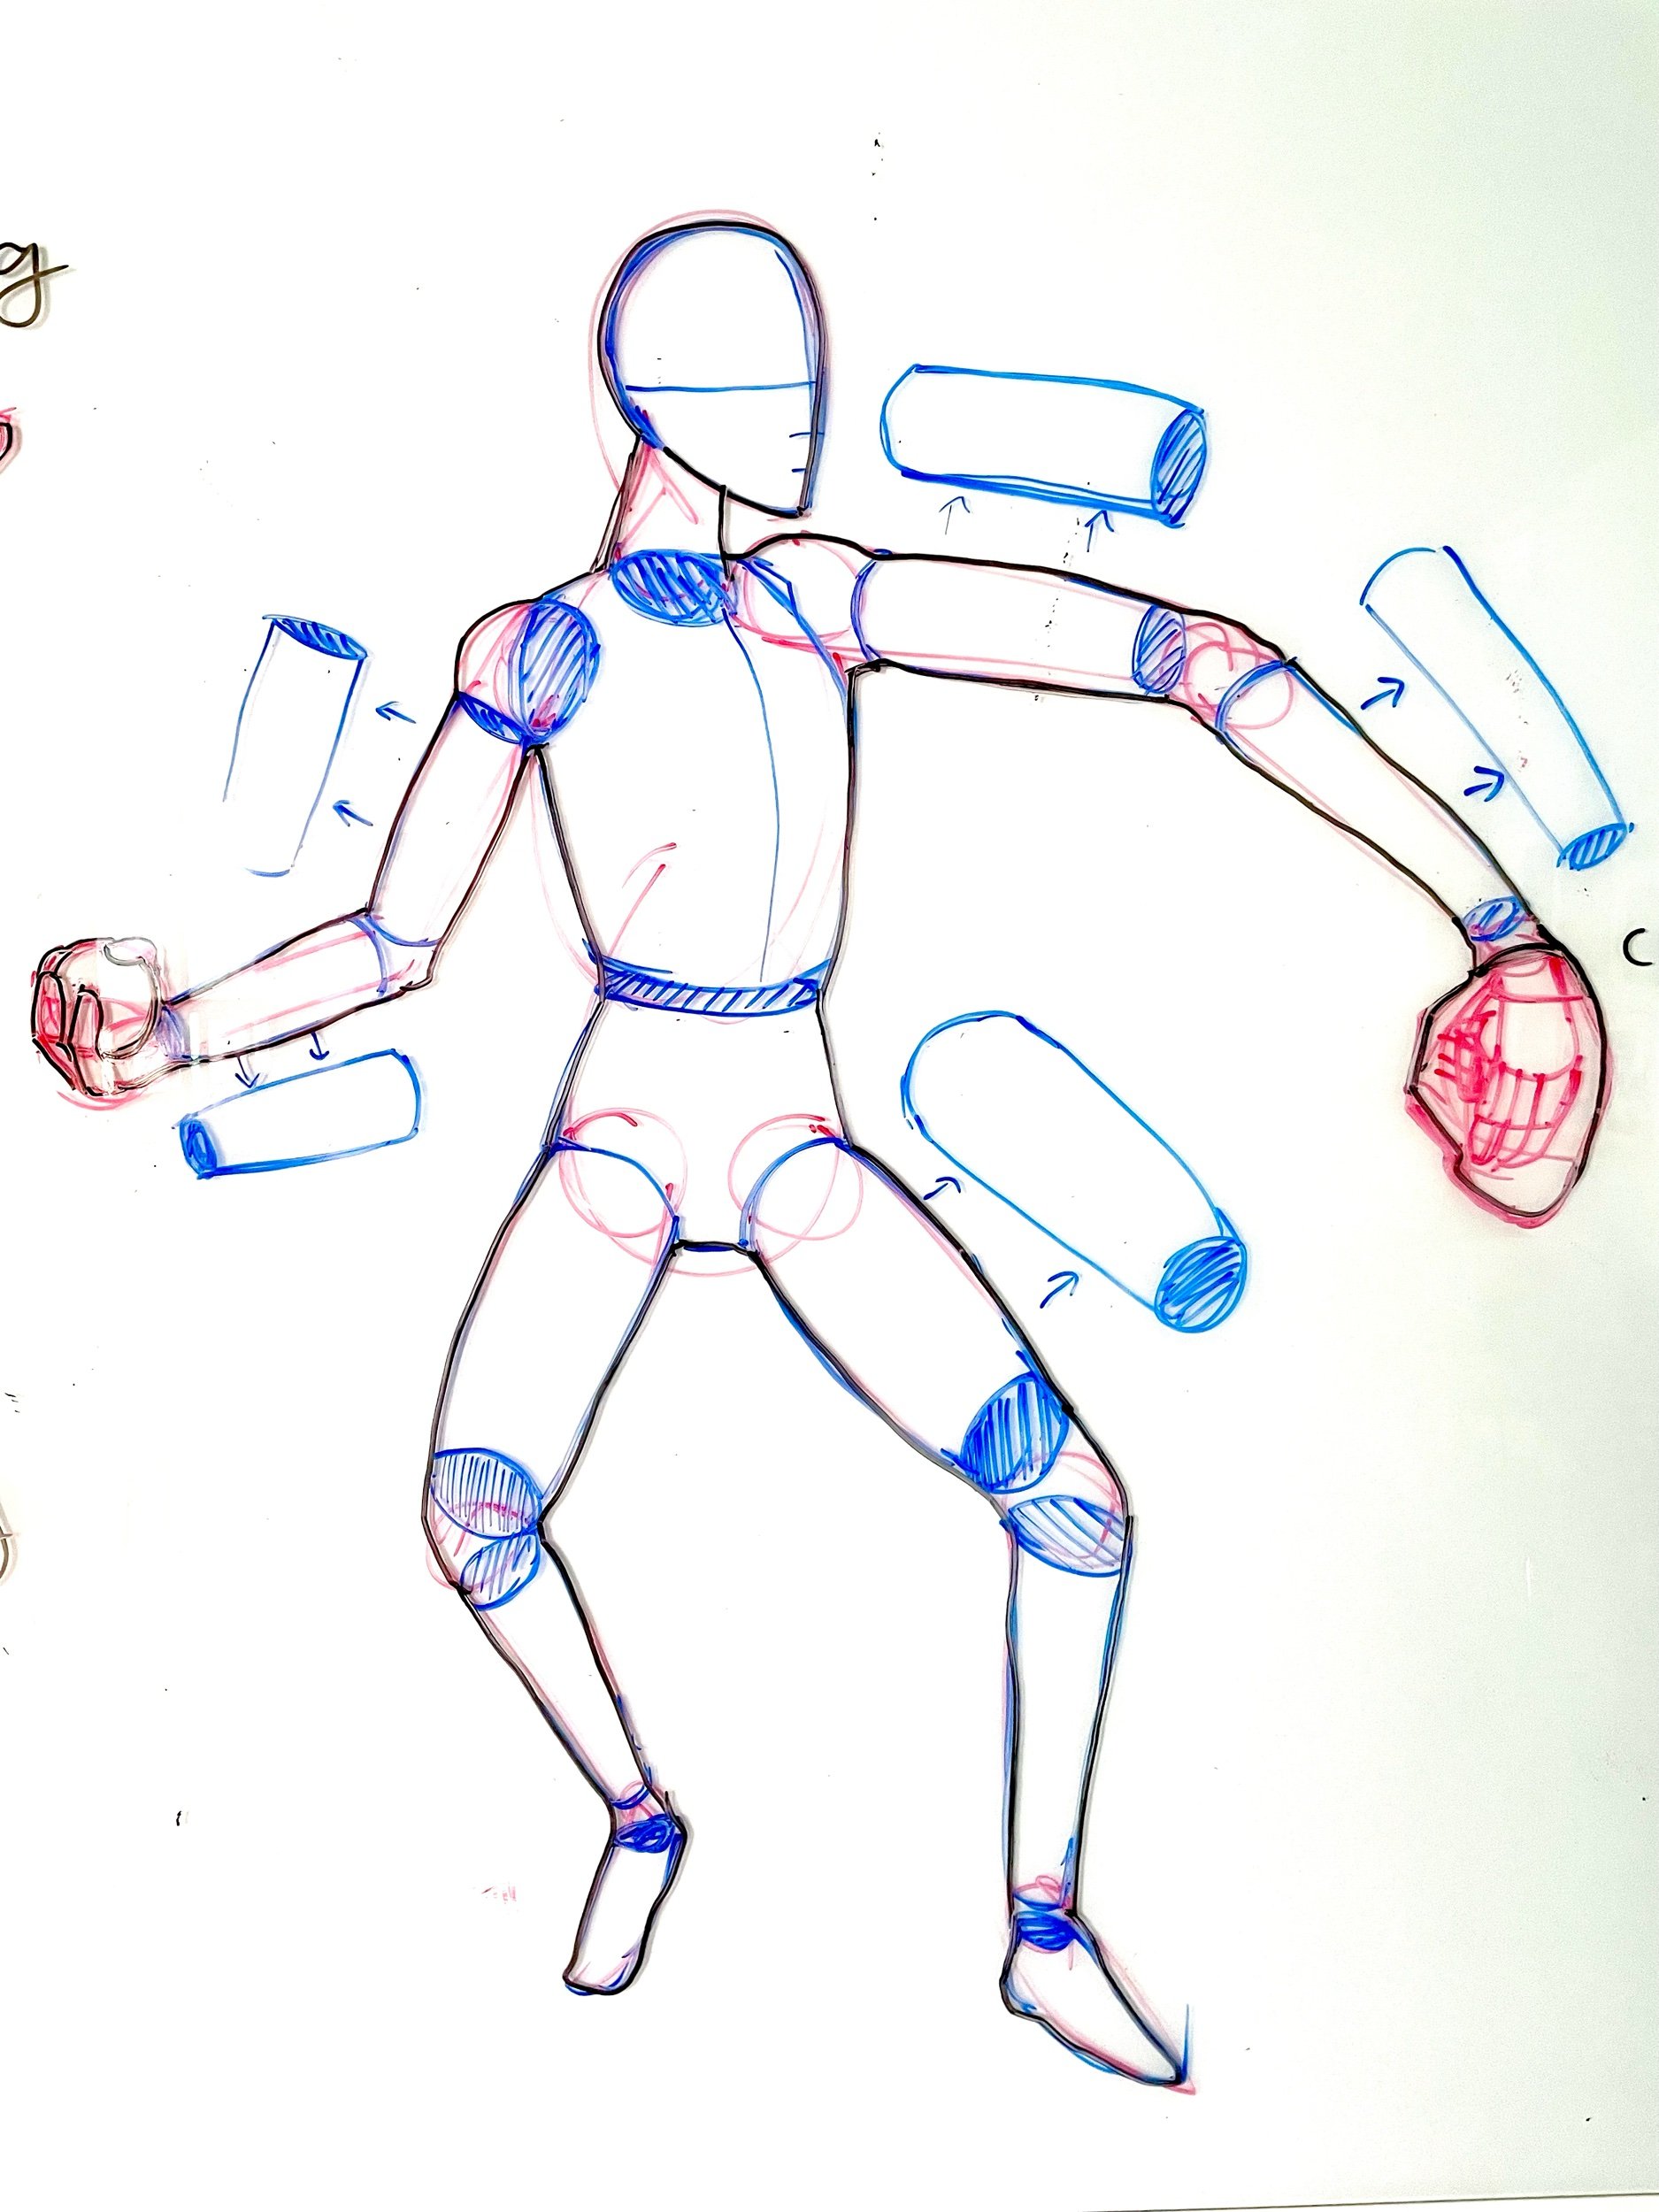
Hands and Feet: Start with basic shapes for hands and feet, then add fingers and other details.
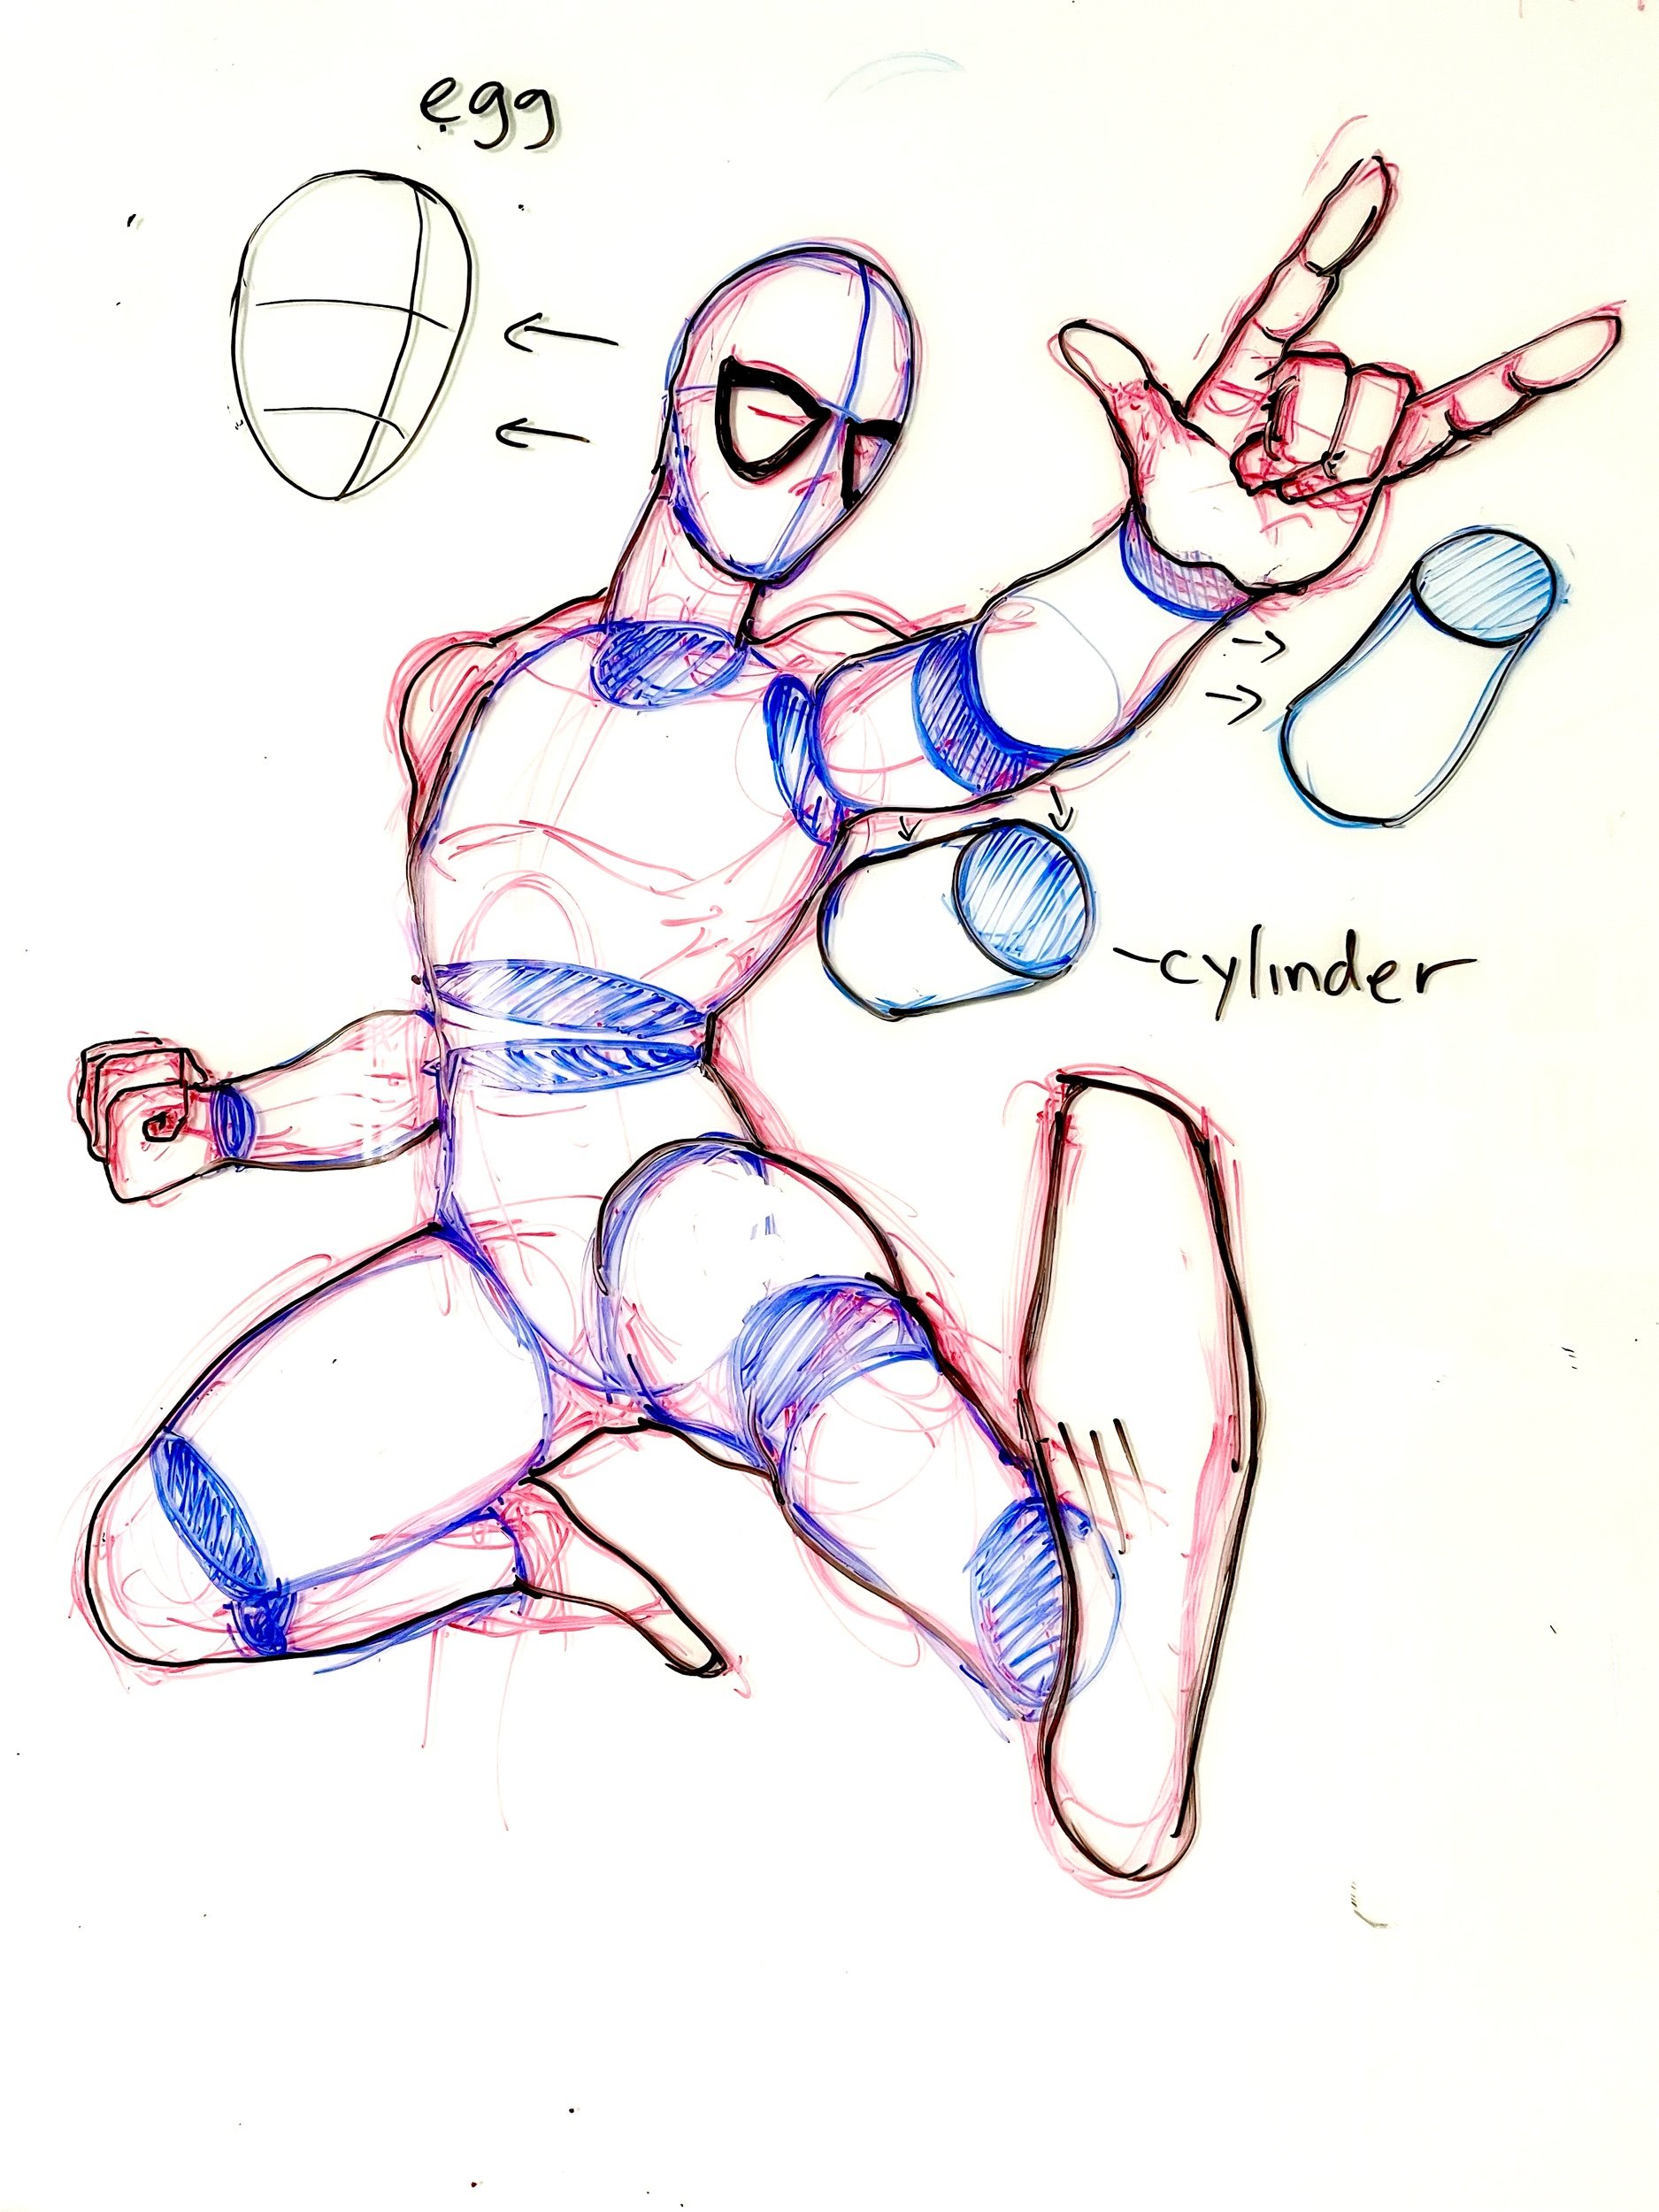
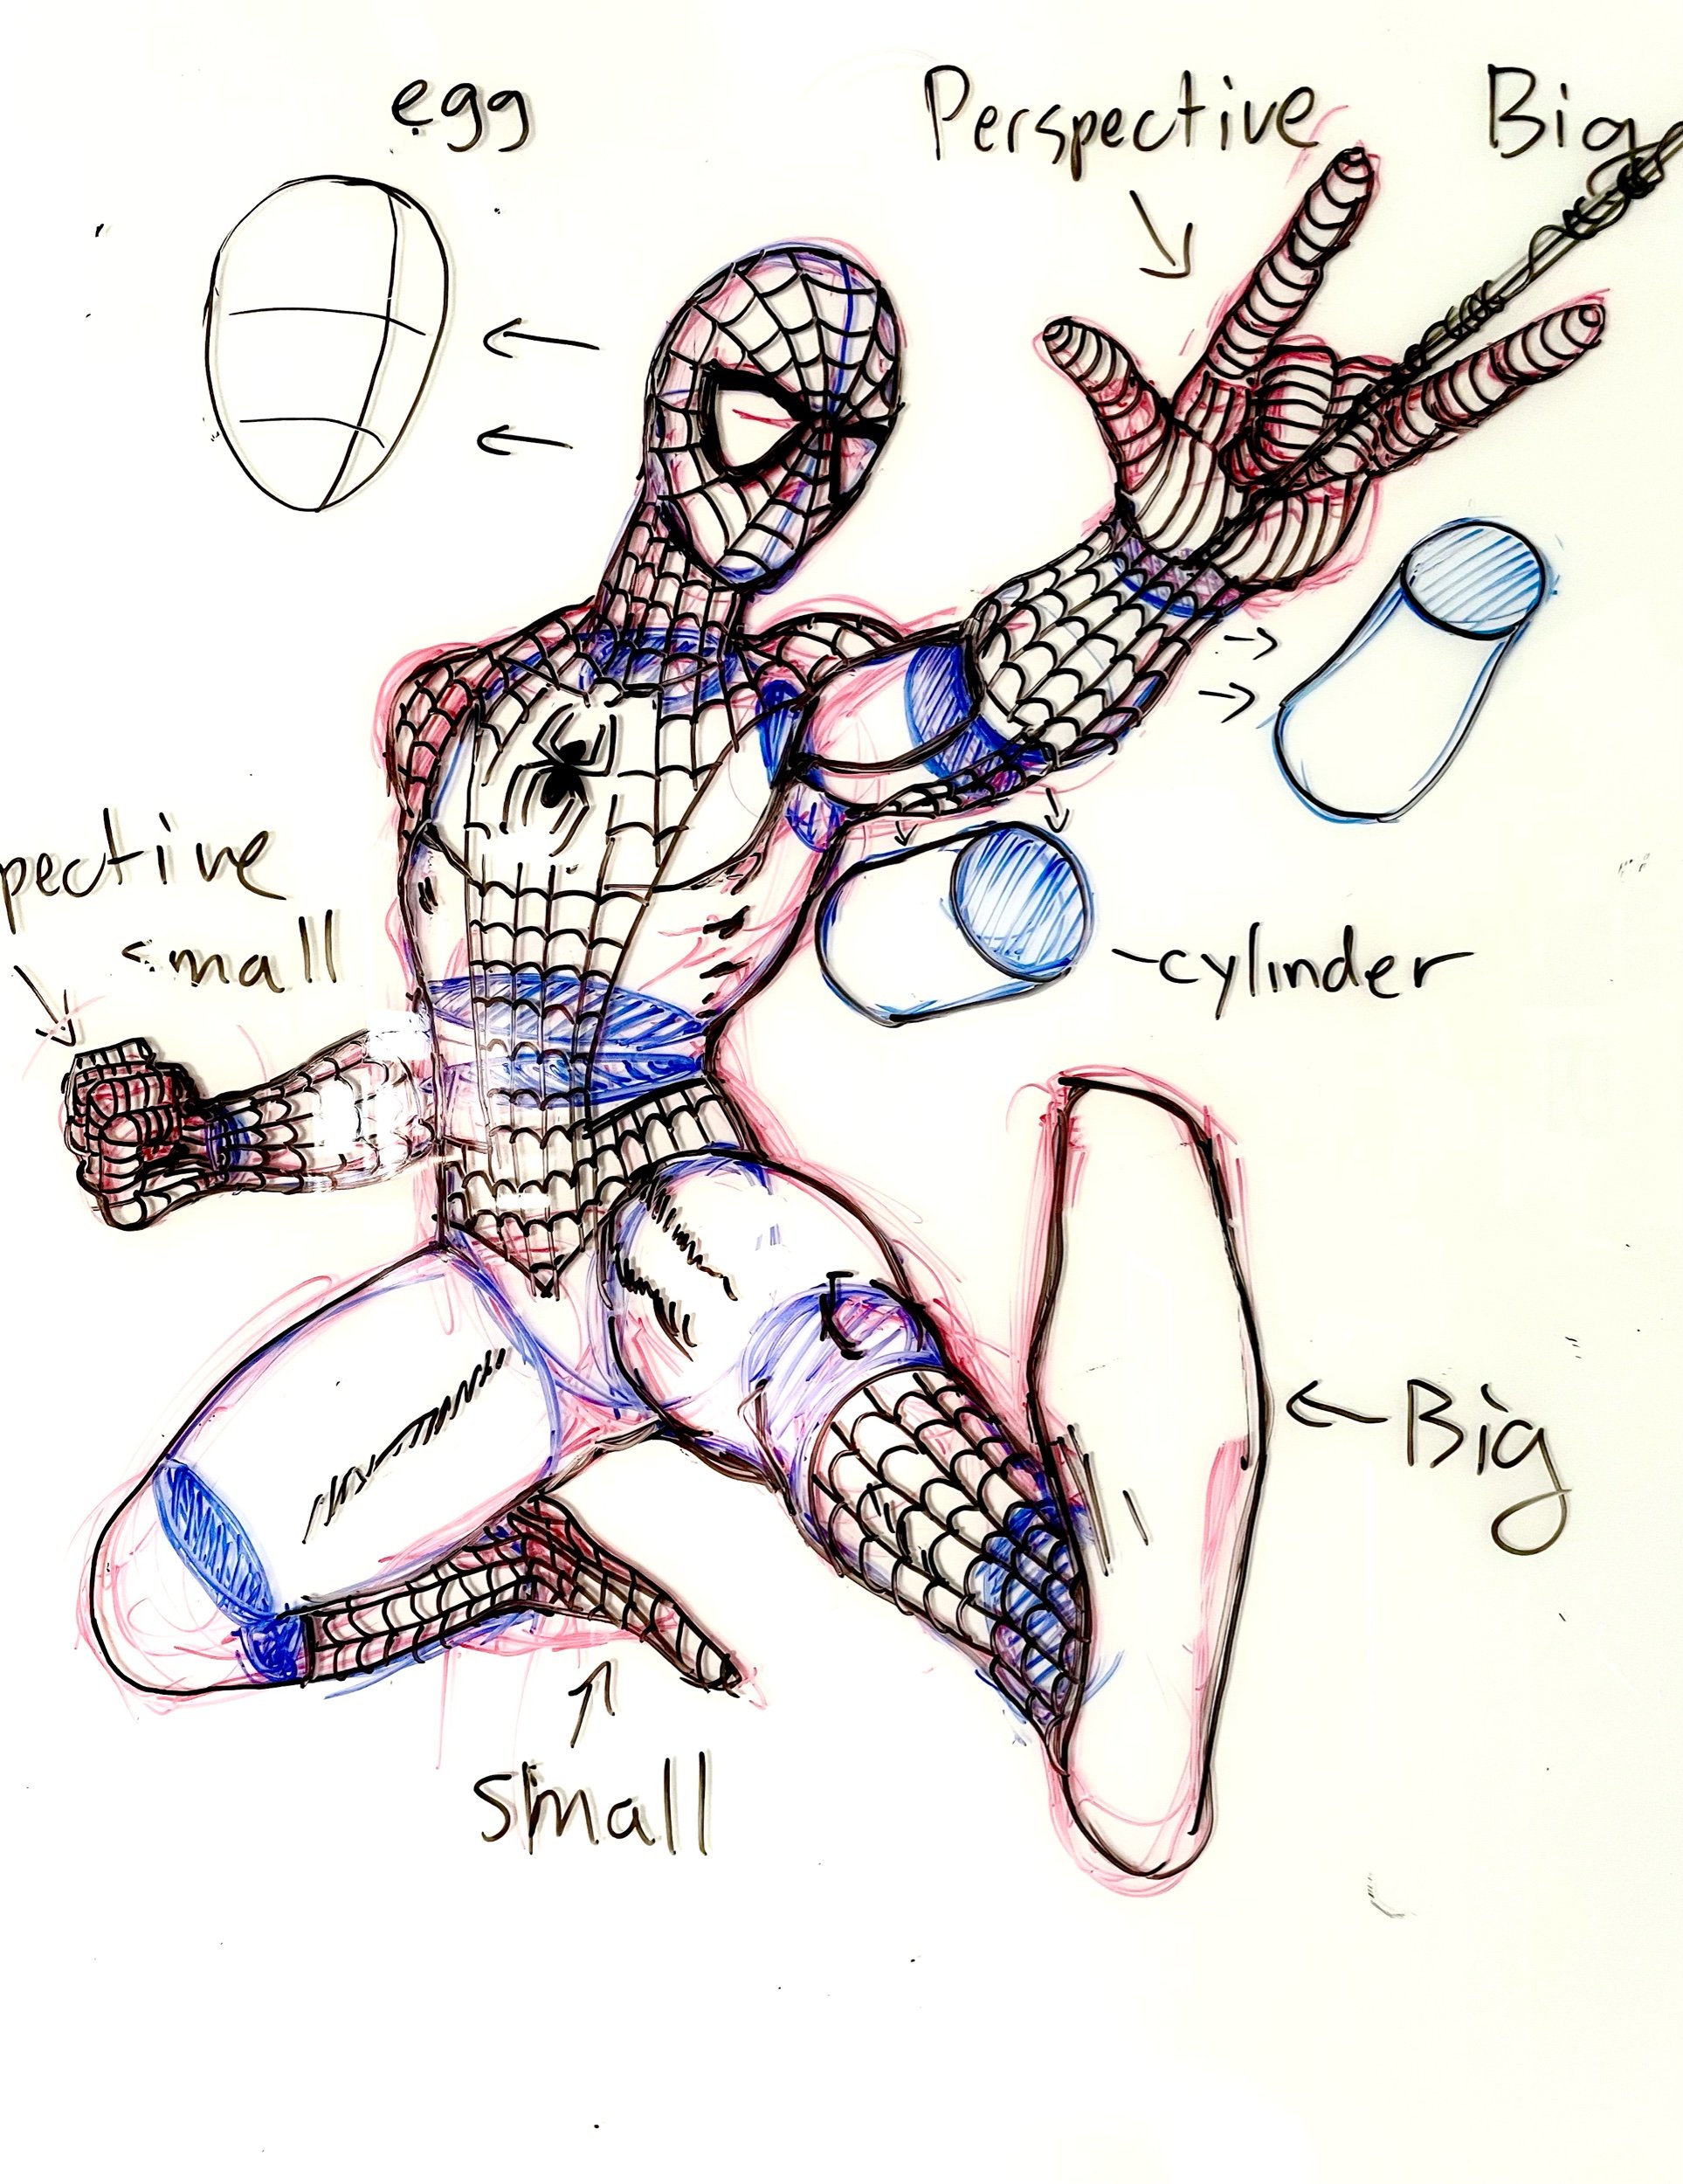
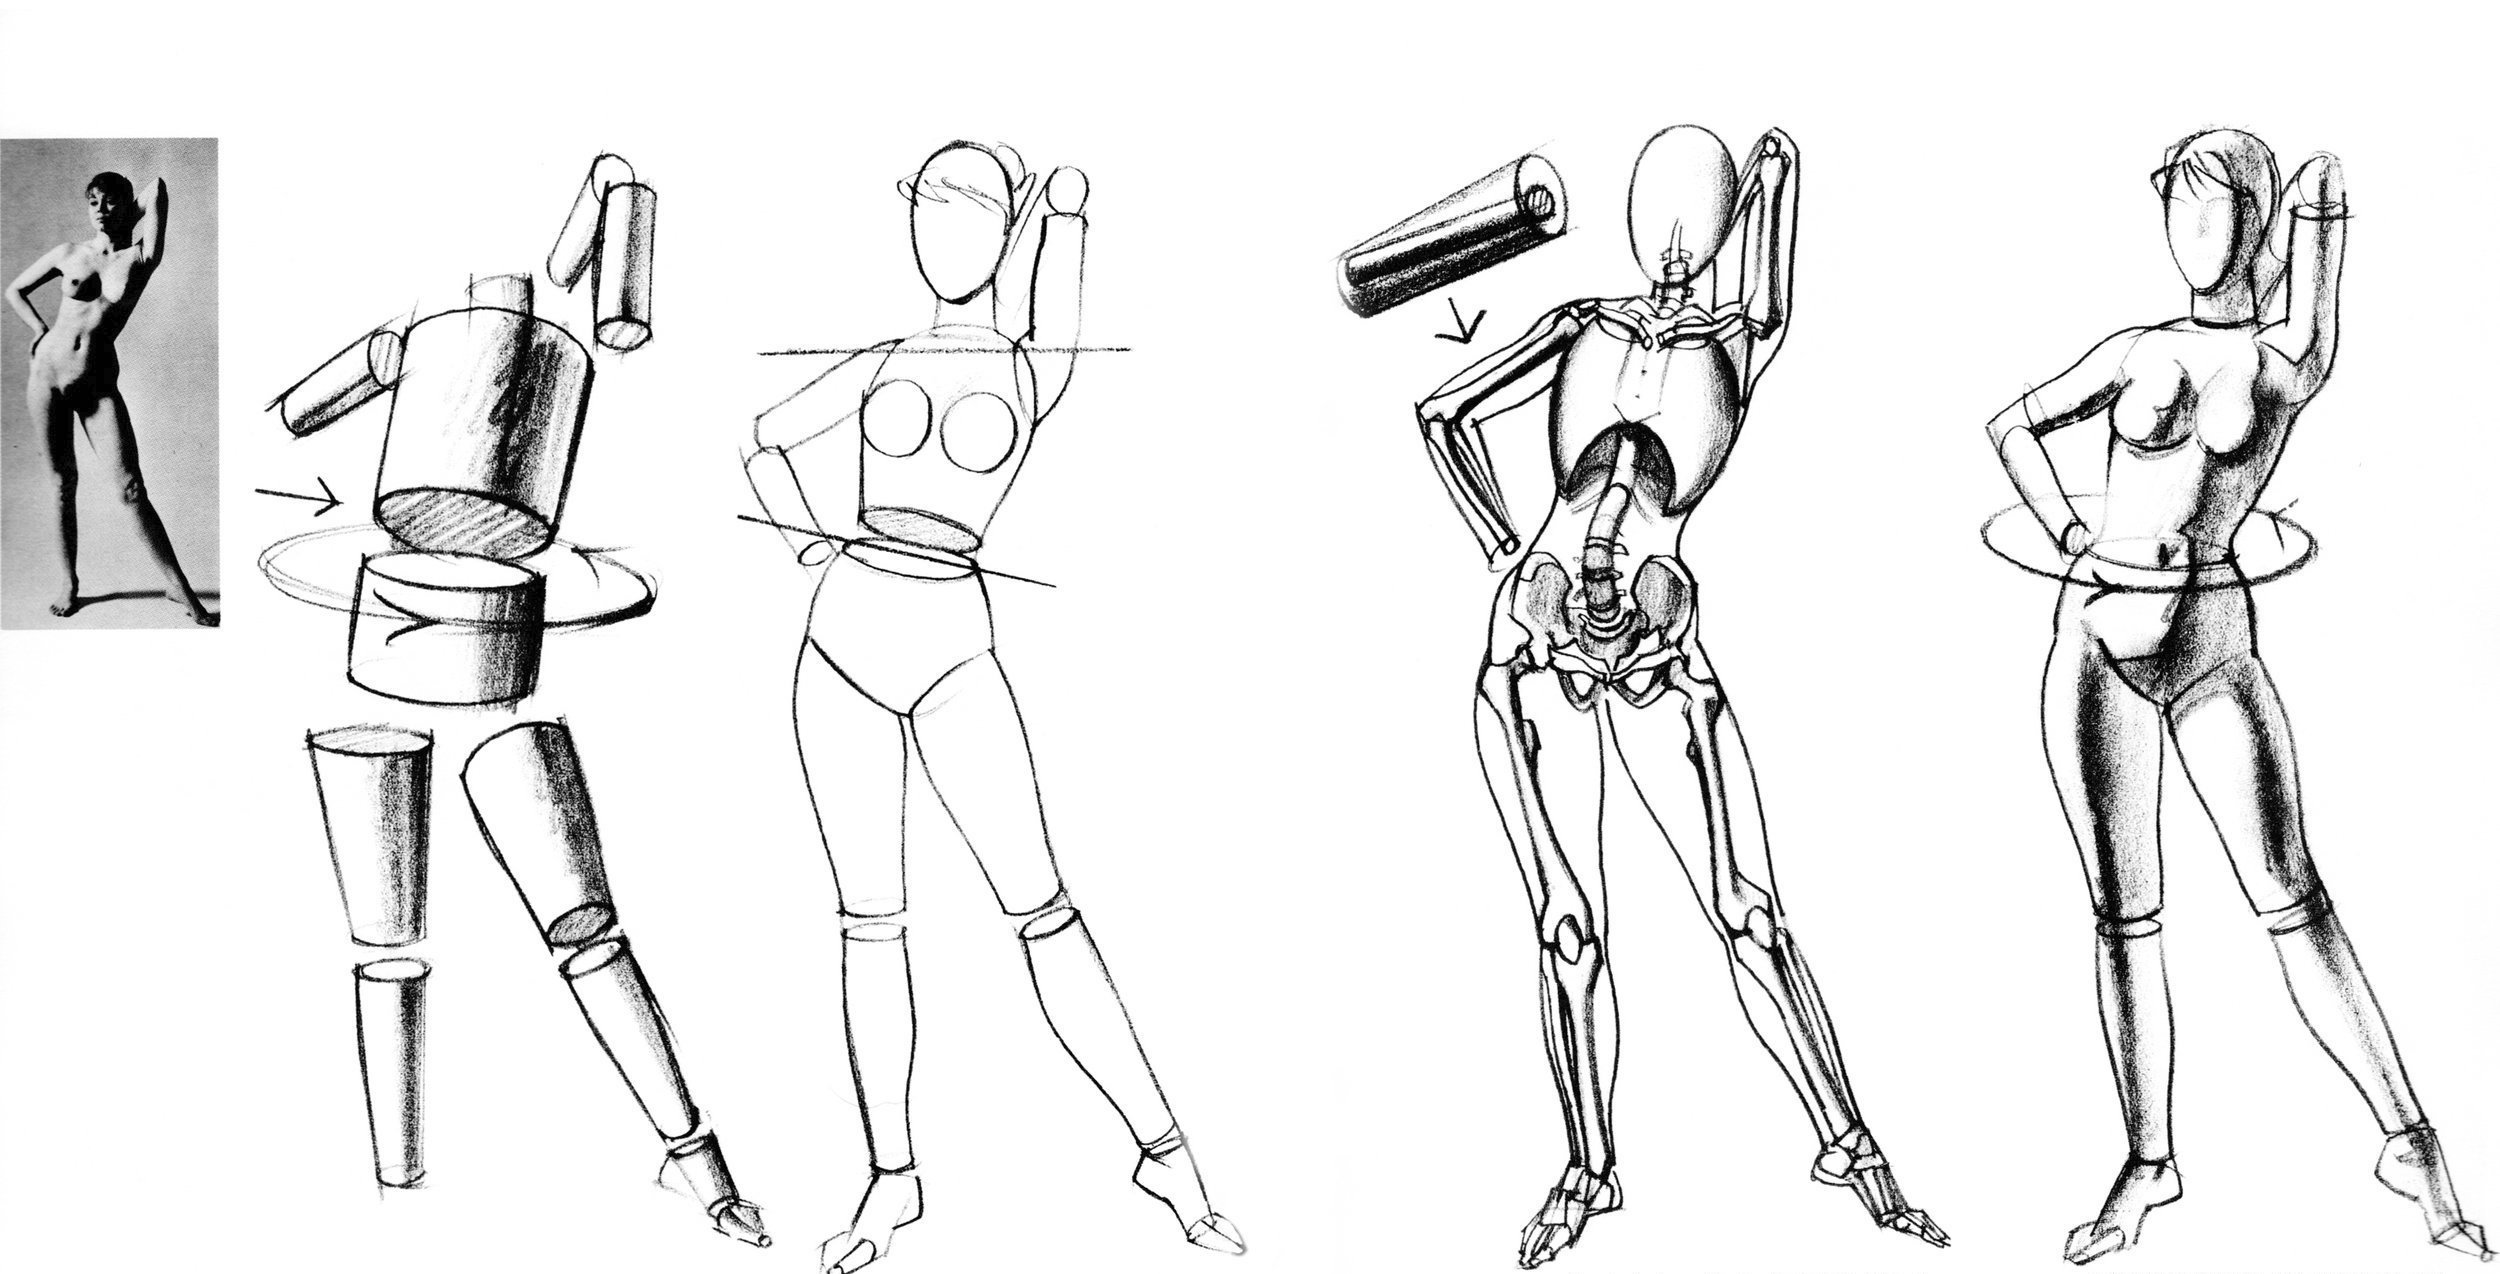
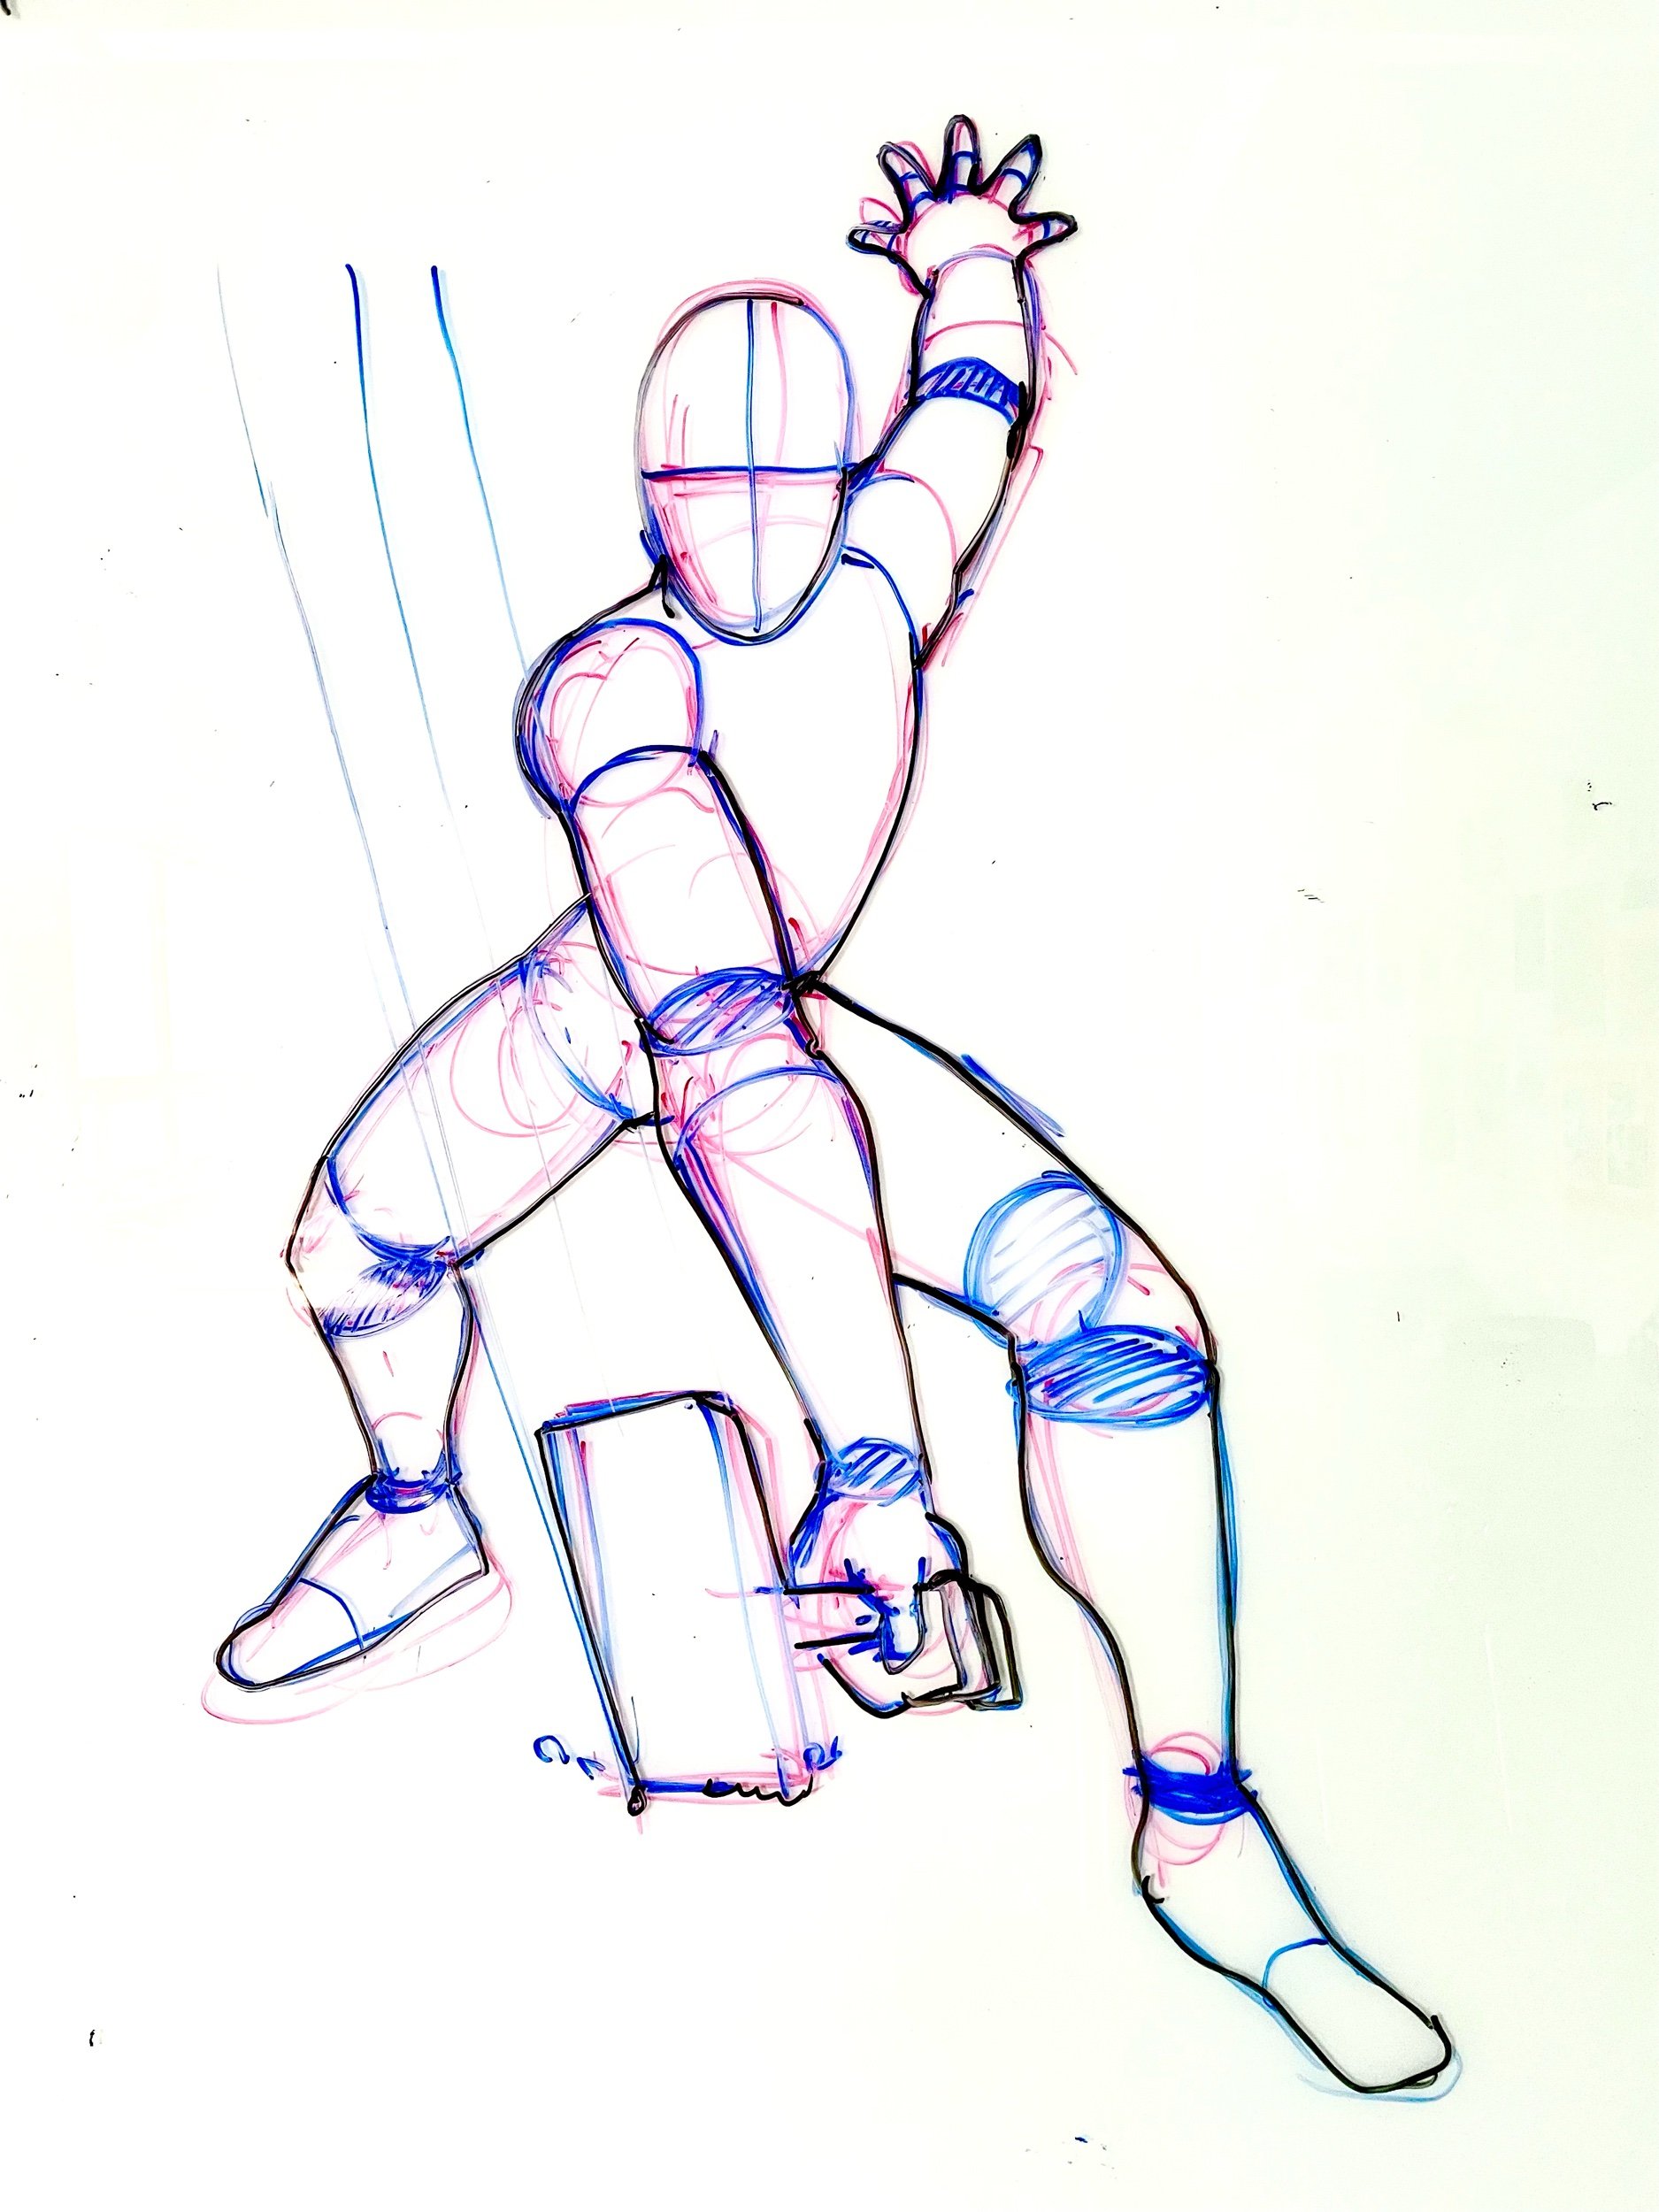
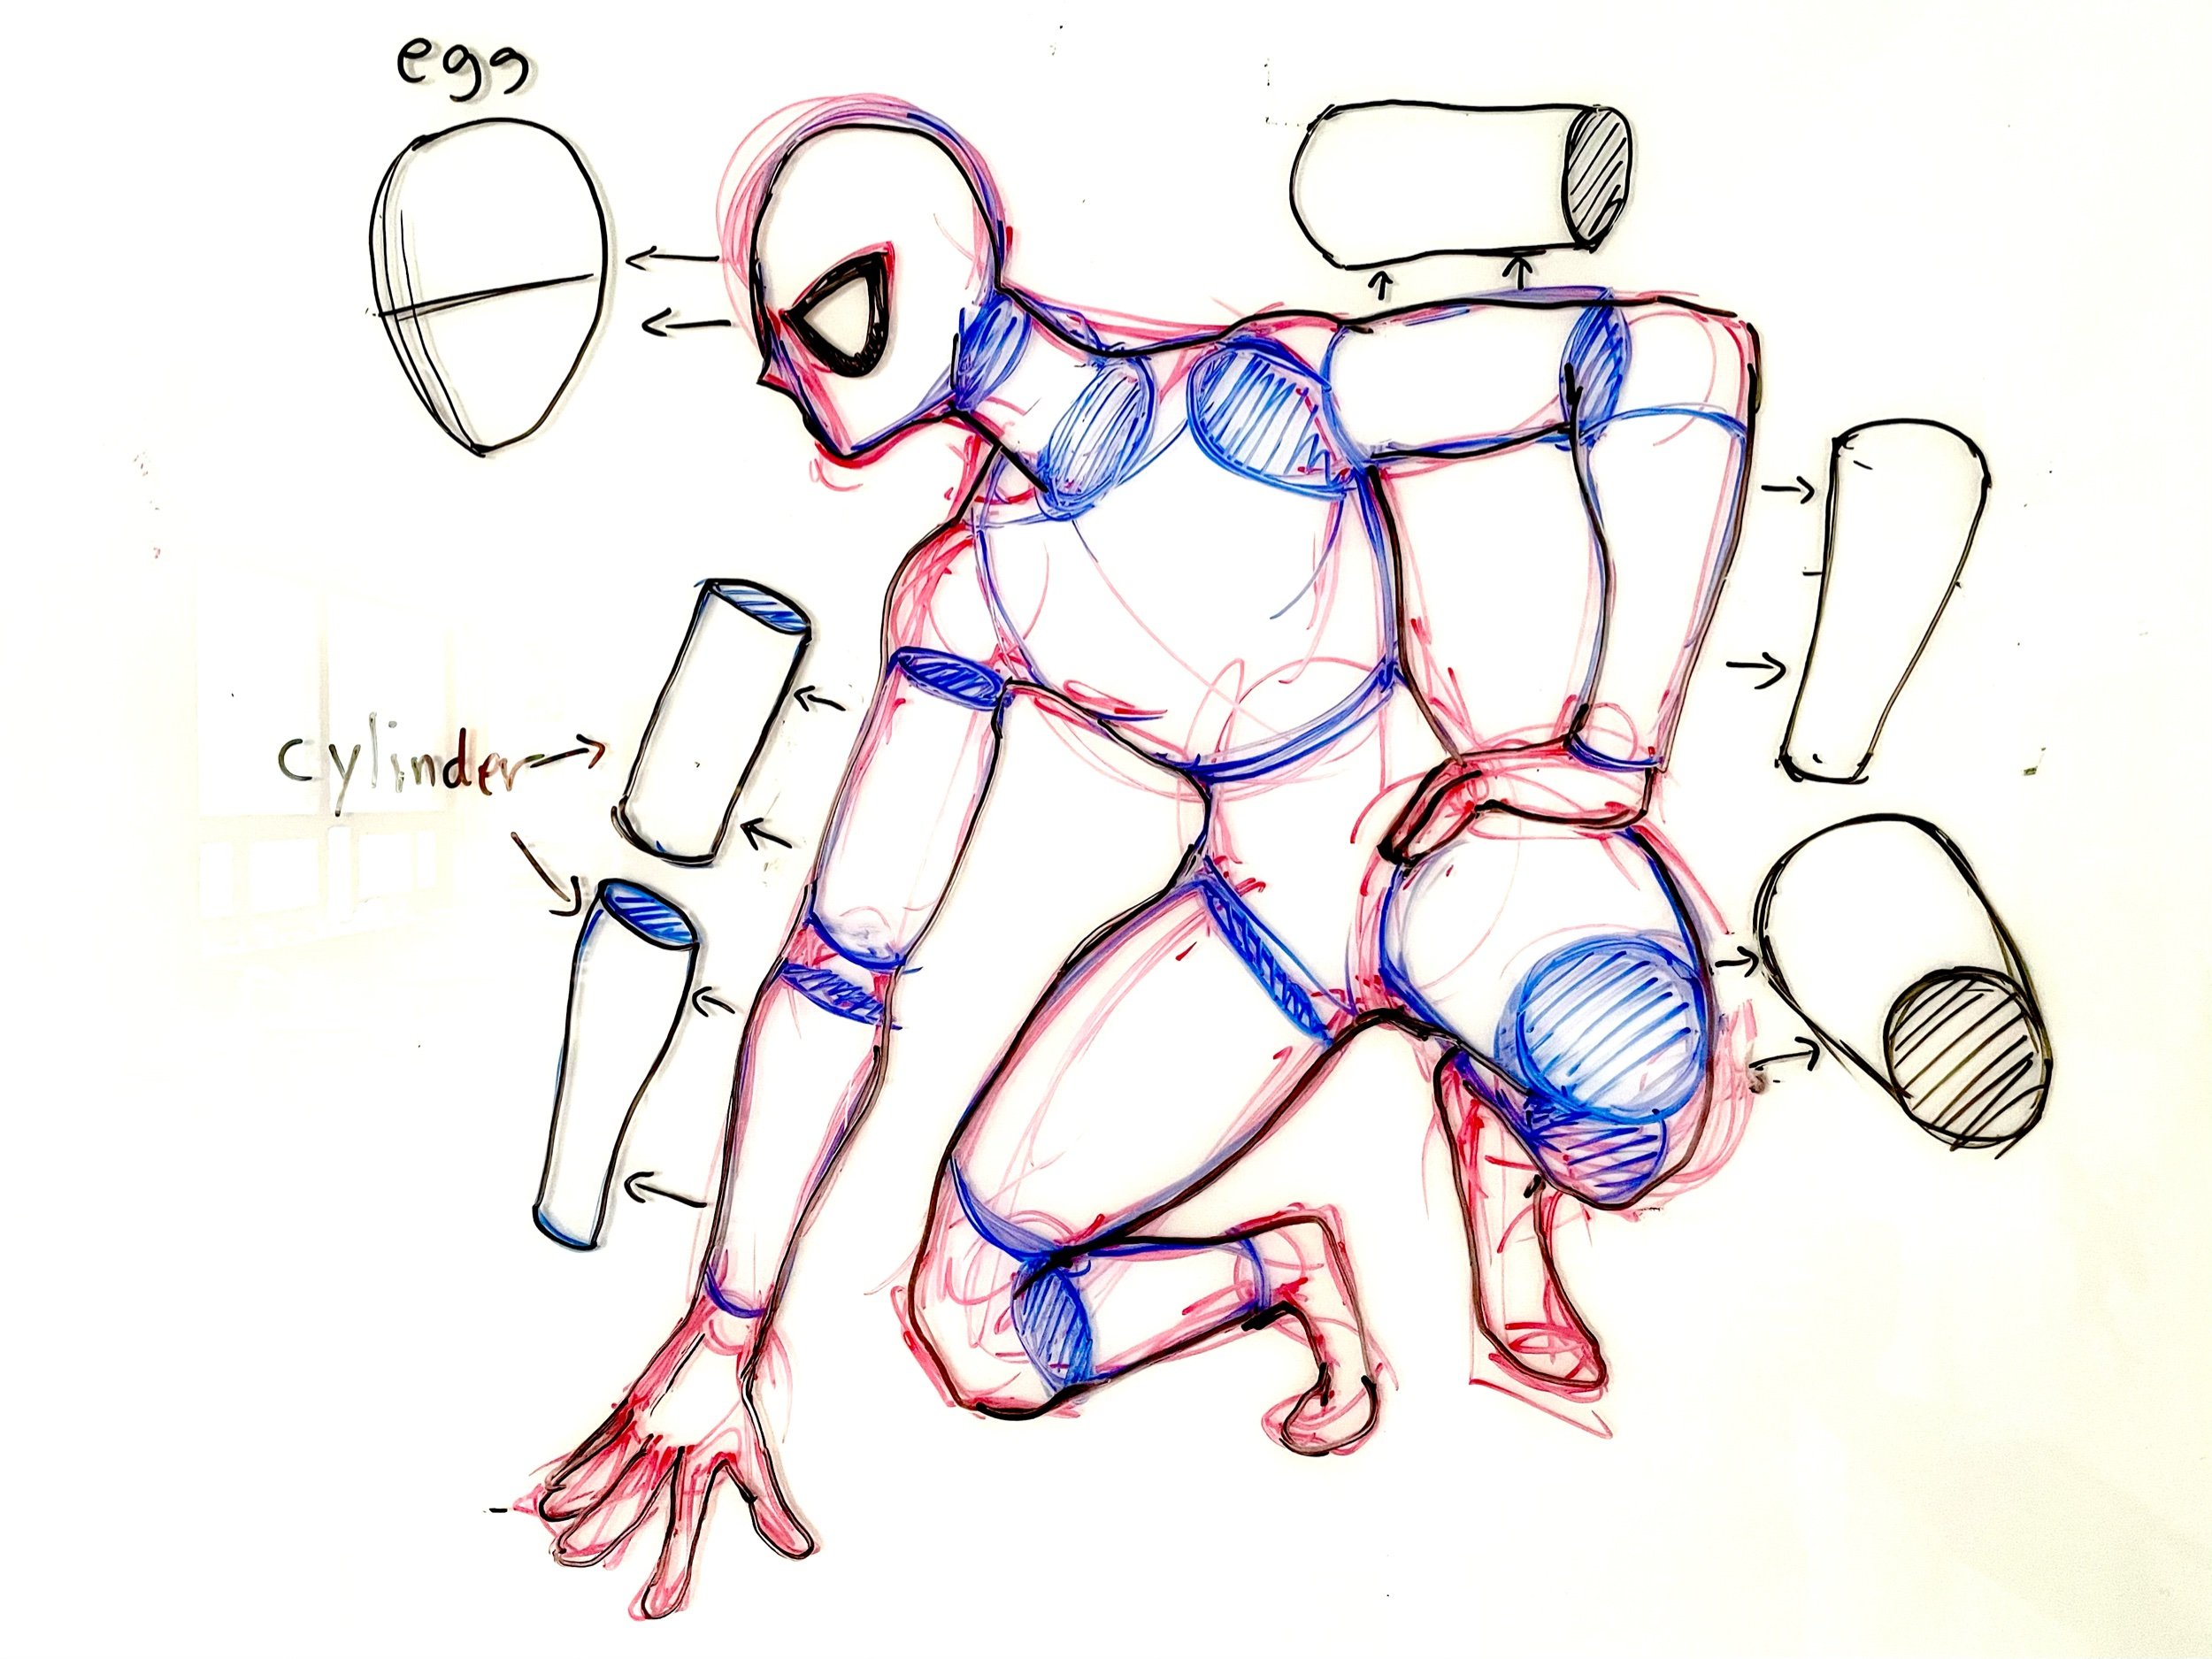
Basic Shapes: Turn each of the body parts into basic shapes such as cylinders and spheres.
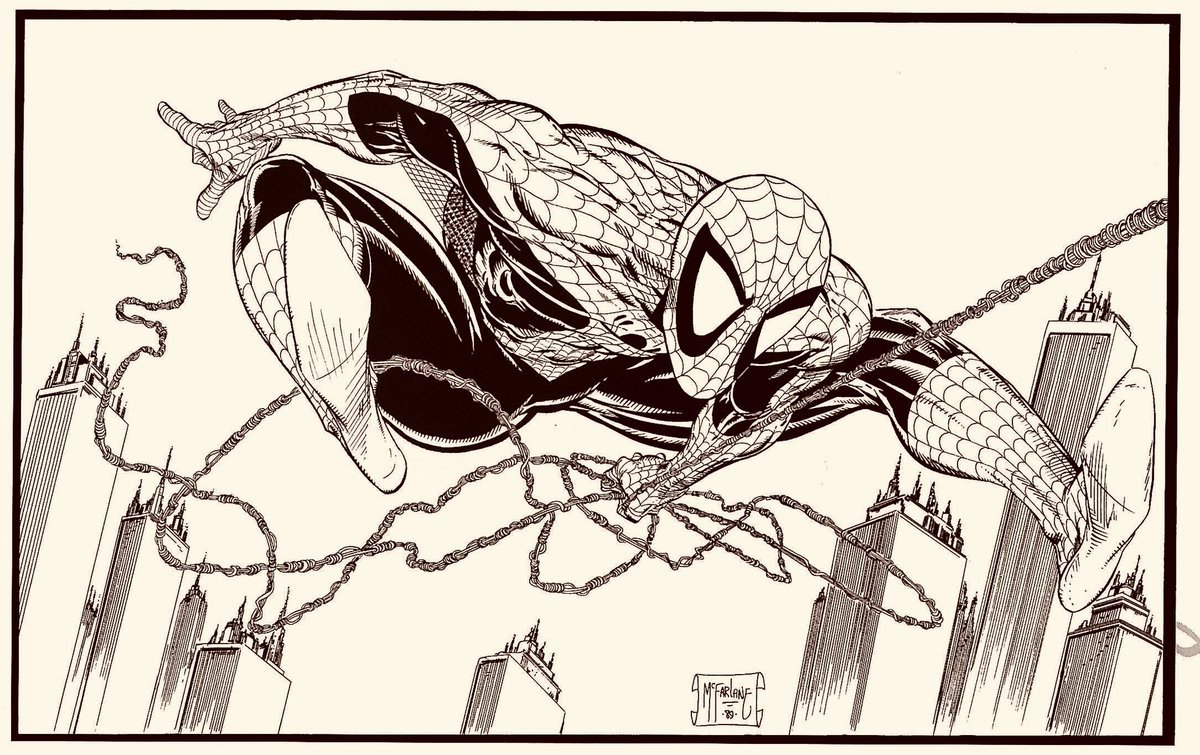
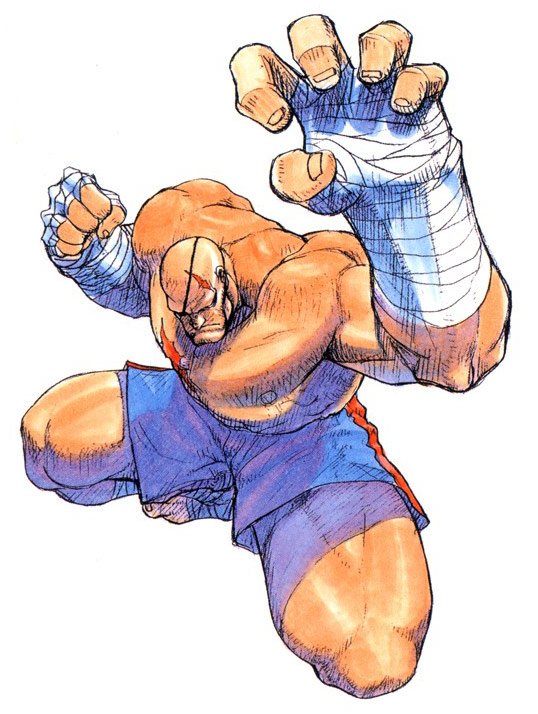
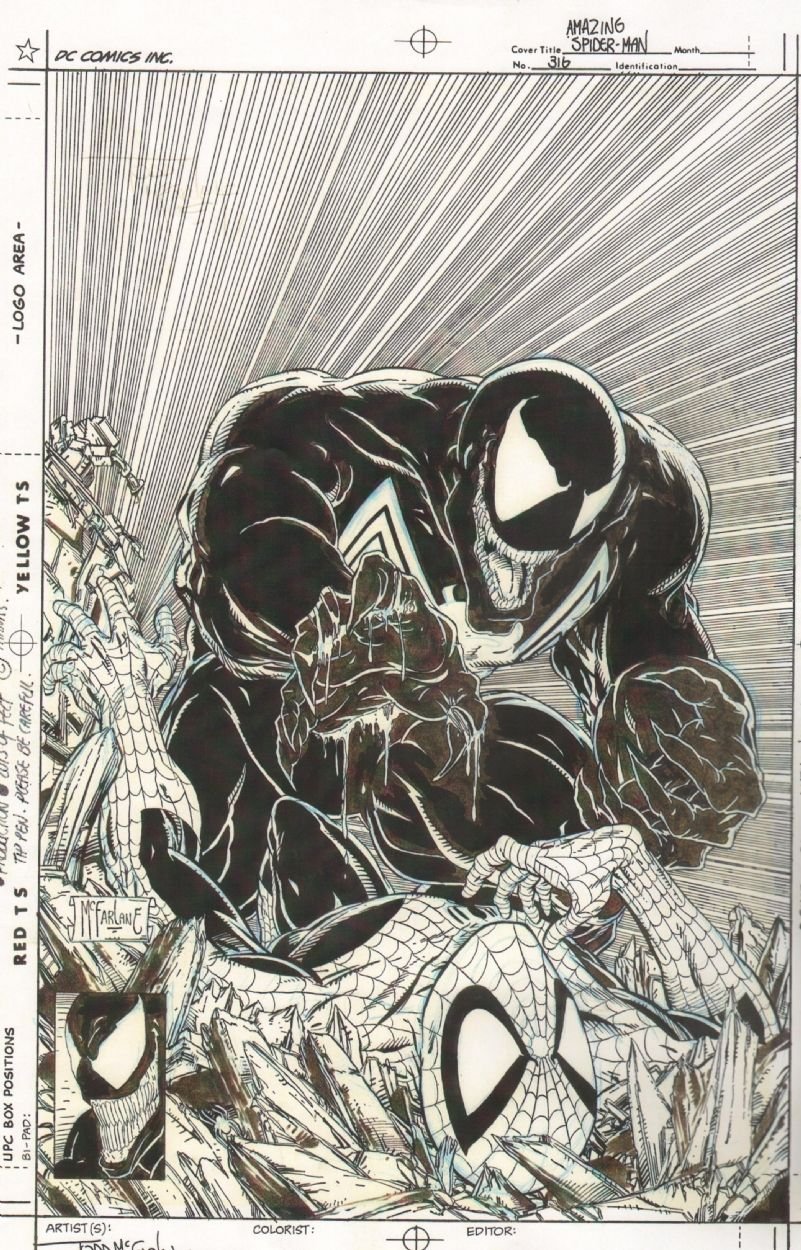
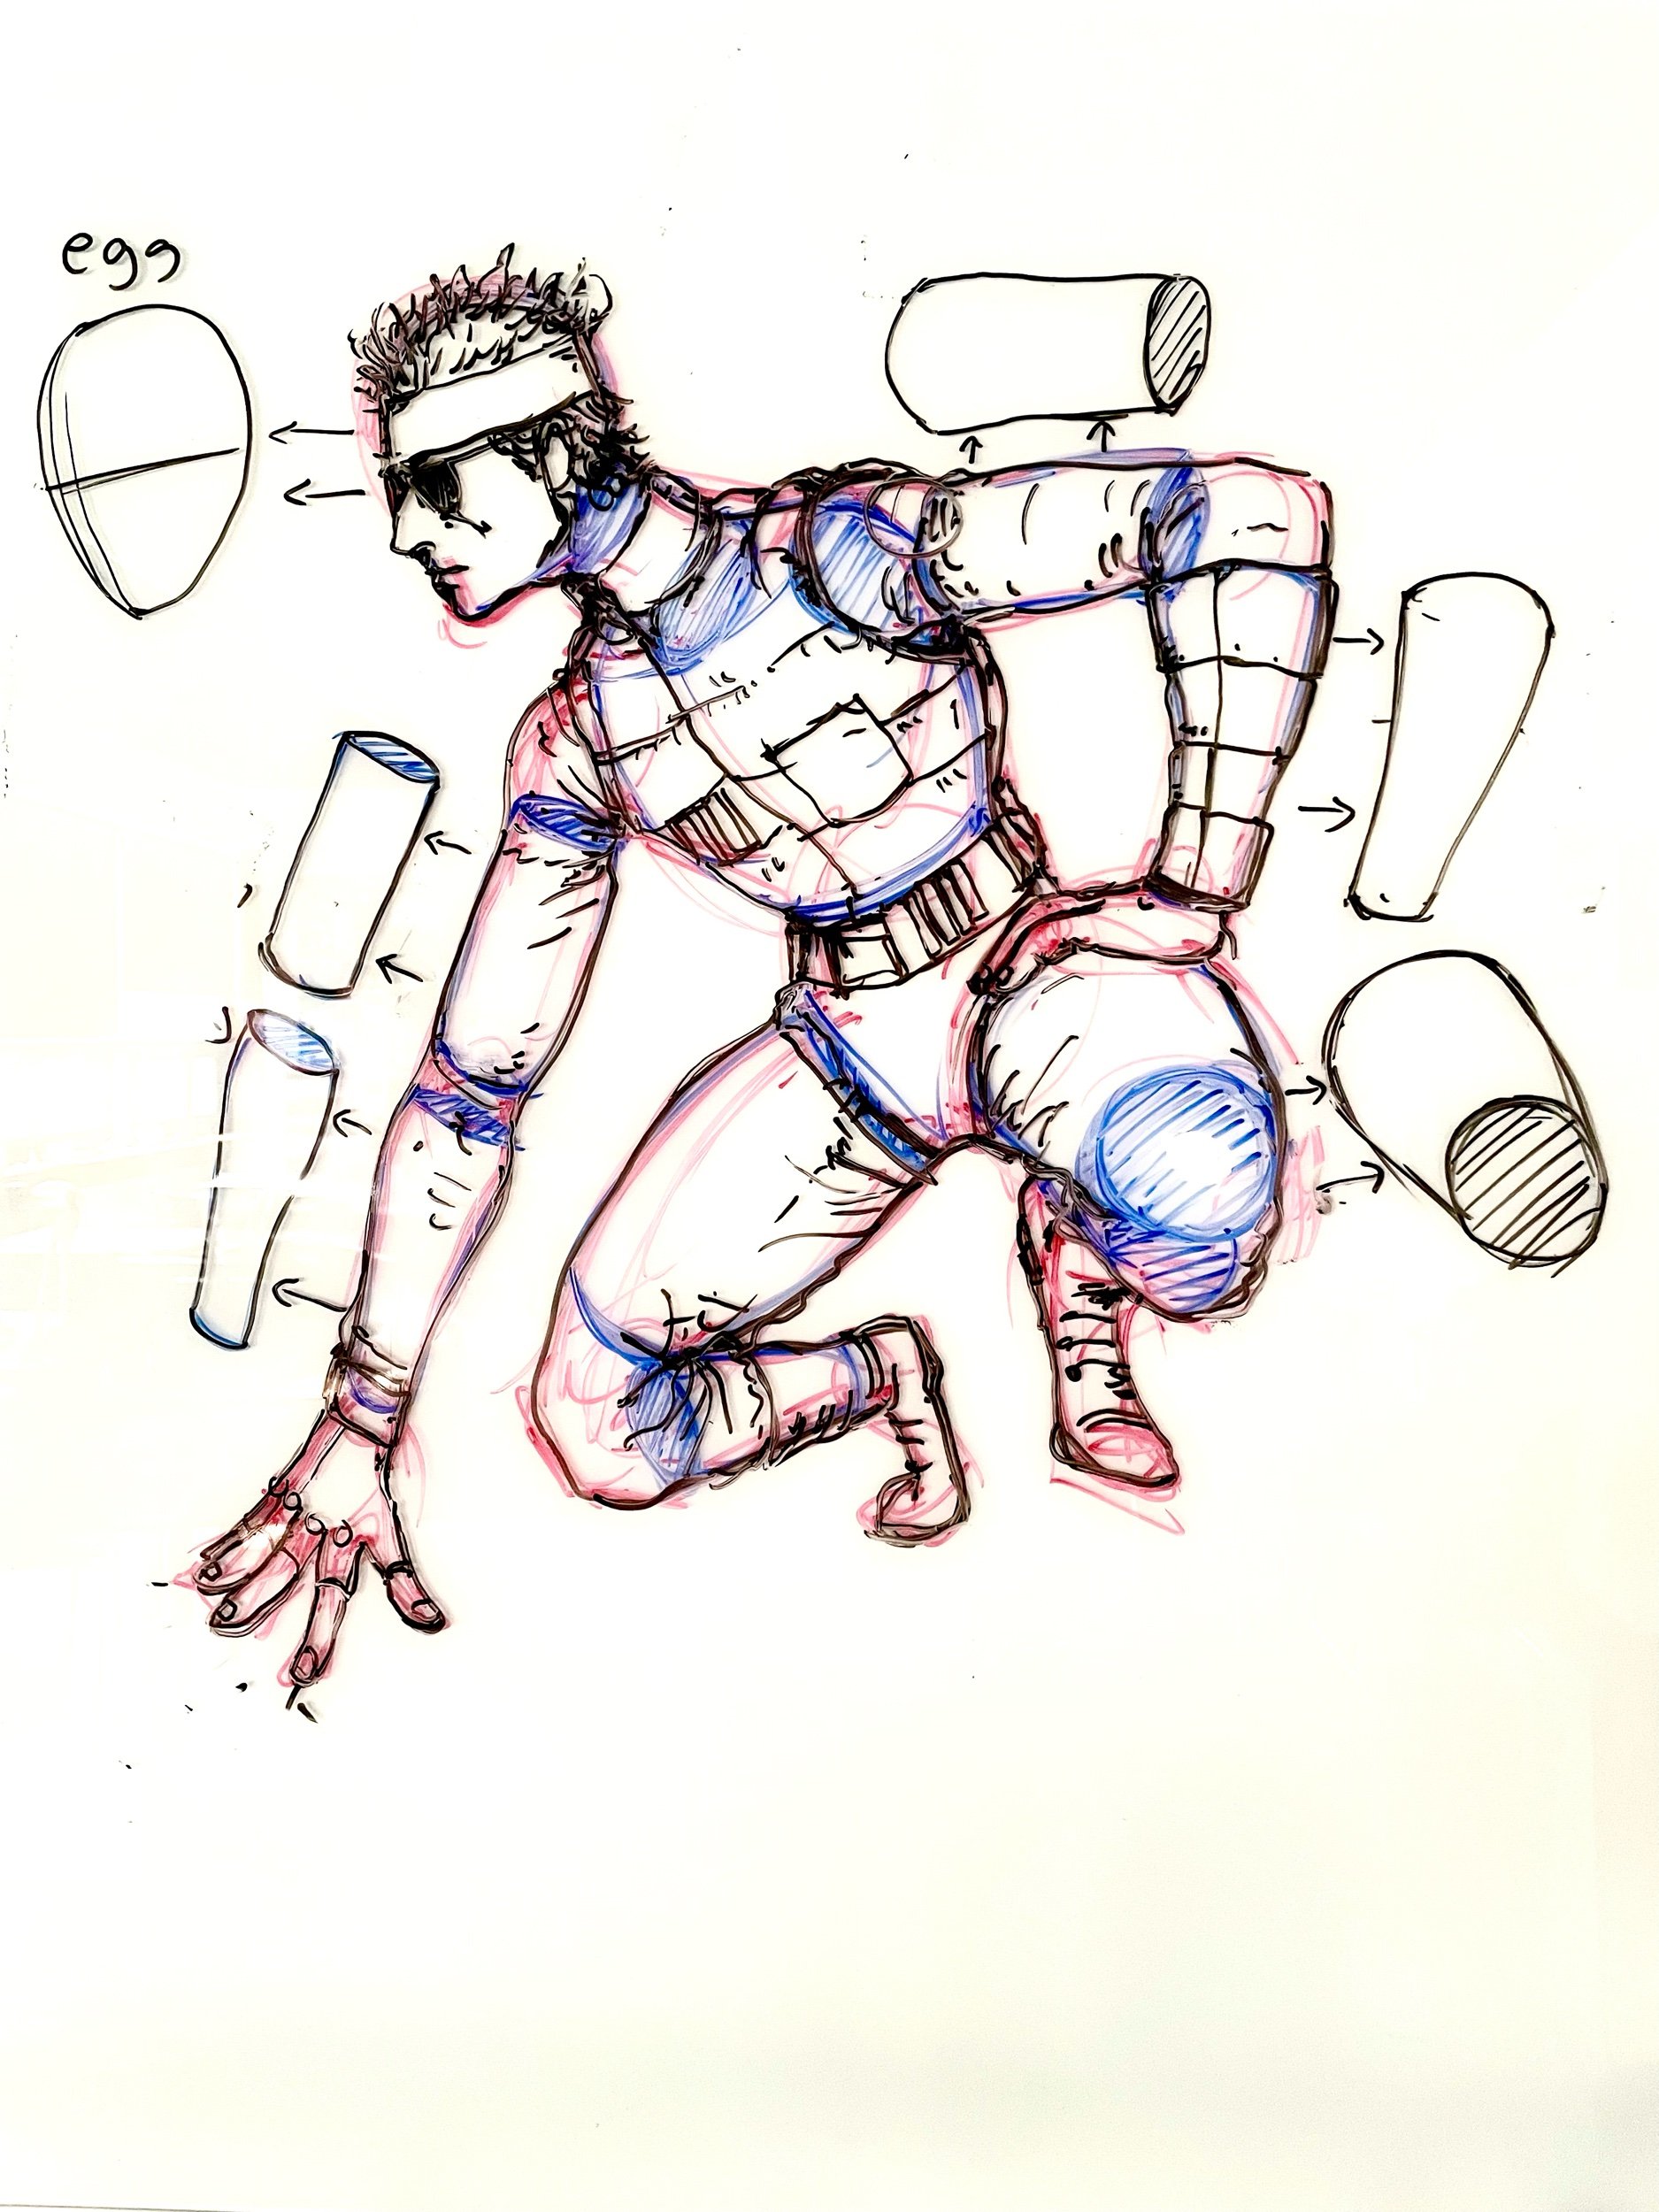
Foreshortening: Draw each of the basic shapes (body parts) in correct perspective, foreshortening each body part as needed.
Facial Features: Include facial features like eyes, nose, ears, mouth and hair.
Clothing: You may cloth your figure in some fashionable attire.
Draw More Figures: Experiment by drawing the figure in different poses. You may even turn your figure into a superhero or another character that is to your liking.

Terminology
Foreshortening — The technique of depicting an object or body in a way that creates the illusion of depth and projection in a picture.
Pose — A particular way of standing or sitting, usually adopted for effect or in order to be photographed, painted, or drawn.
Examples of Foreshortening Used in Figure Drawing